
You are currently browsing the category archive for the ‘farmhouse’ category.
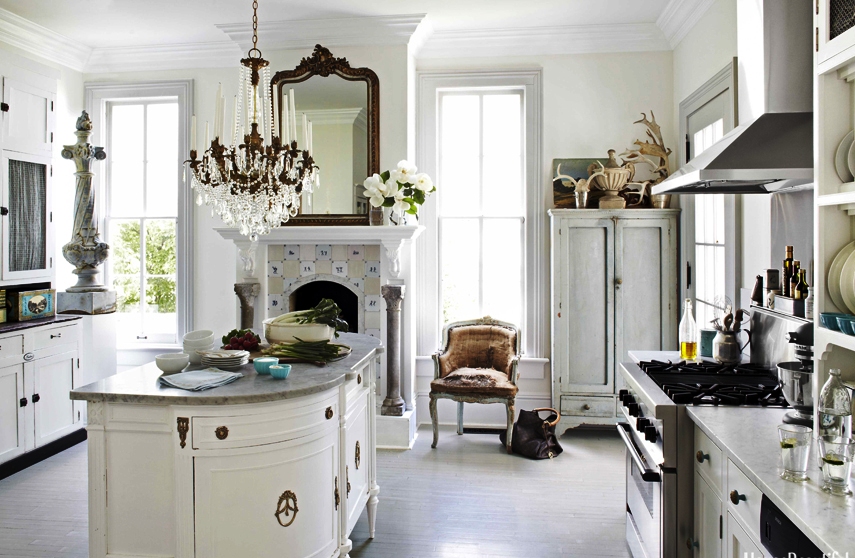 Three months ago I found this gorgeous kitchen in a back volume of House Beautiful. It was all the inspiration I needed to begin a complete “upcyle renovation” of our 200-year-old farmhouse kitchen. Budget was limited, but the more immediate objective, was to create a kitchen that did “not look like a kitchen”. As you will see, we achieved this by eliminating upper cabinets, including a mirror in our design, and by upcycling antiques to create the warm HEIRLOOM environment we were looking for.
We moved in to this lovely home 6 years ago and learned to tolerate the once -french country rustic- kitchen we inherited. But once this photo came into my life, I knew a few things had to change.
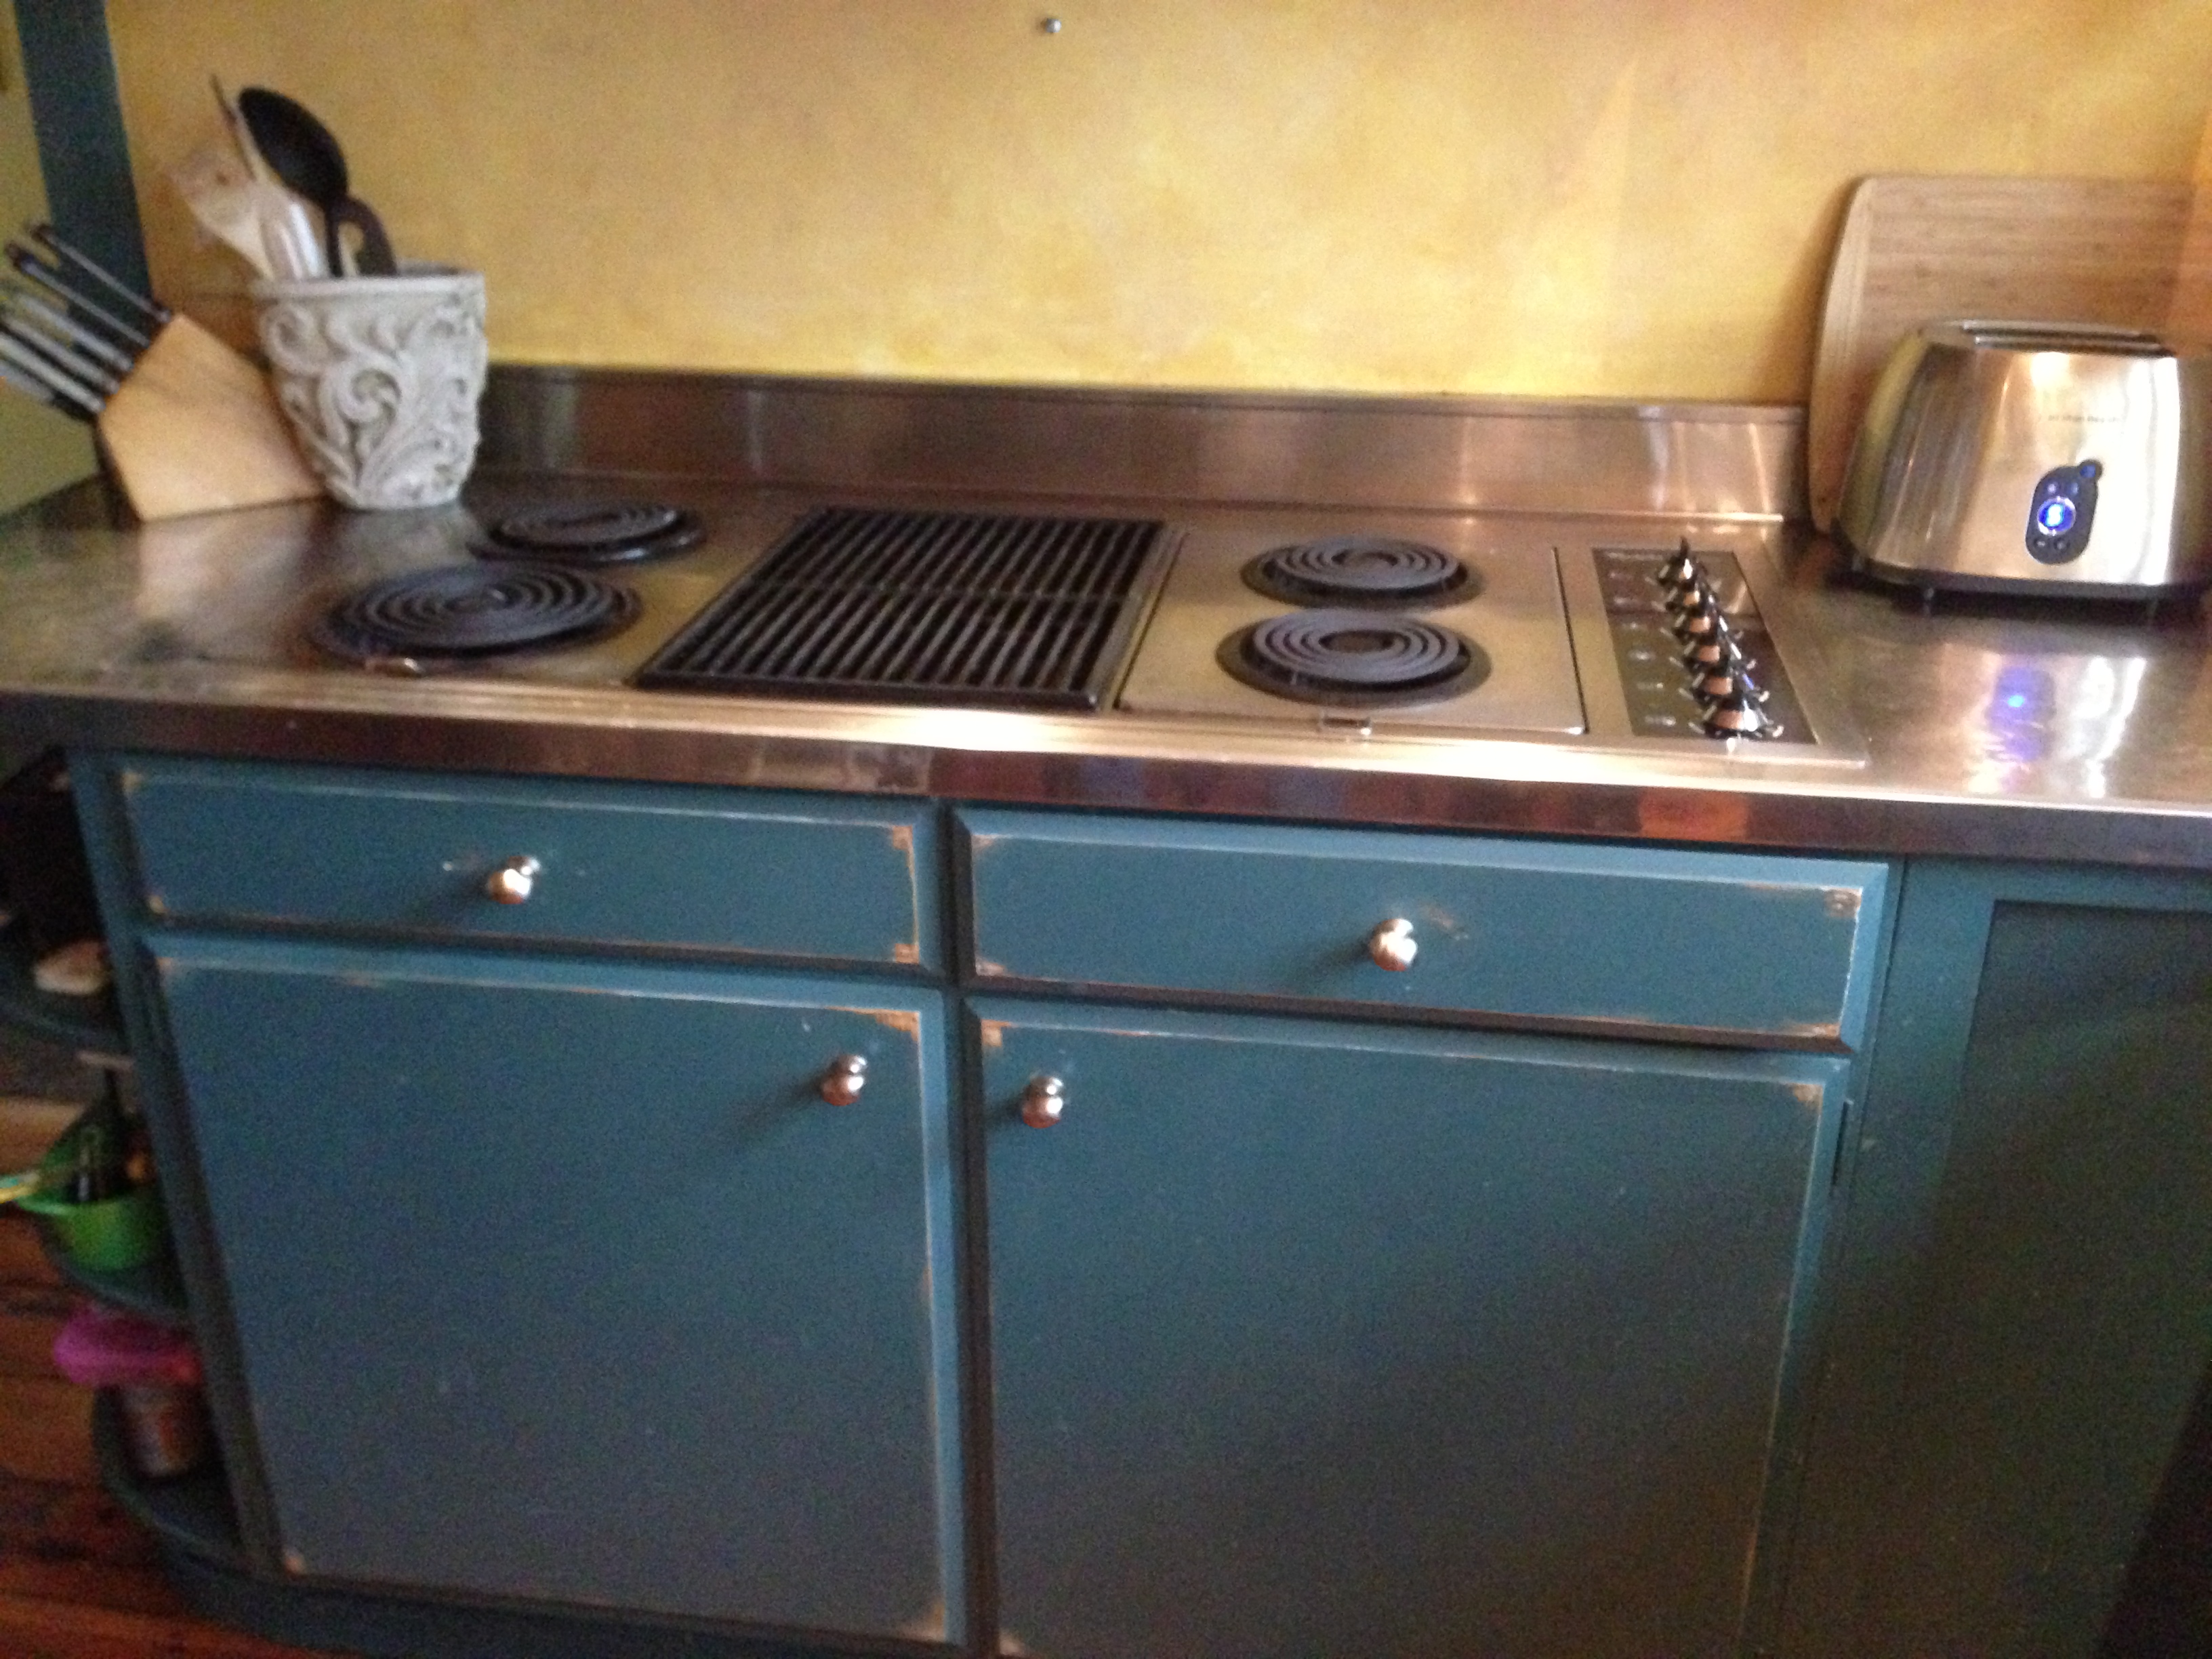
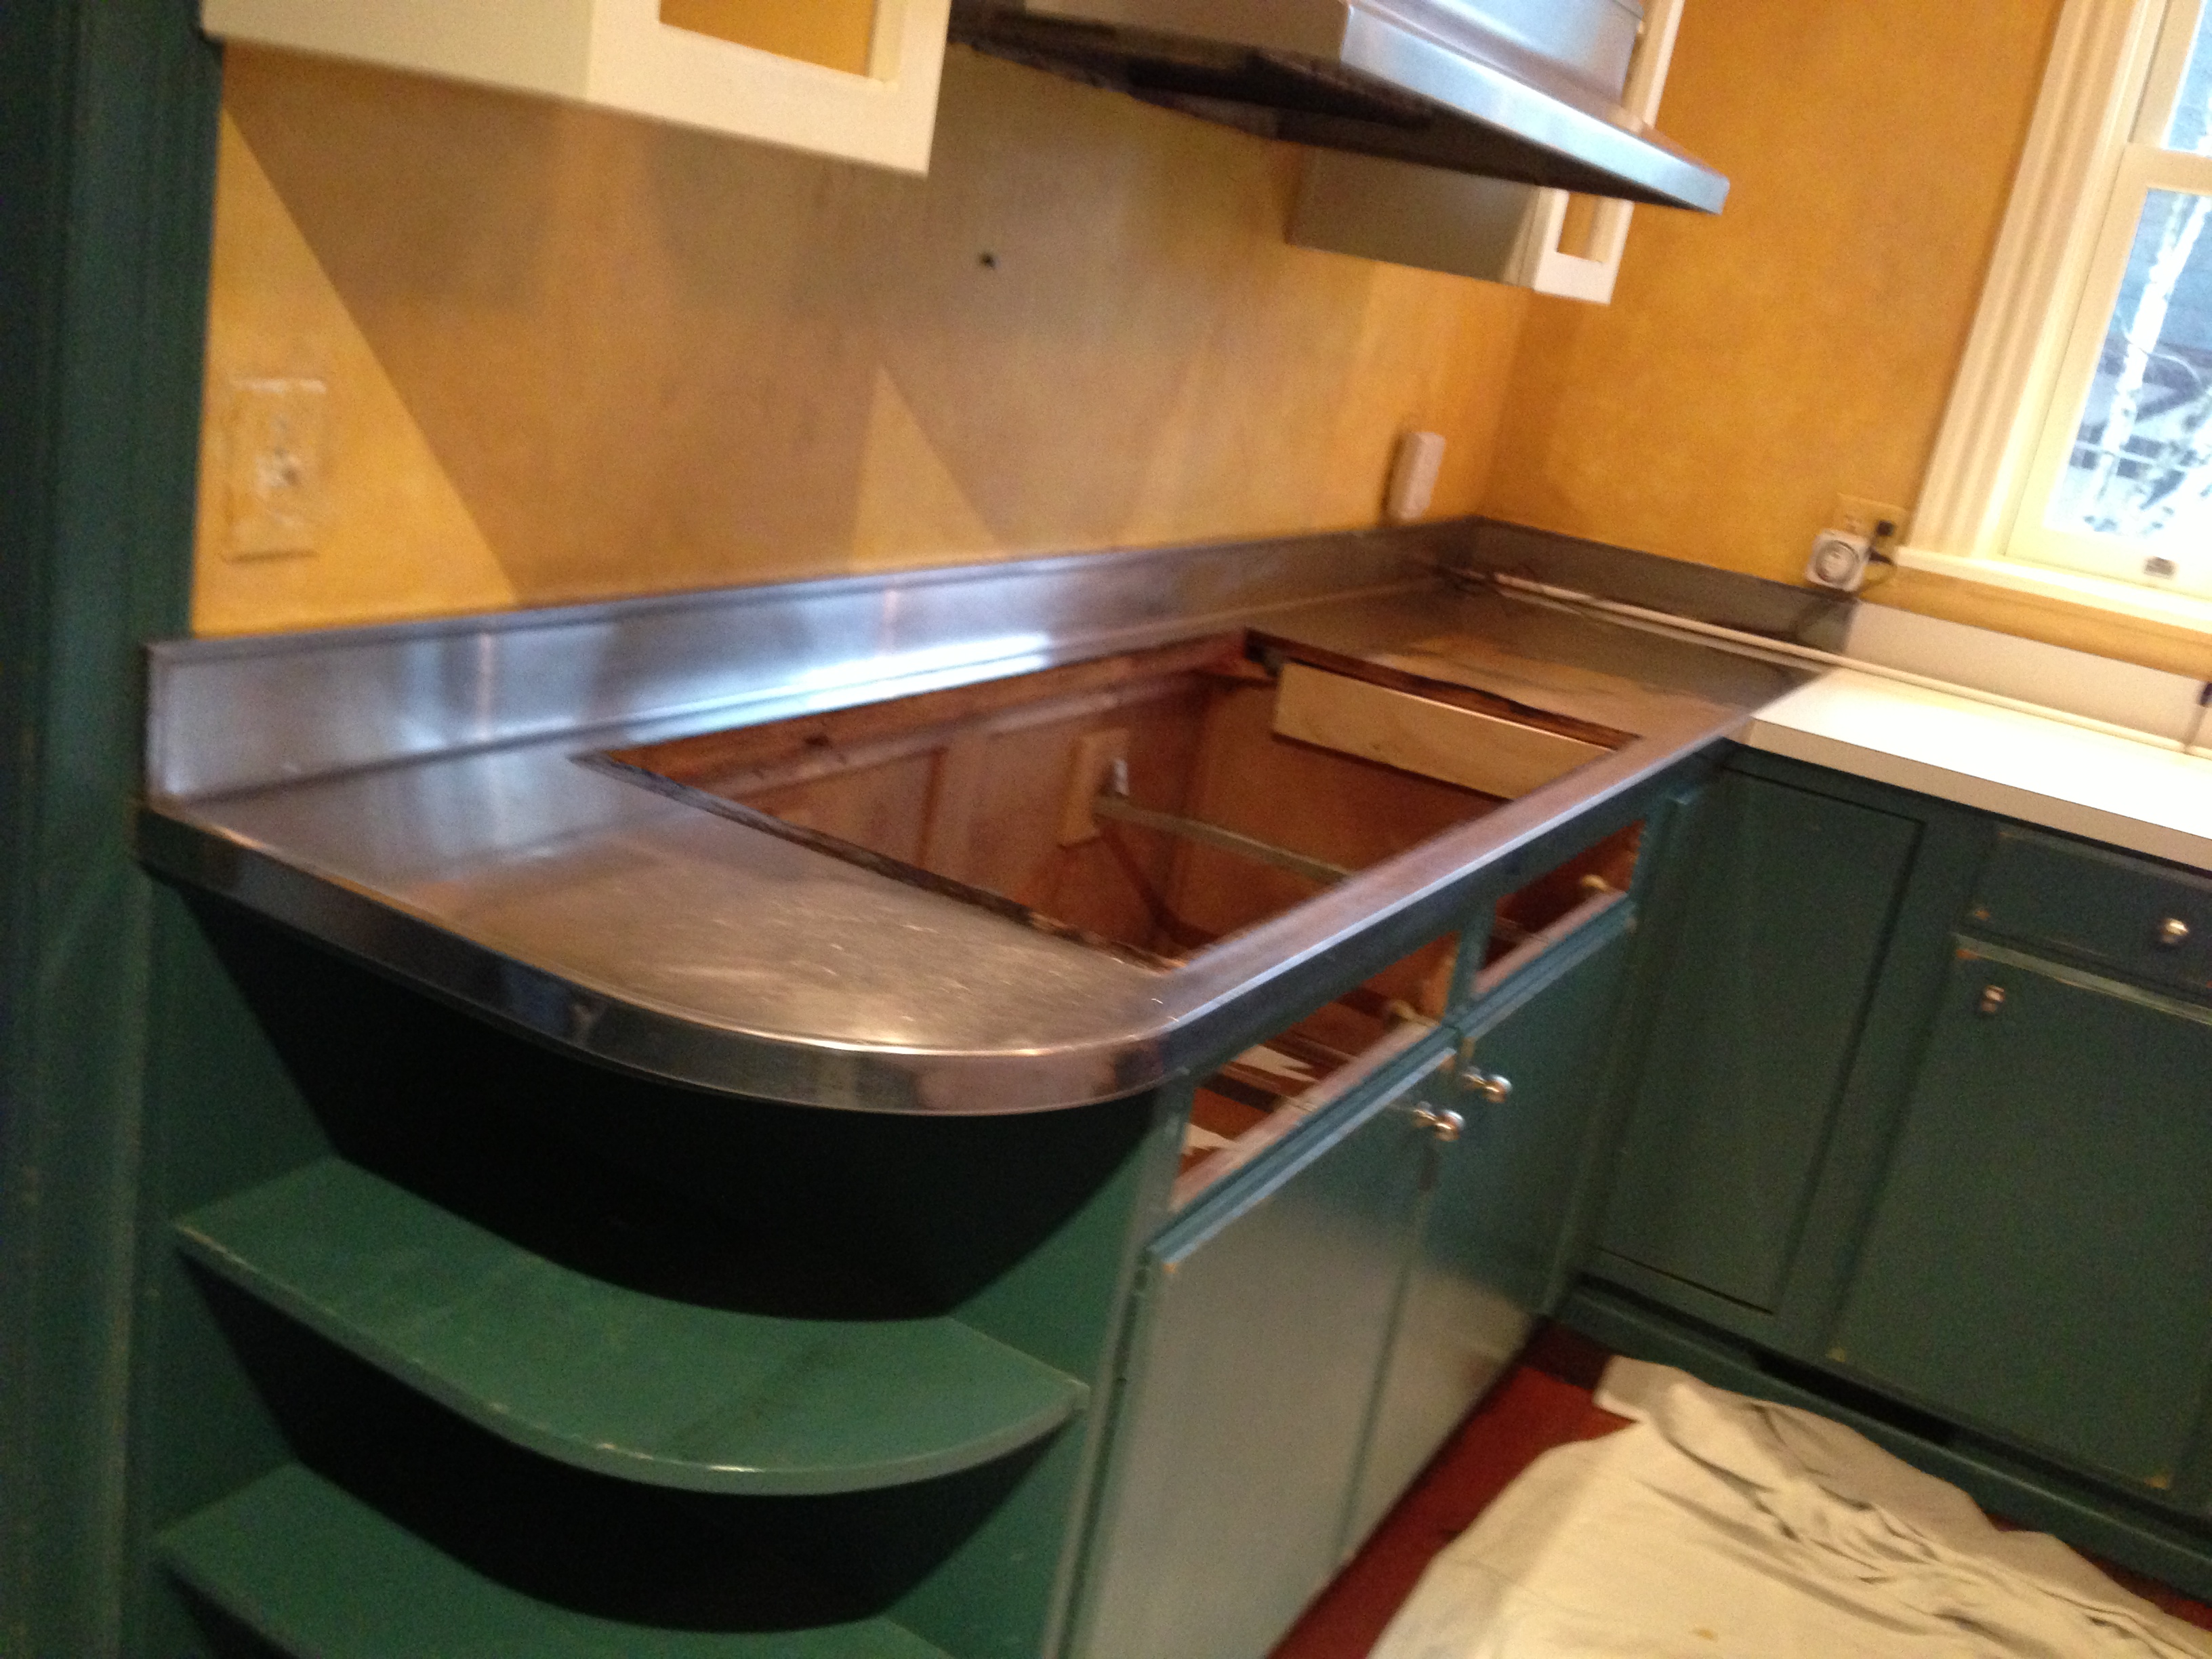
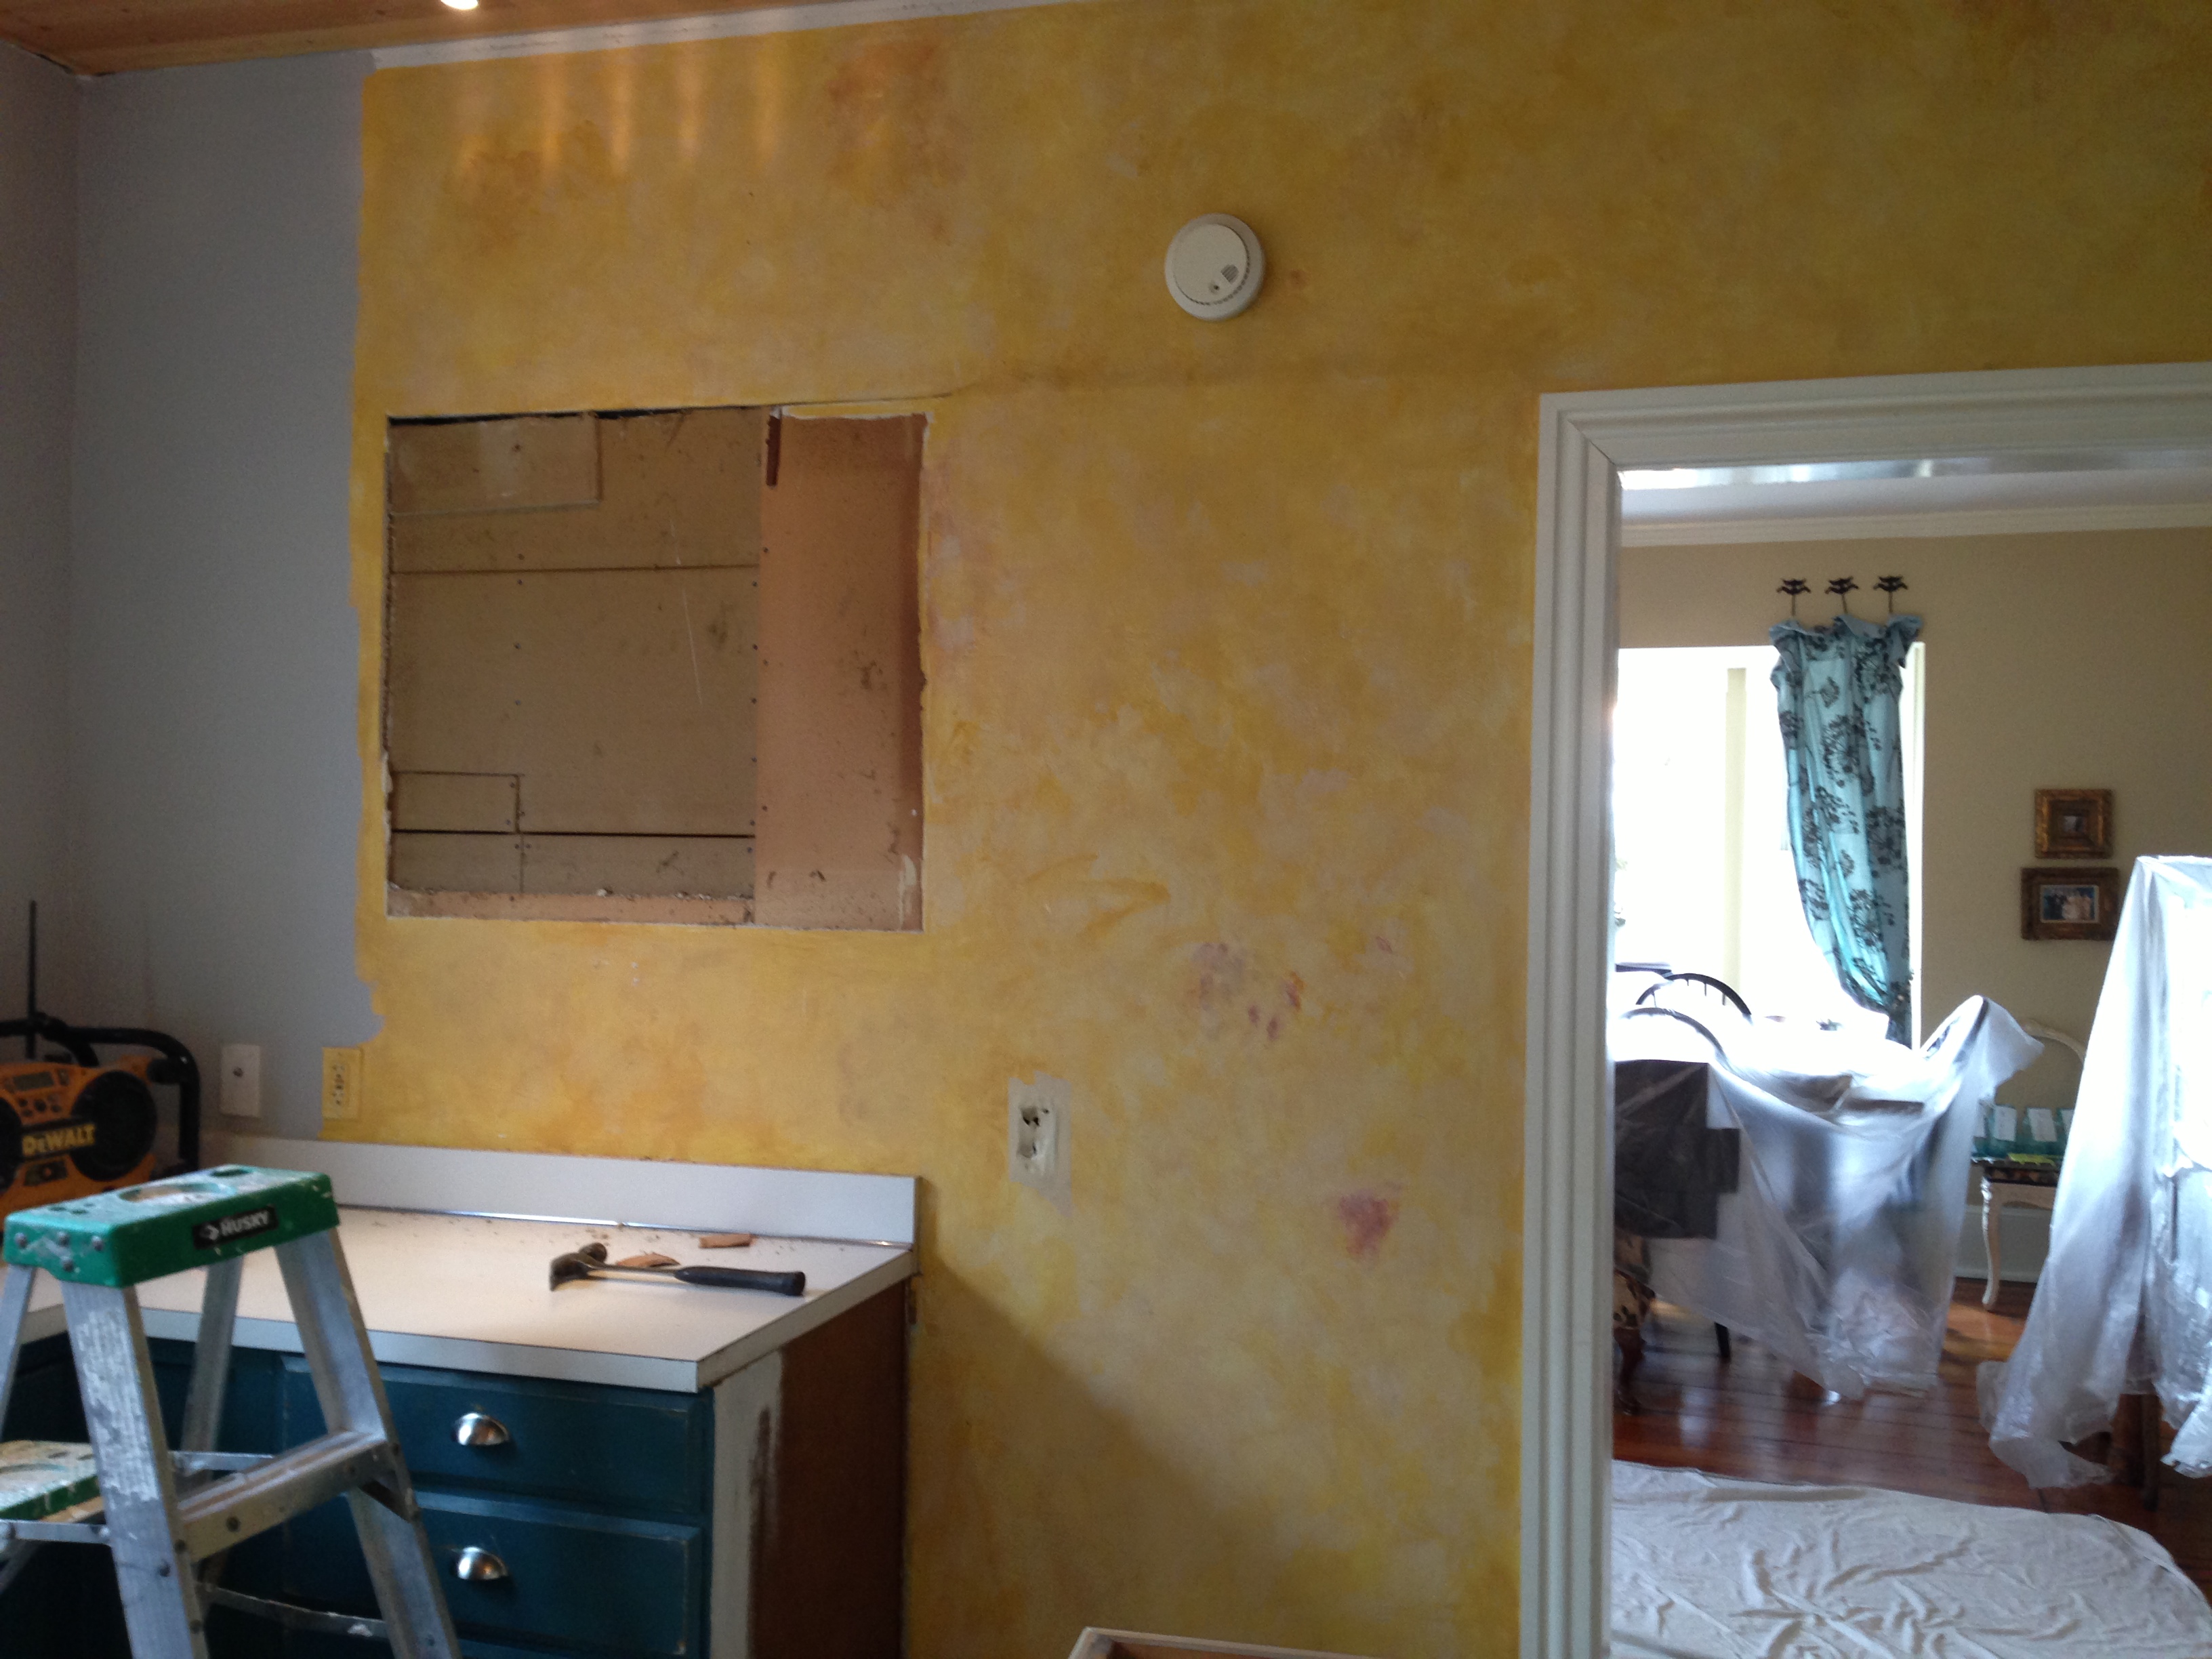
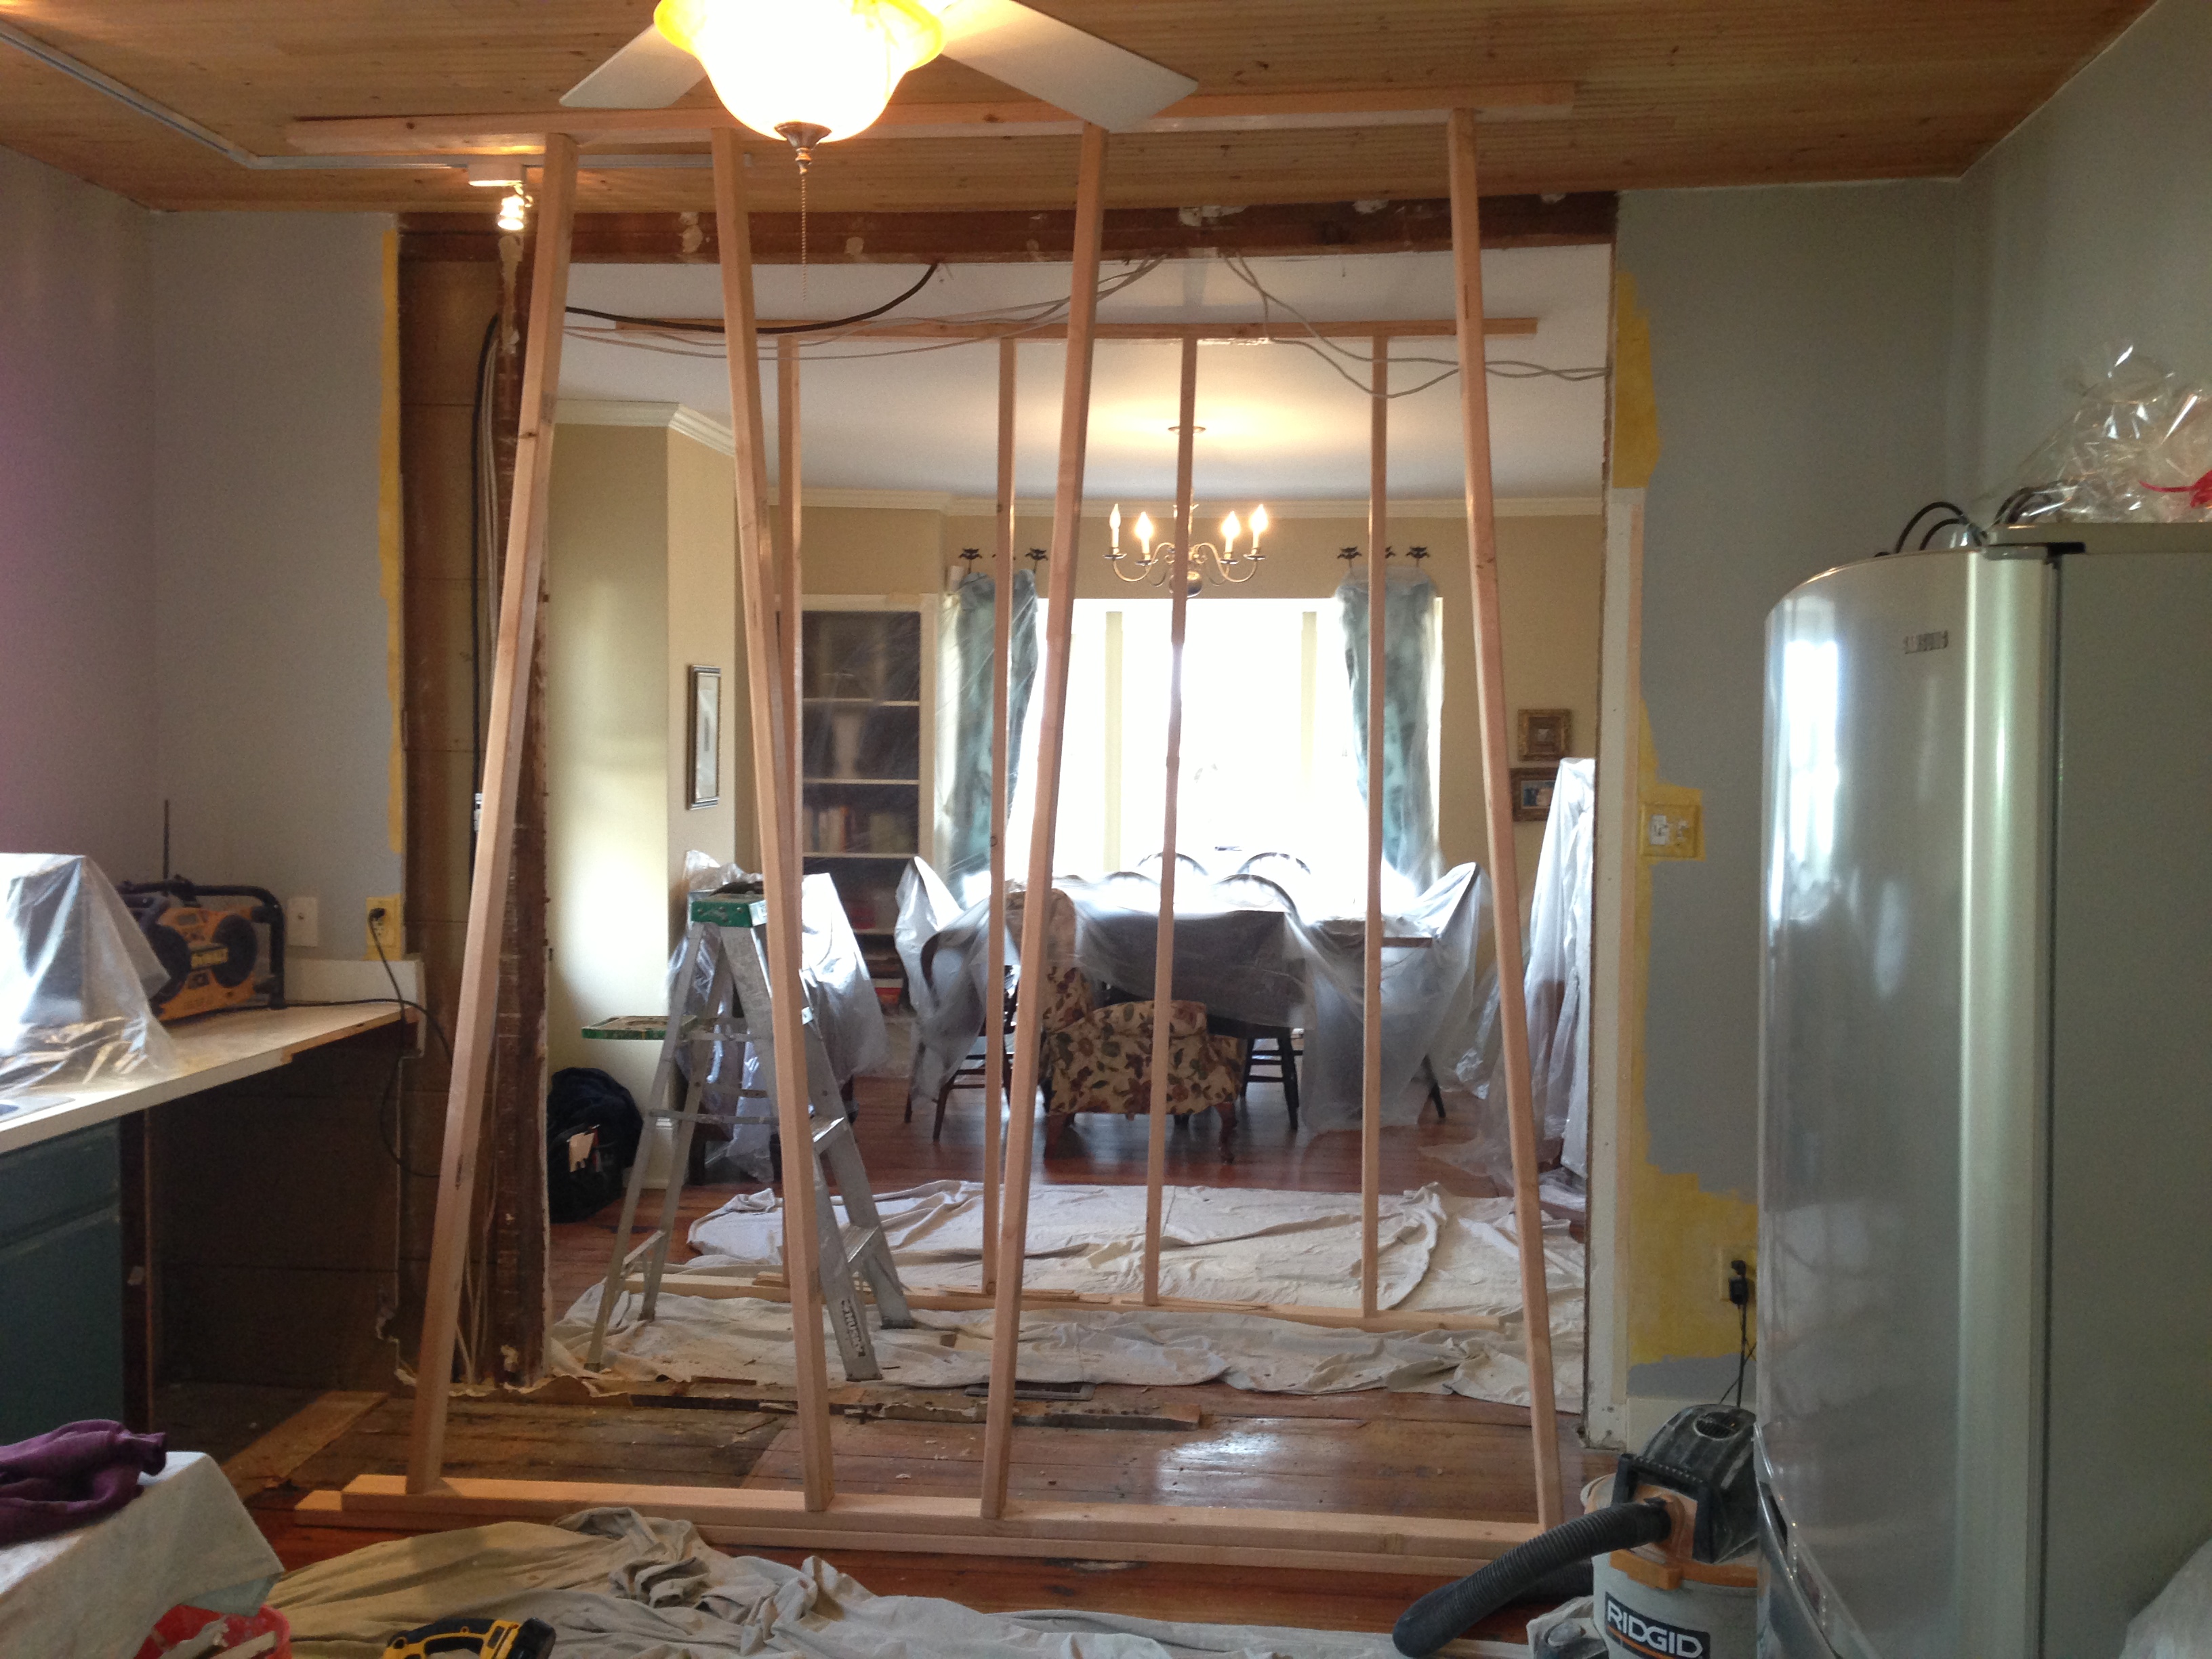
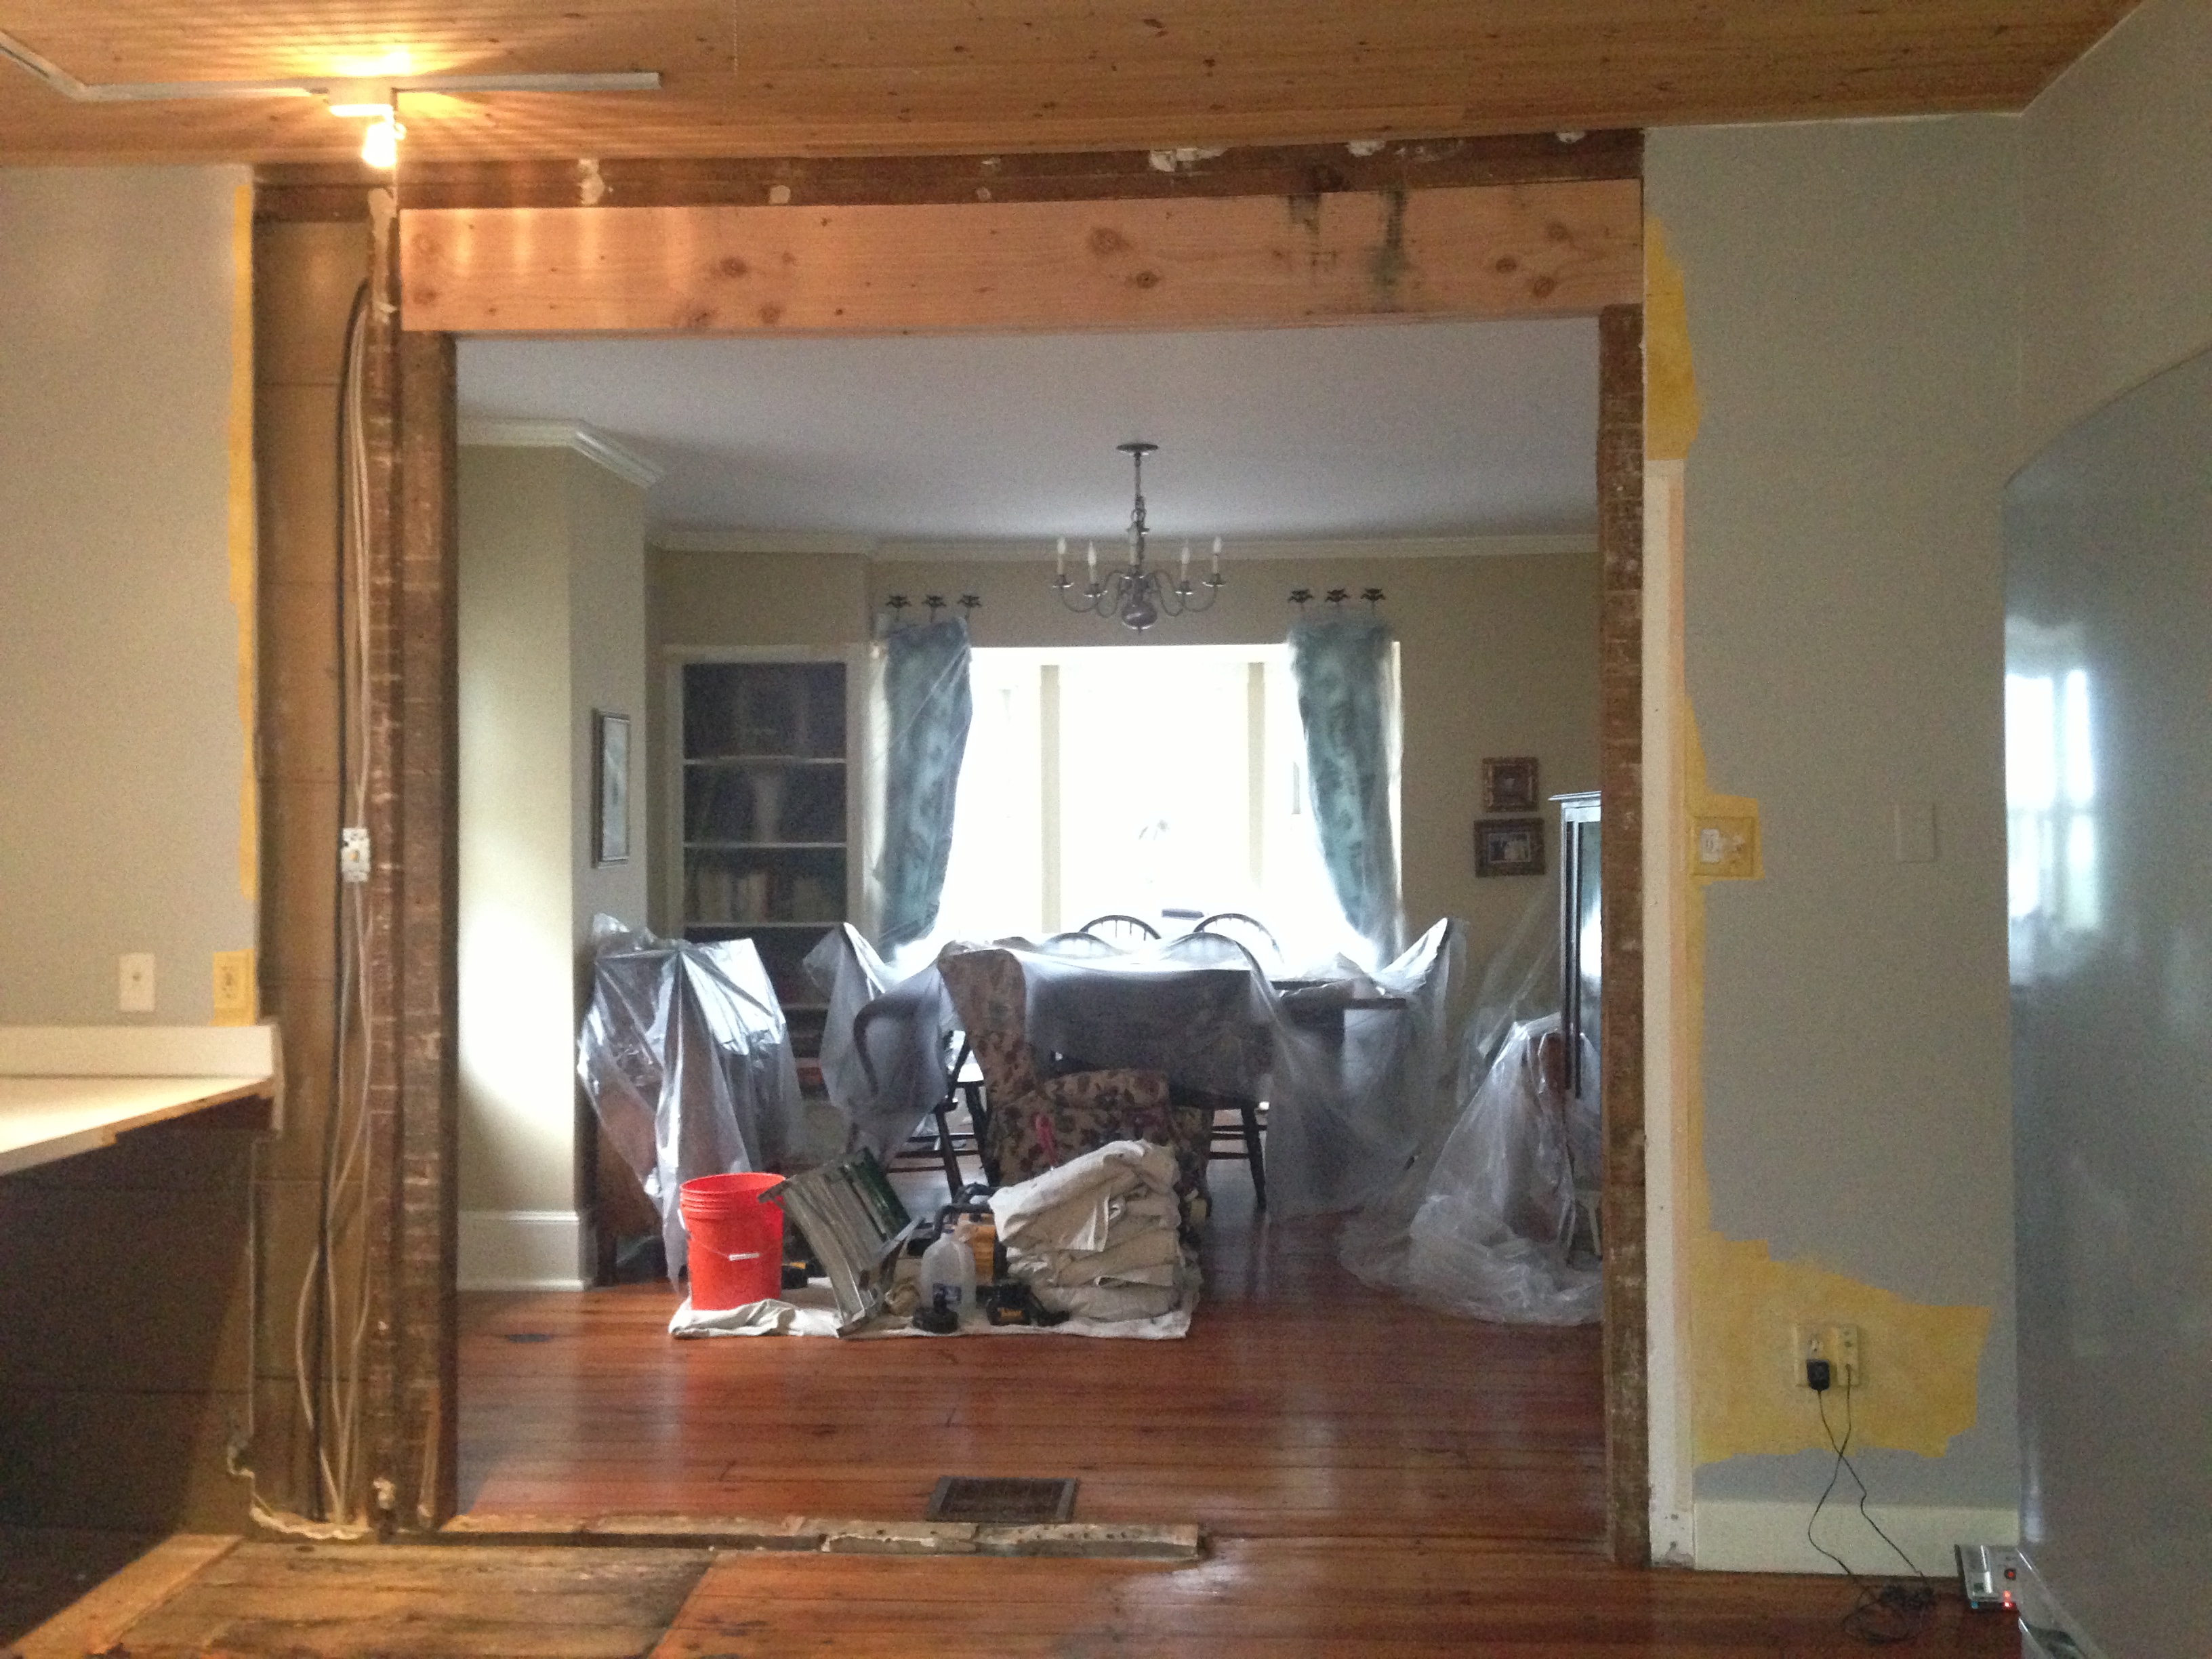
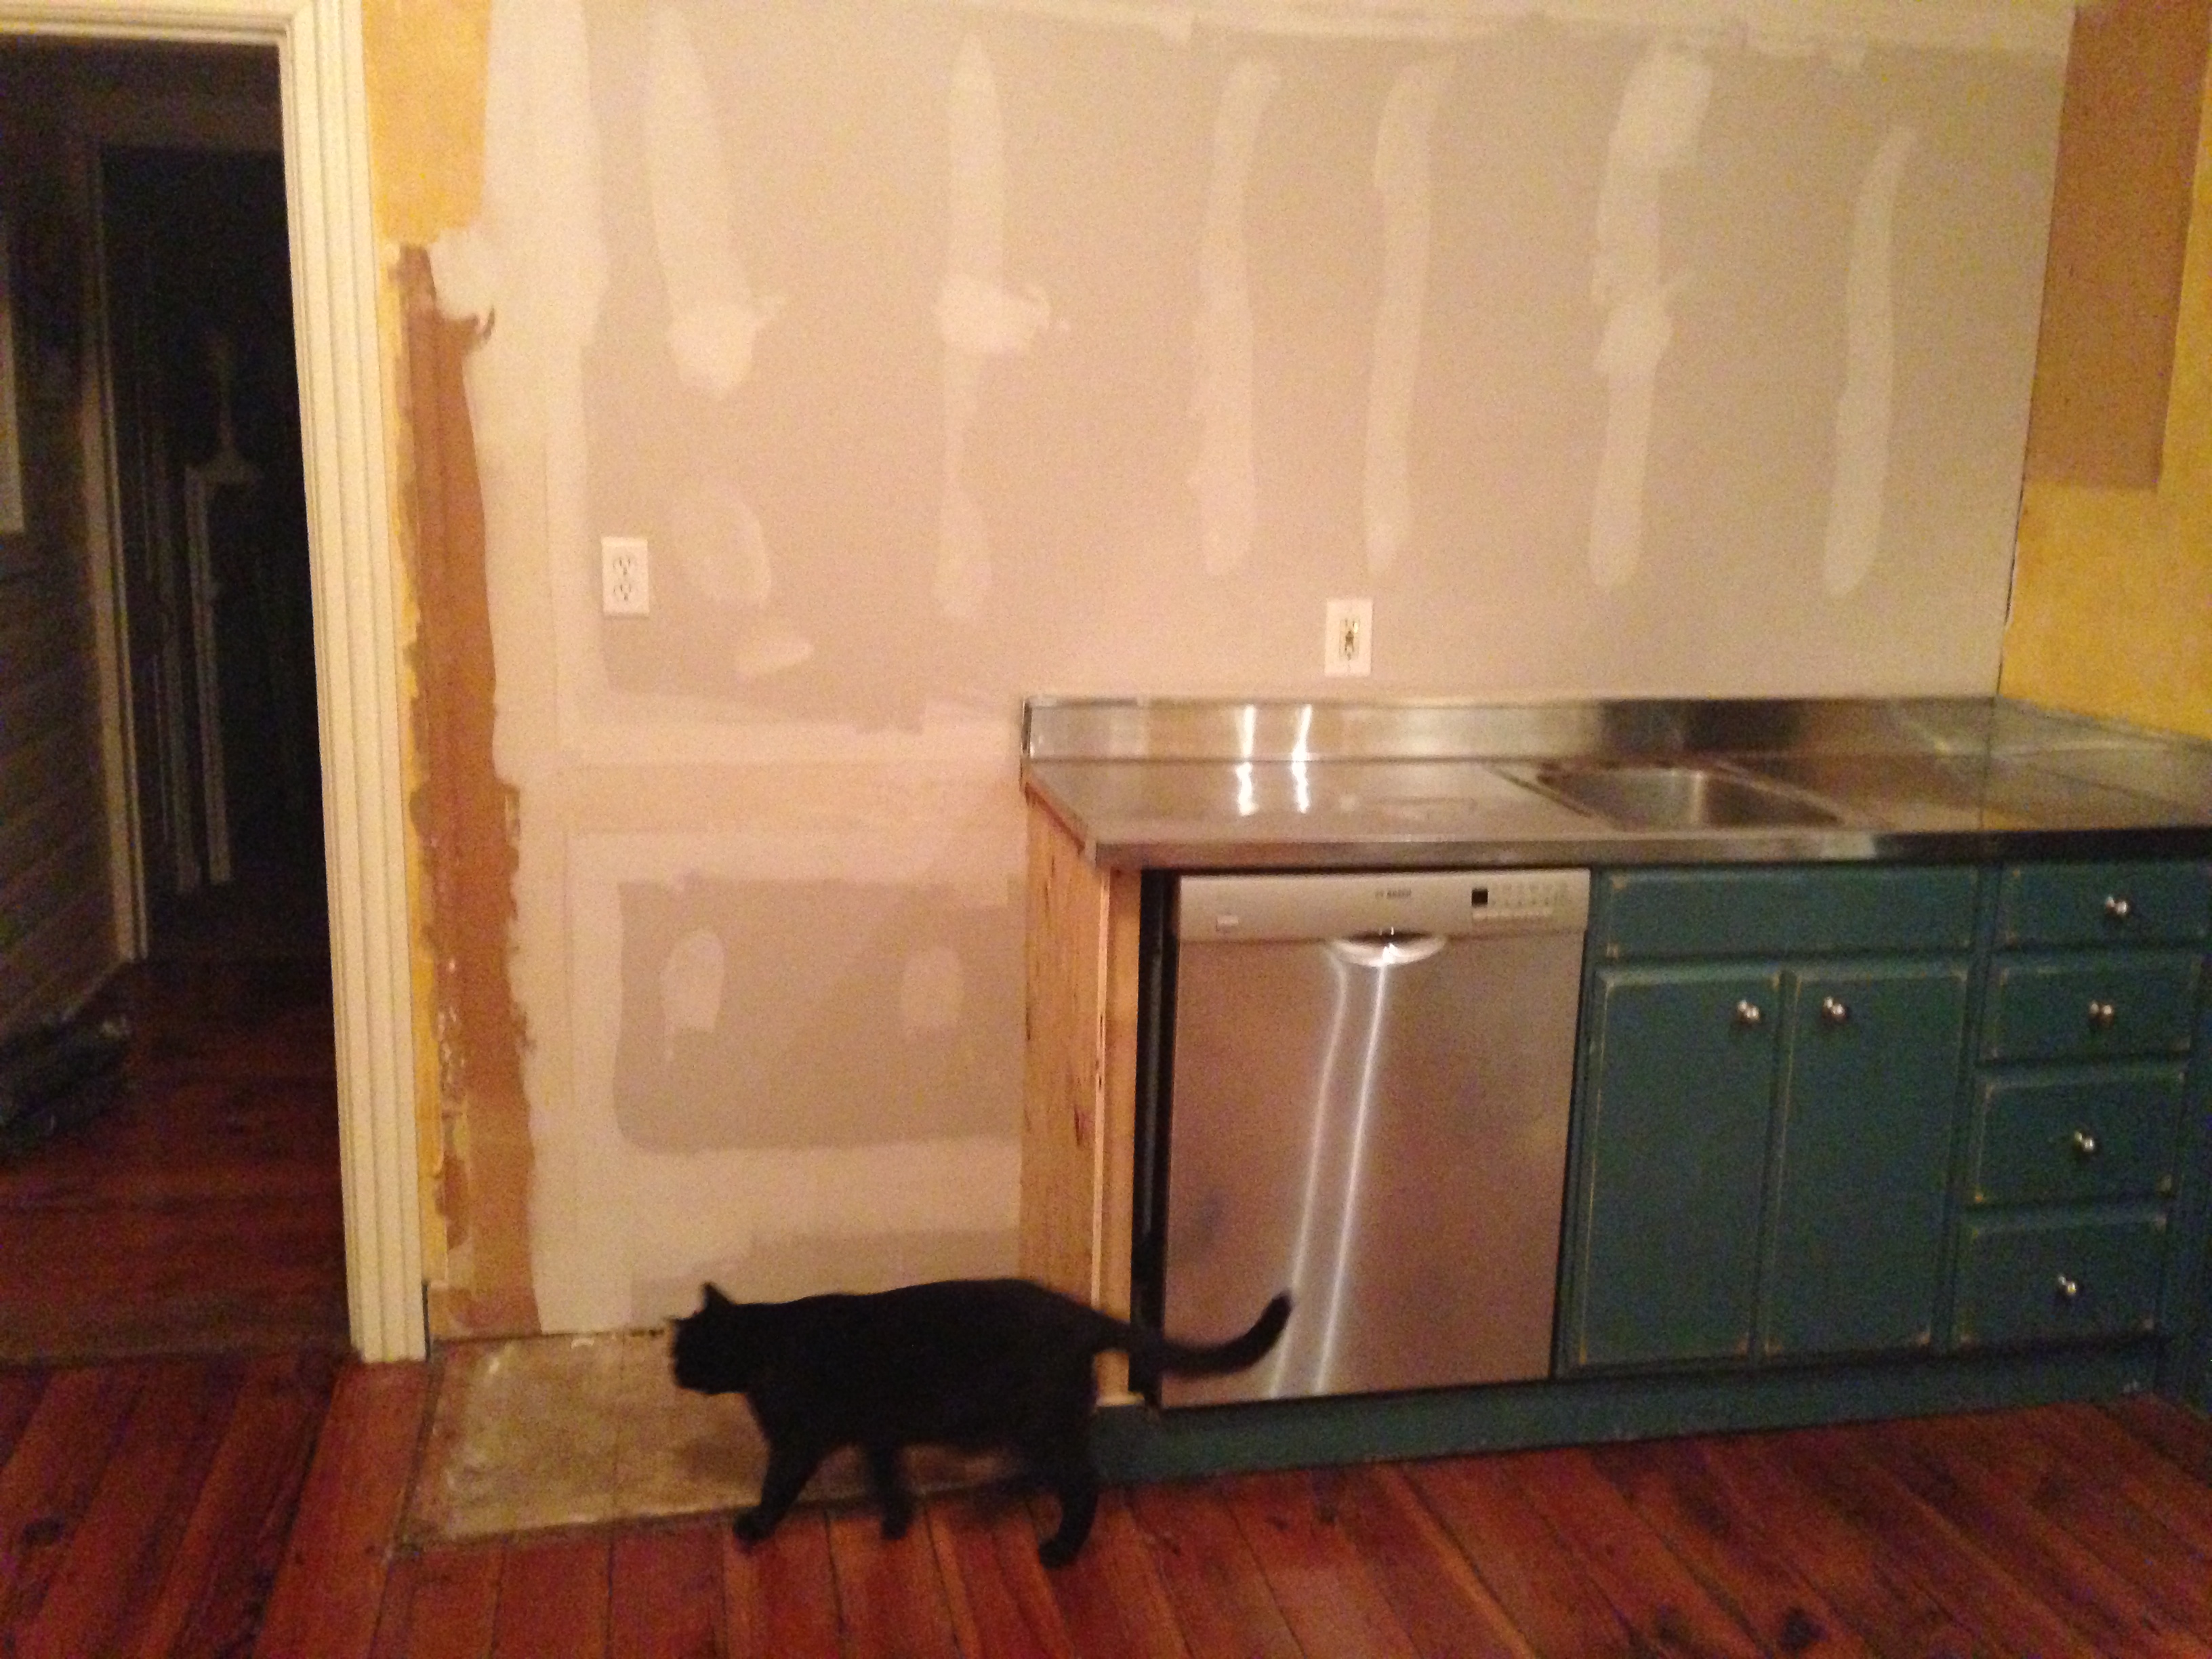
To begin, I will show you a few “befores” so you can get some idea of the scope of the project.
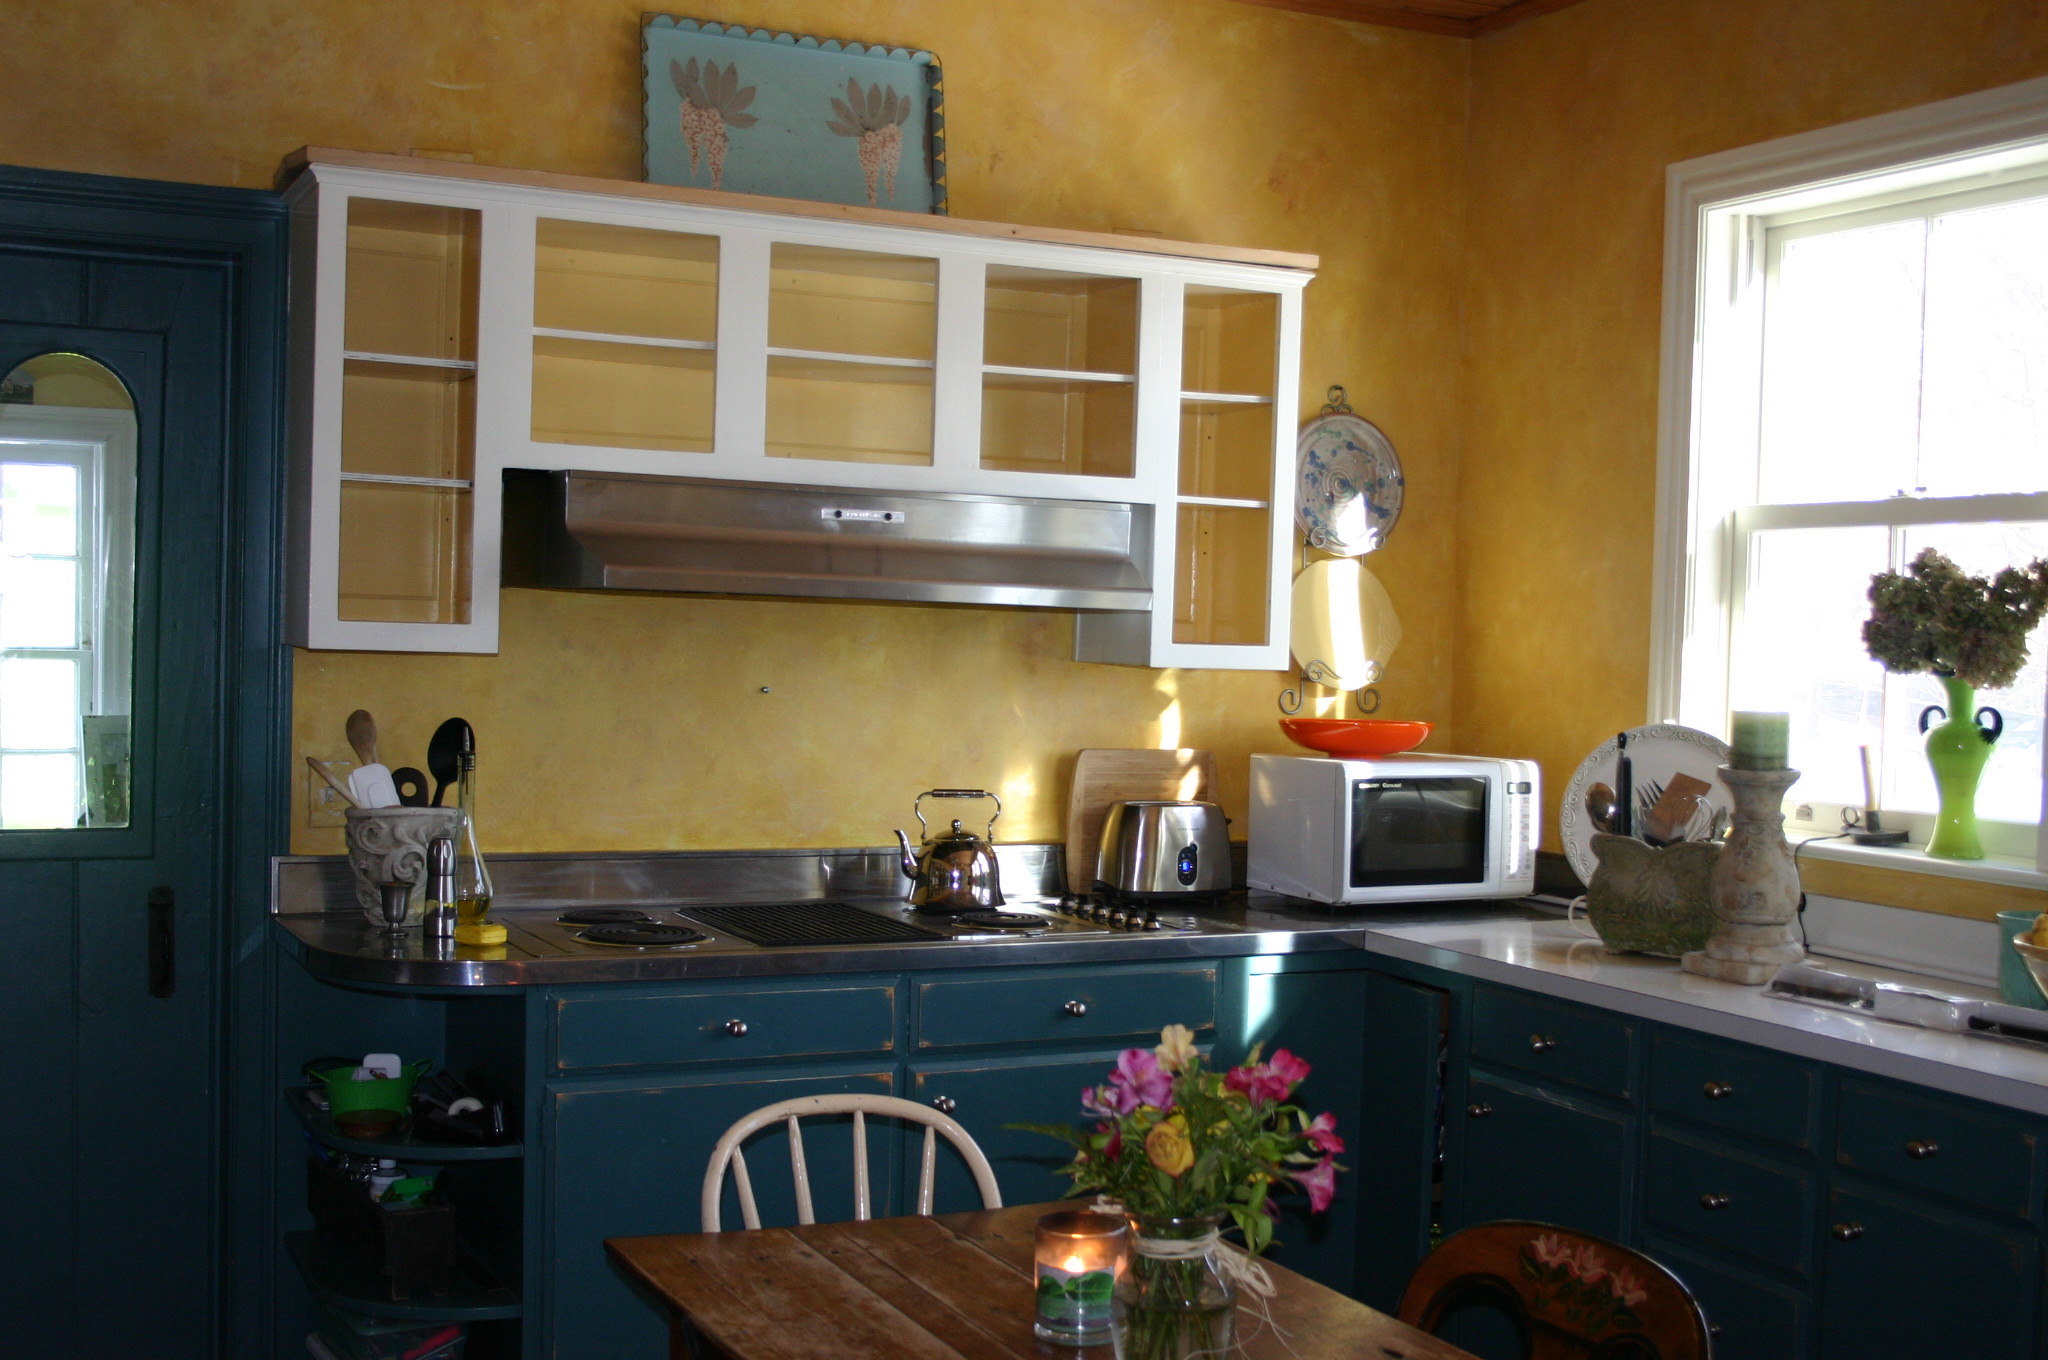
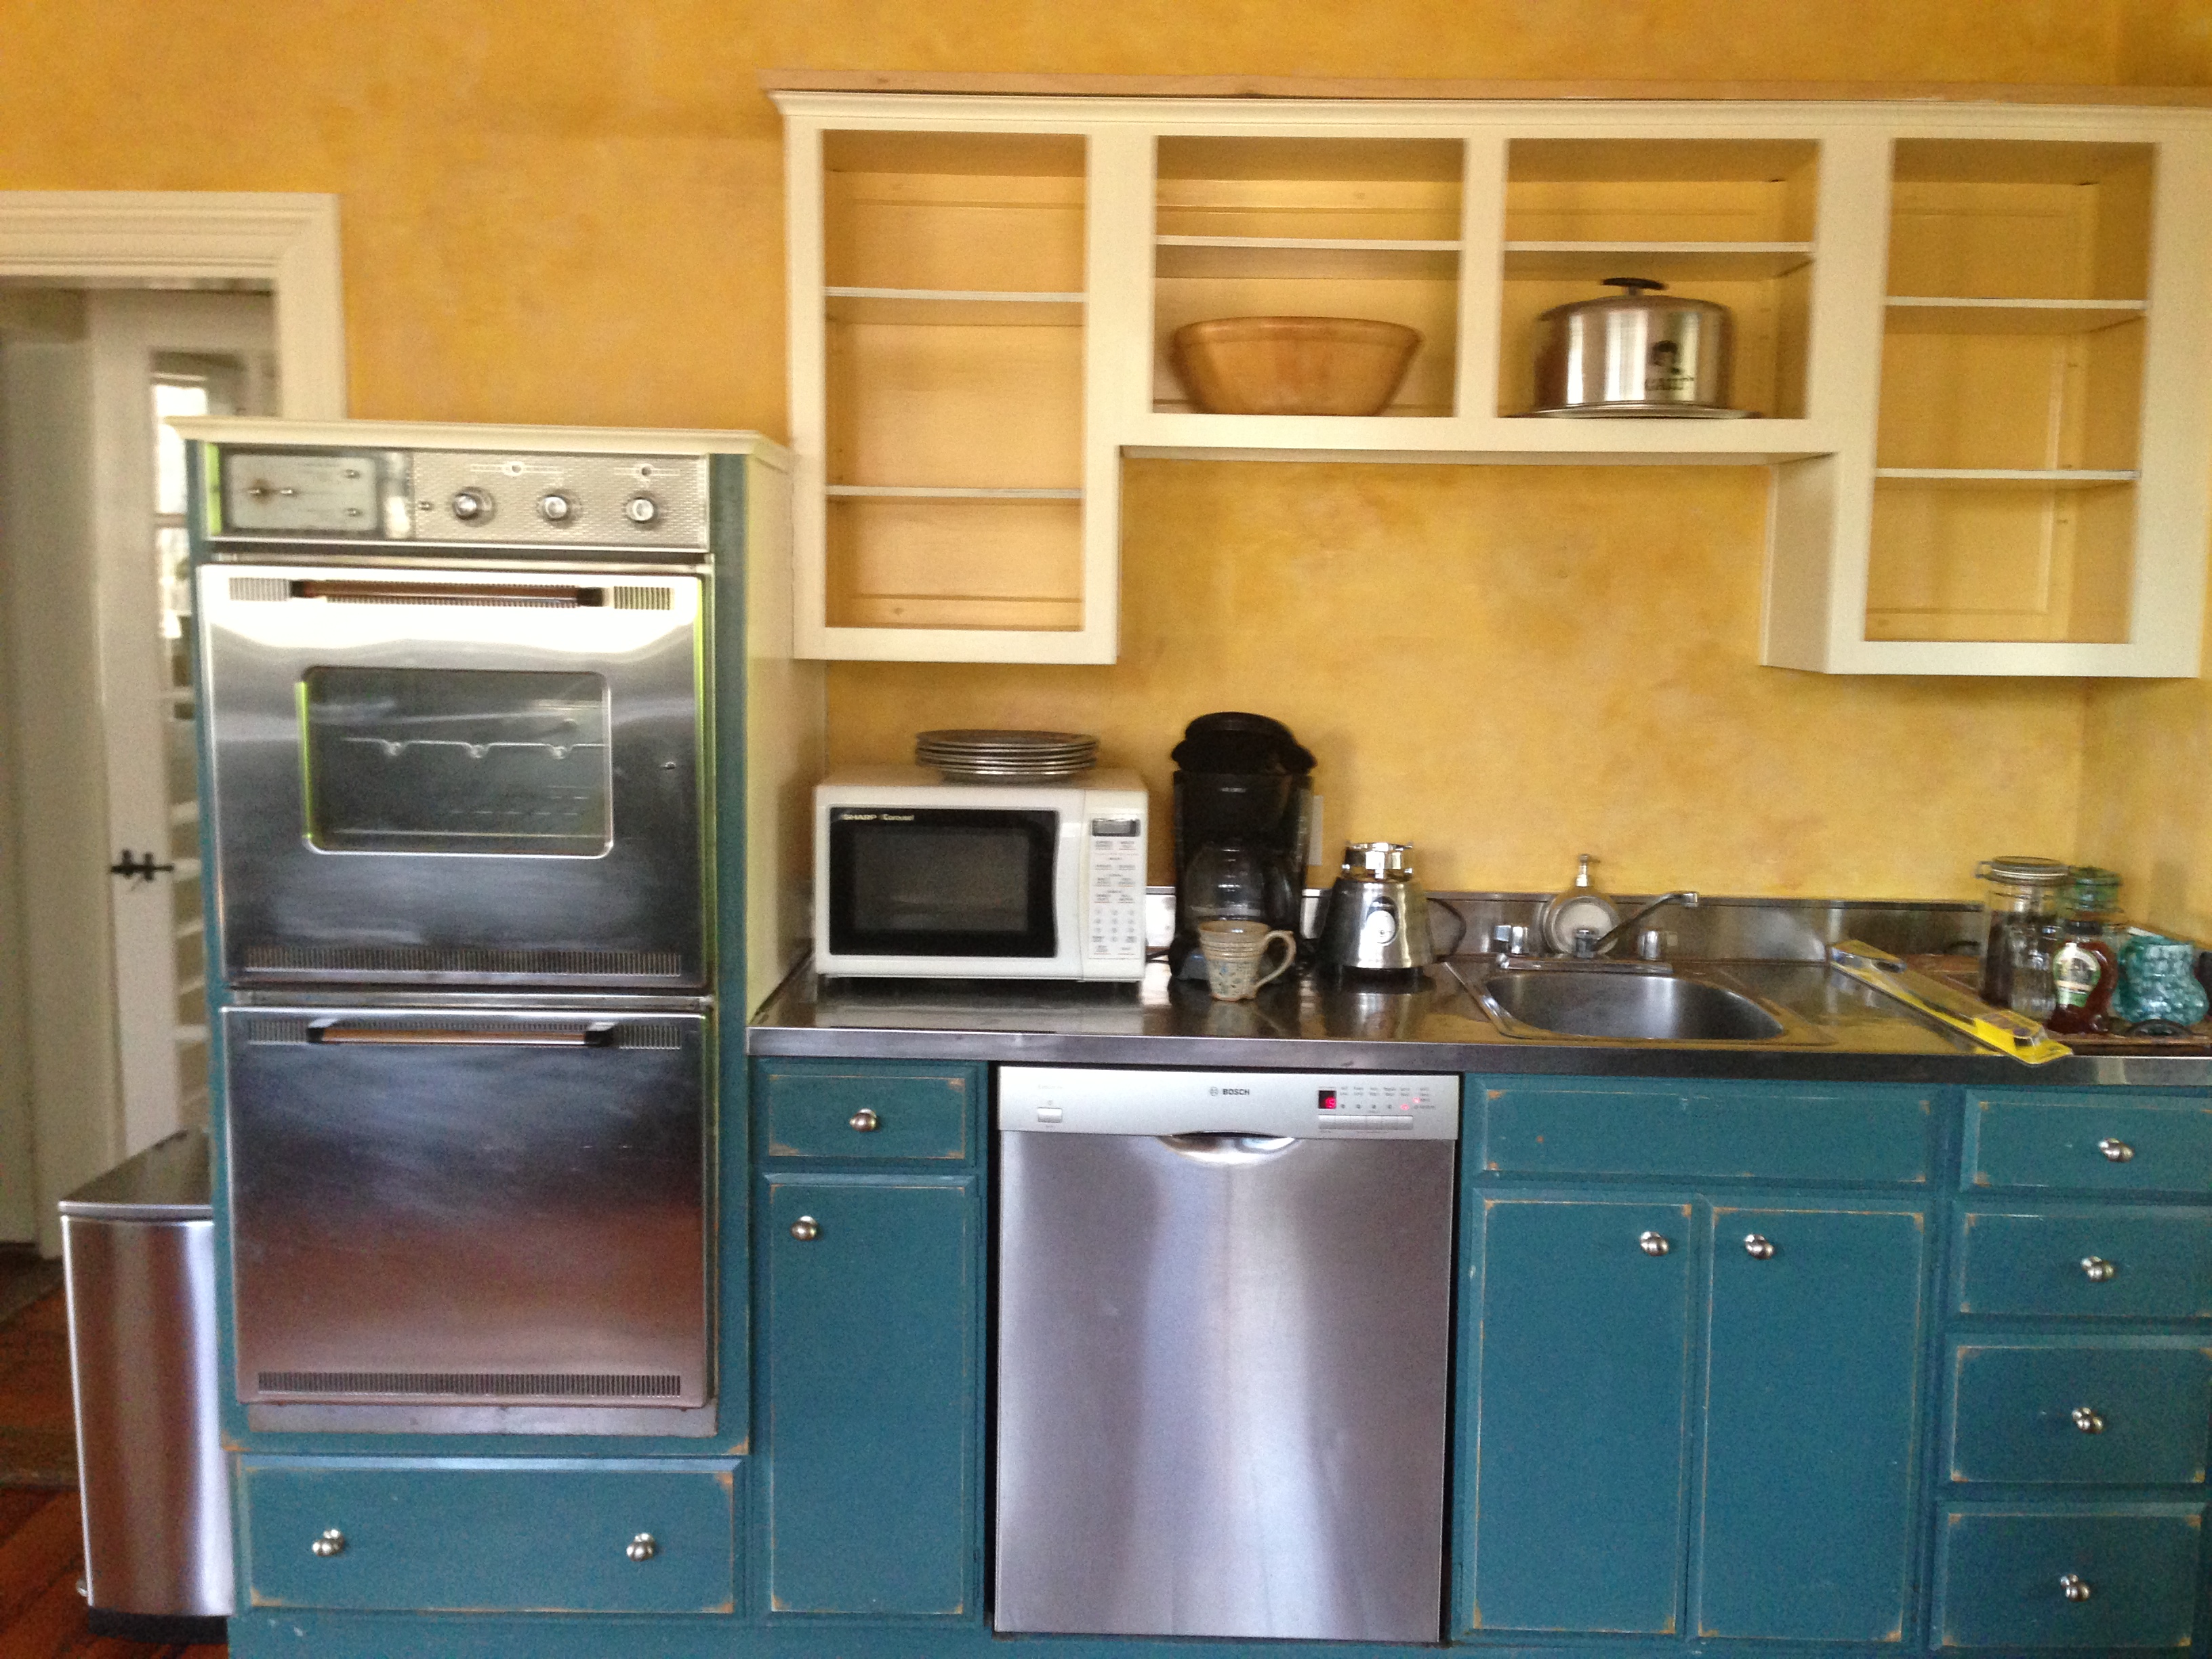
Yep, you get the idea. Dated teal undercabinets, yellow rag-washed walls, open upper cabinets, and very very very antique stainless appliances.
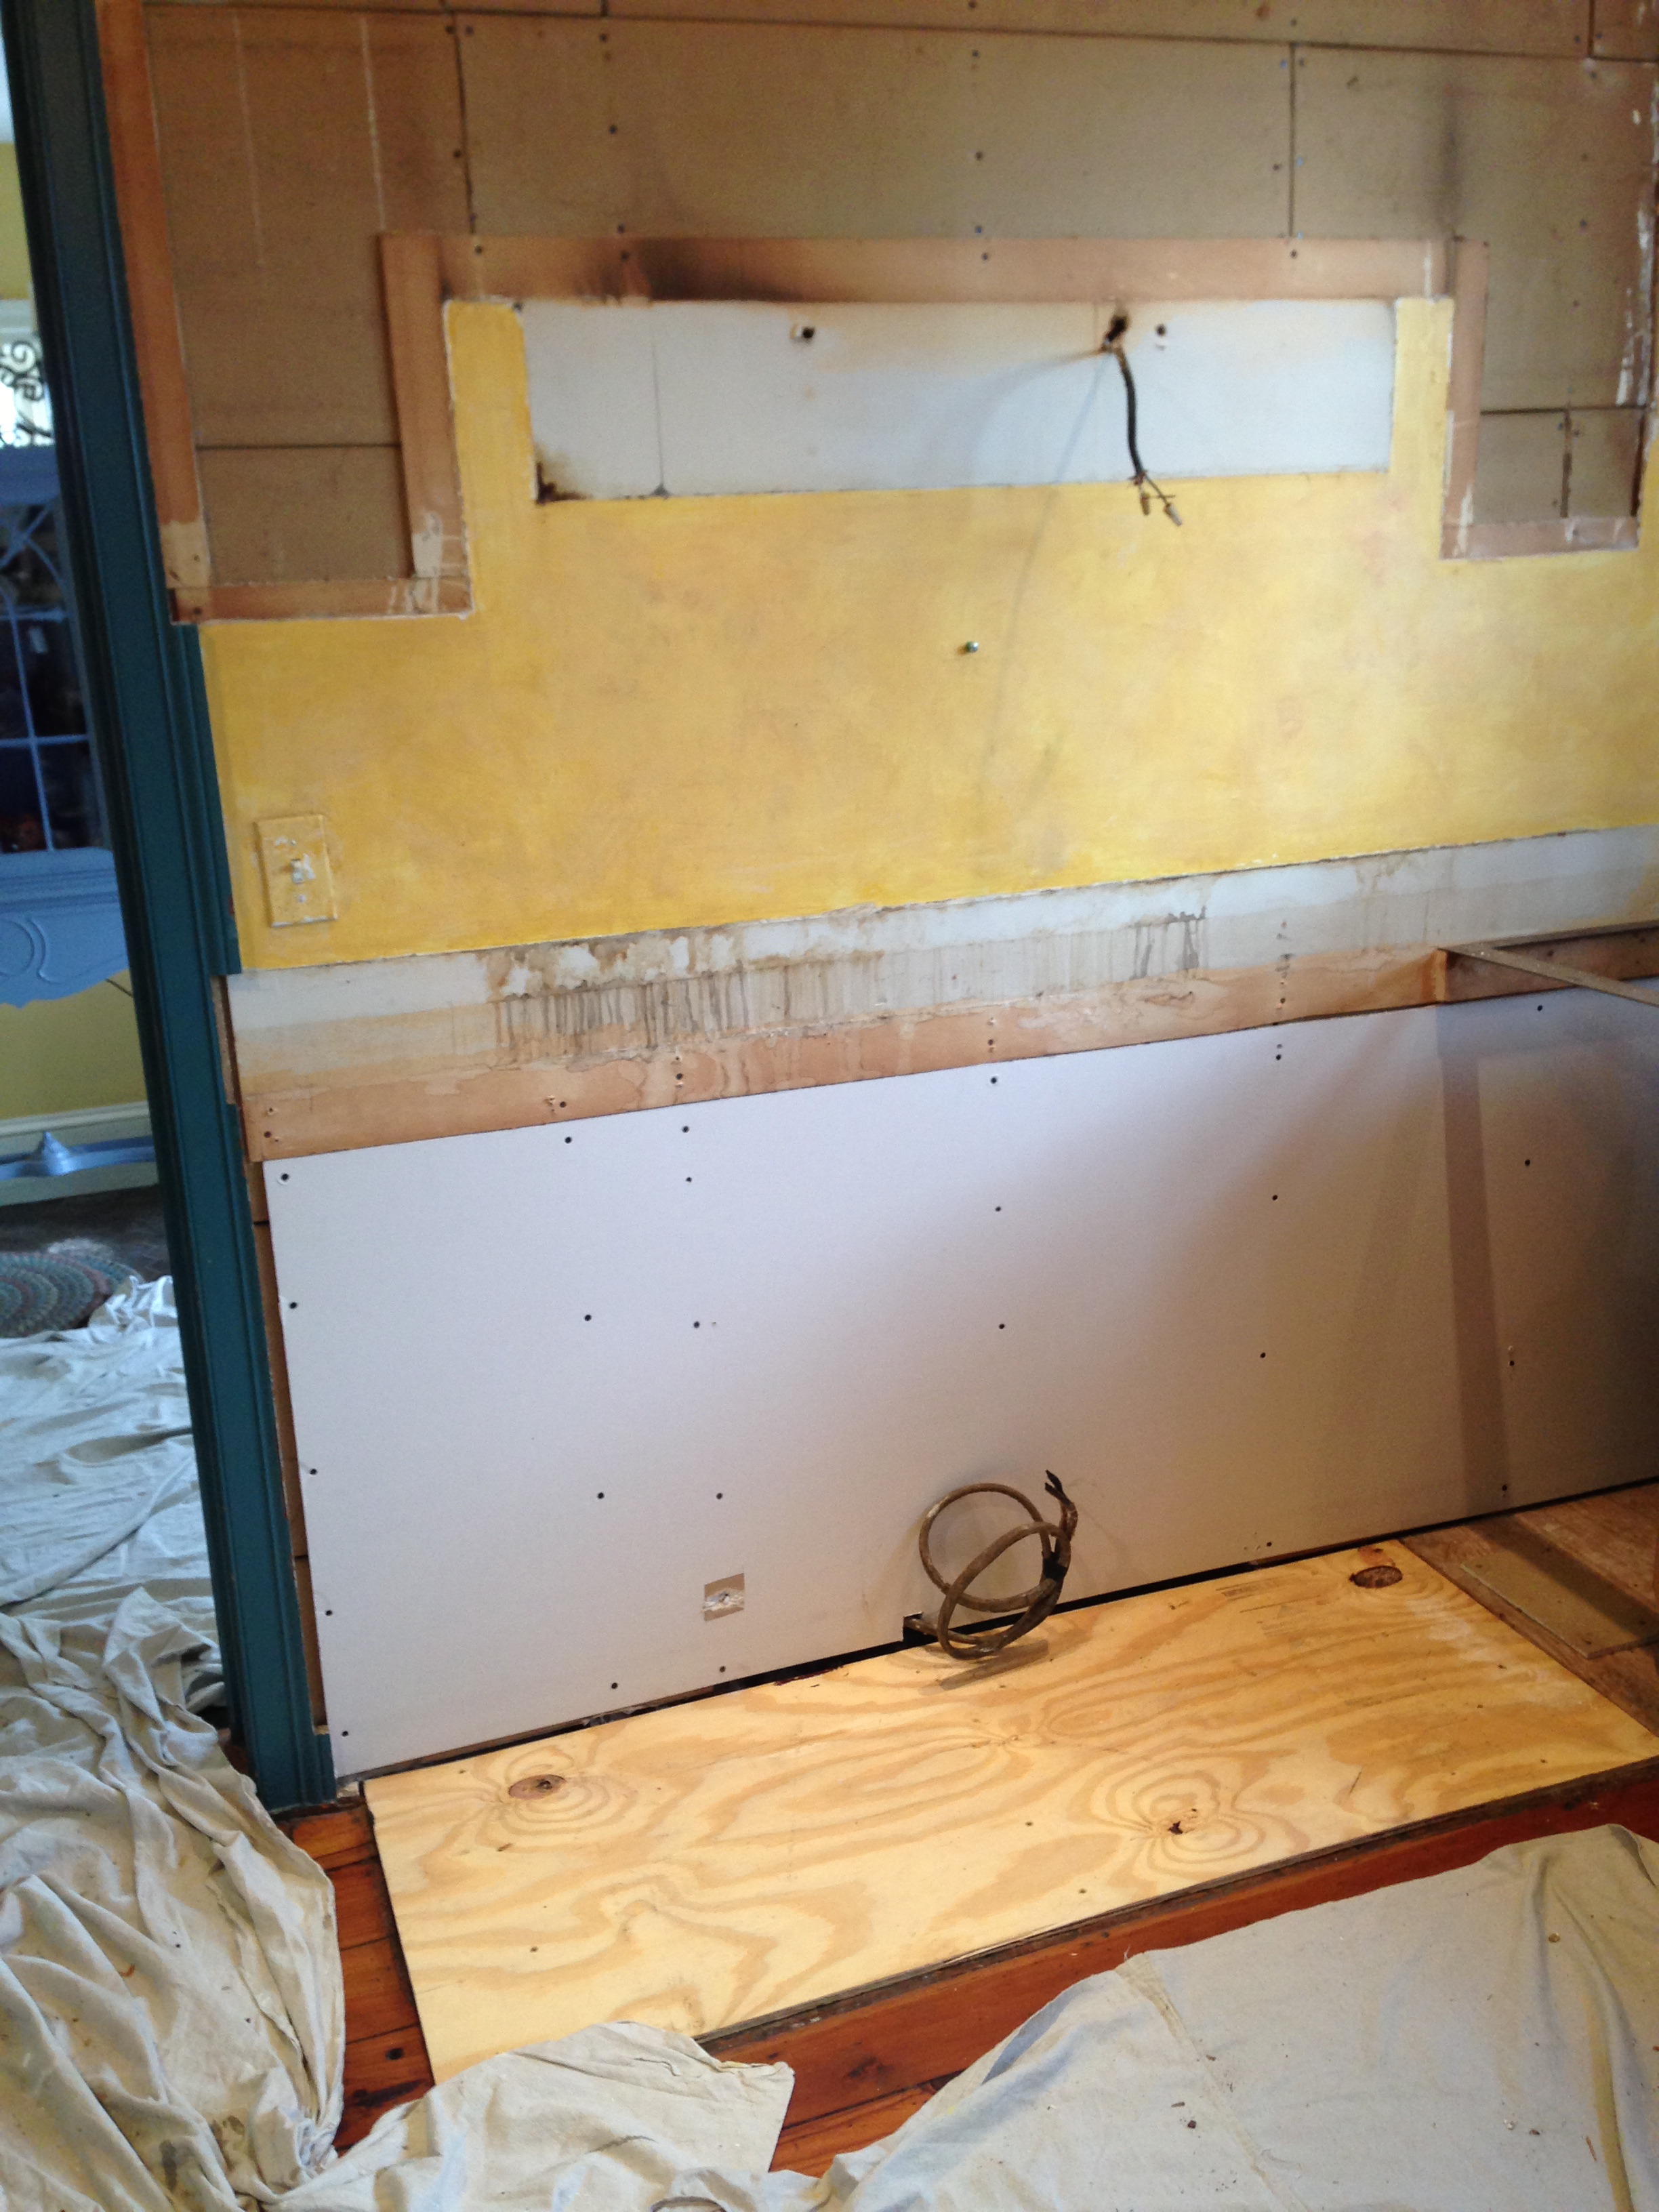
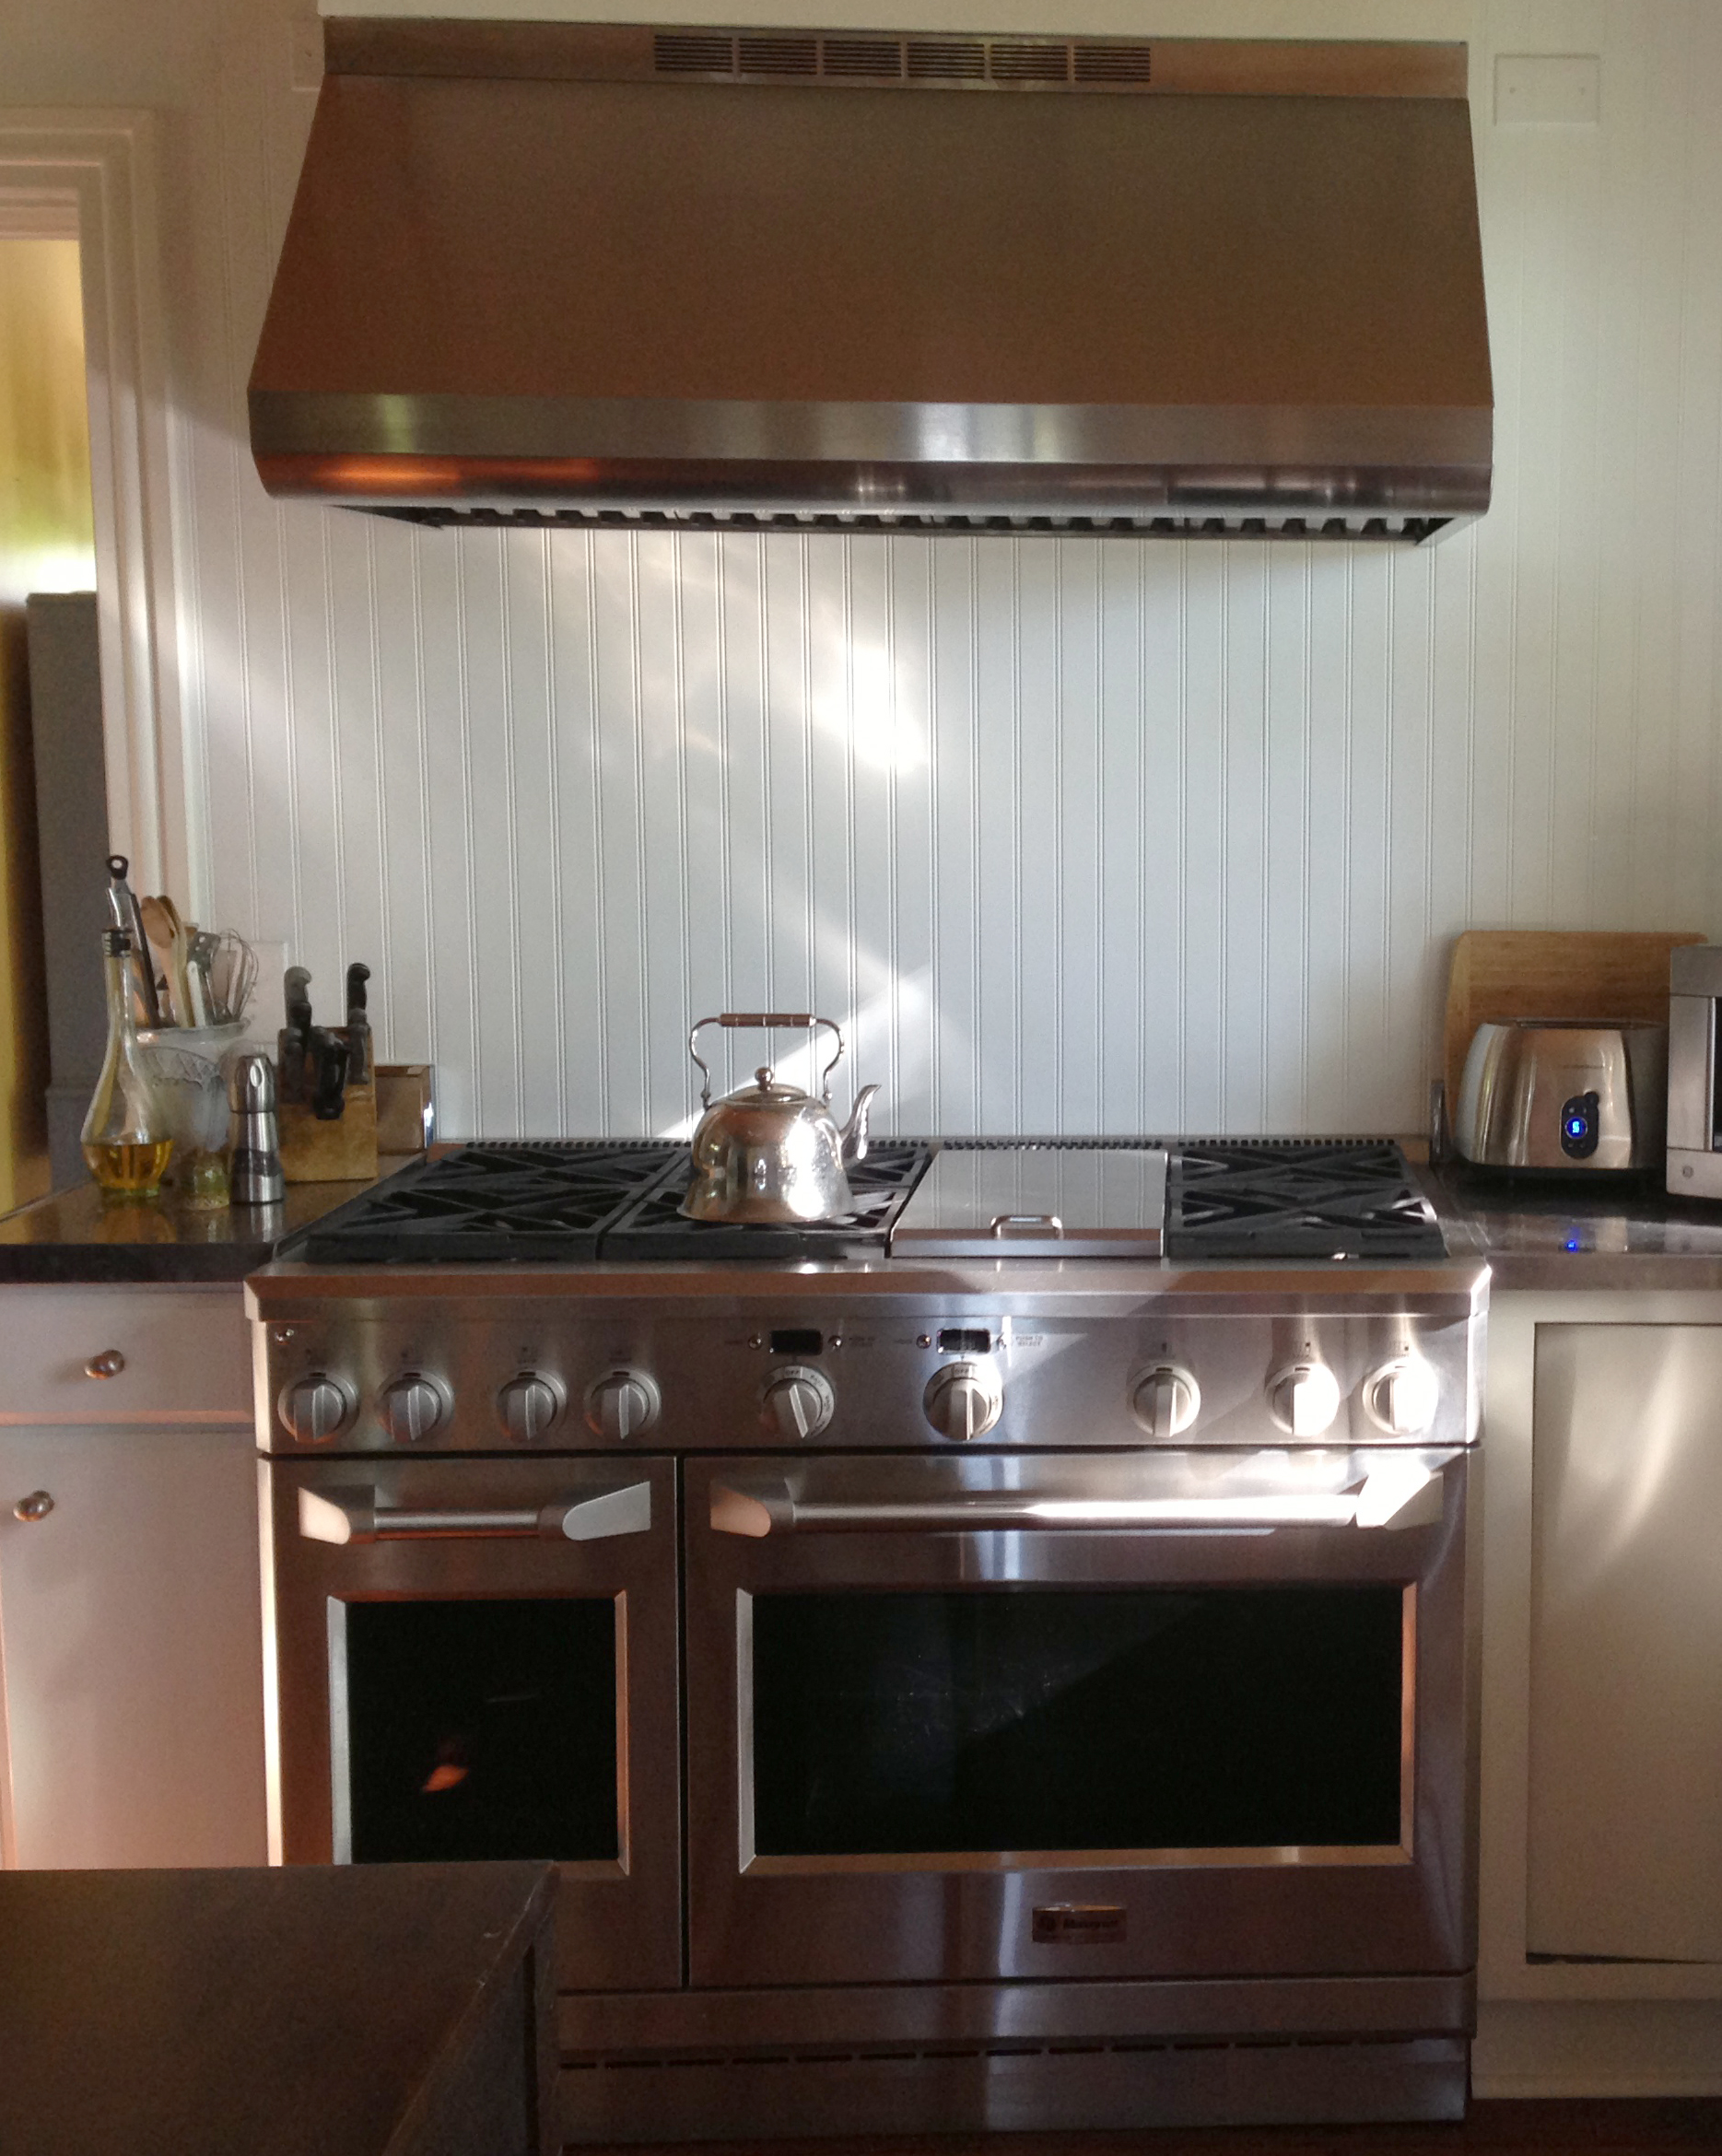
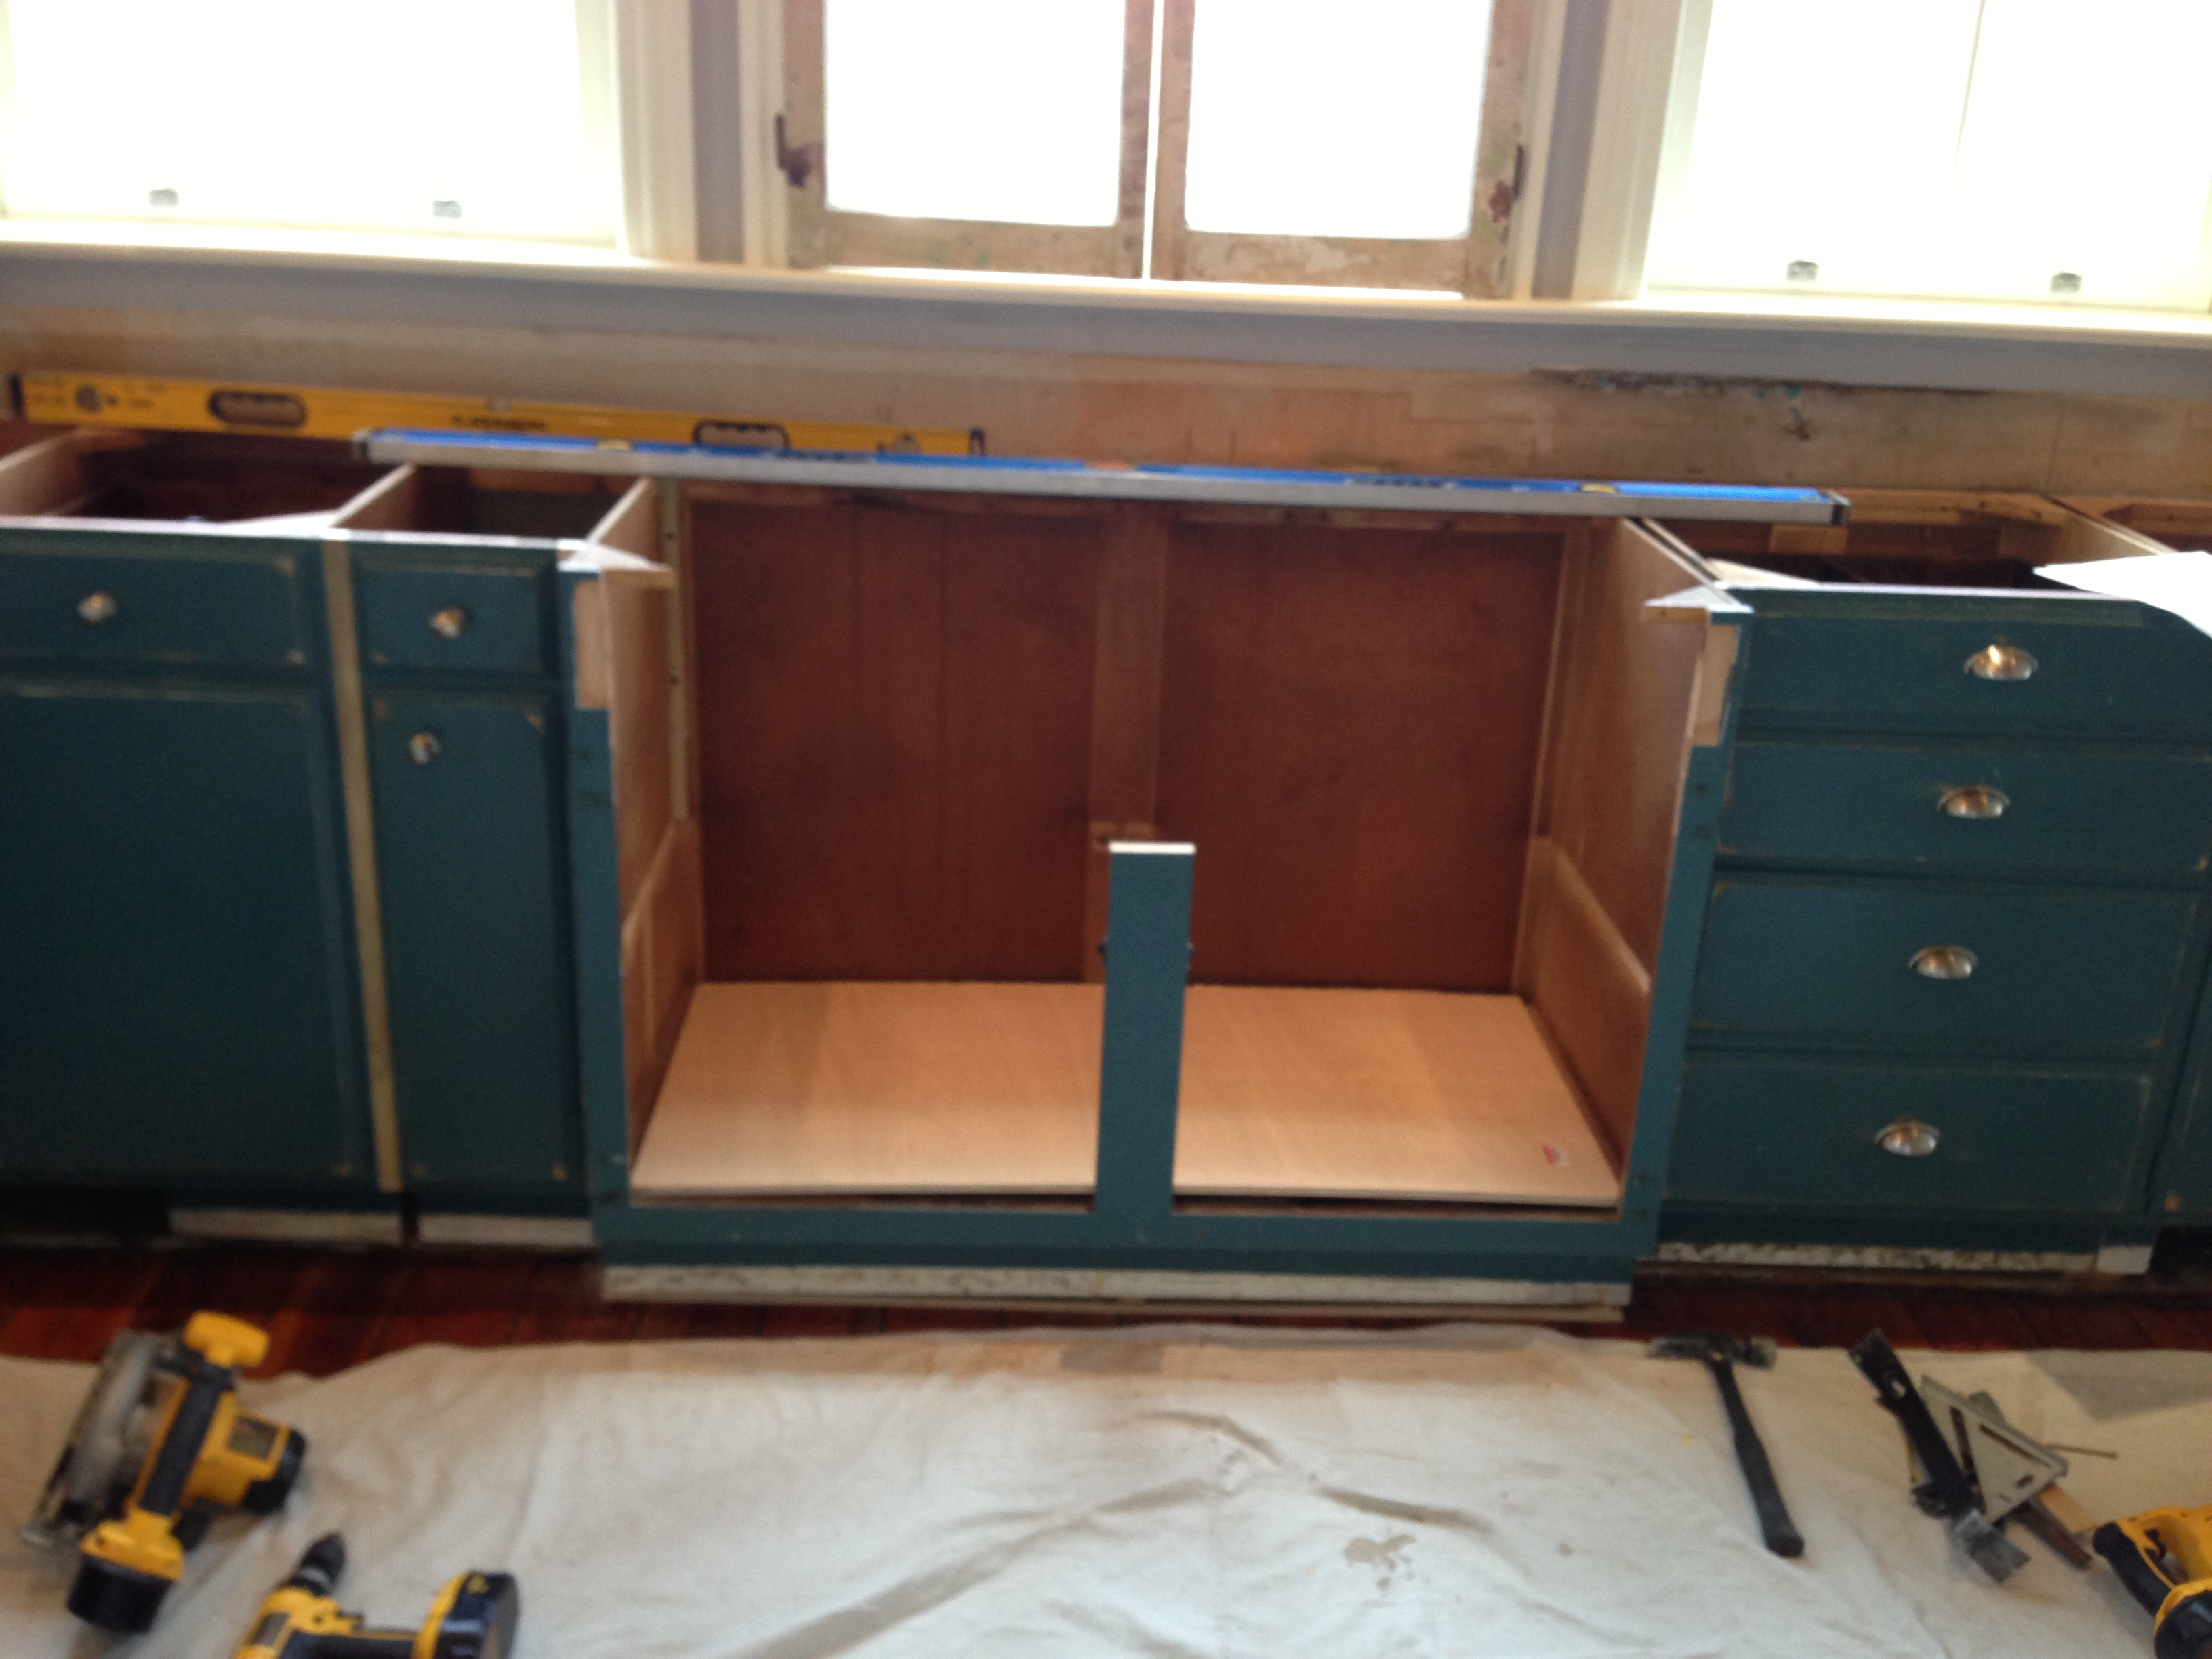
The first thing we decided to do was to replace the at least 40-year-old Thermadore double oven and vintage maytag cooktop. To do this we needed to fill a very large space of 48″ and eliminate a bank of undercabinets, which our genius contractor, Rich Peppiat (267-471-8564), salvaged later. We chose a GE Monogram Professional Range and hood to replace both appliances. We covered the badly damaged wall with white beadboard because it was simple and farmhouse lovely.
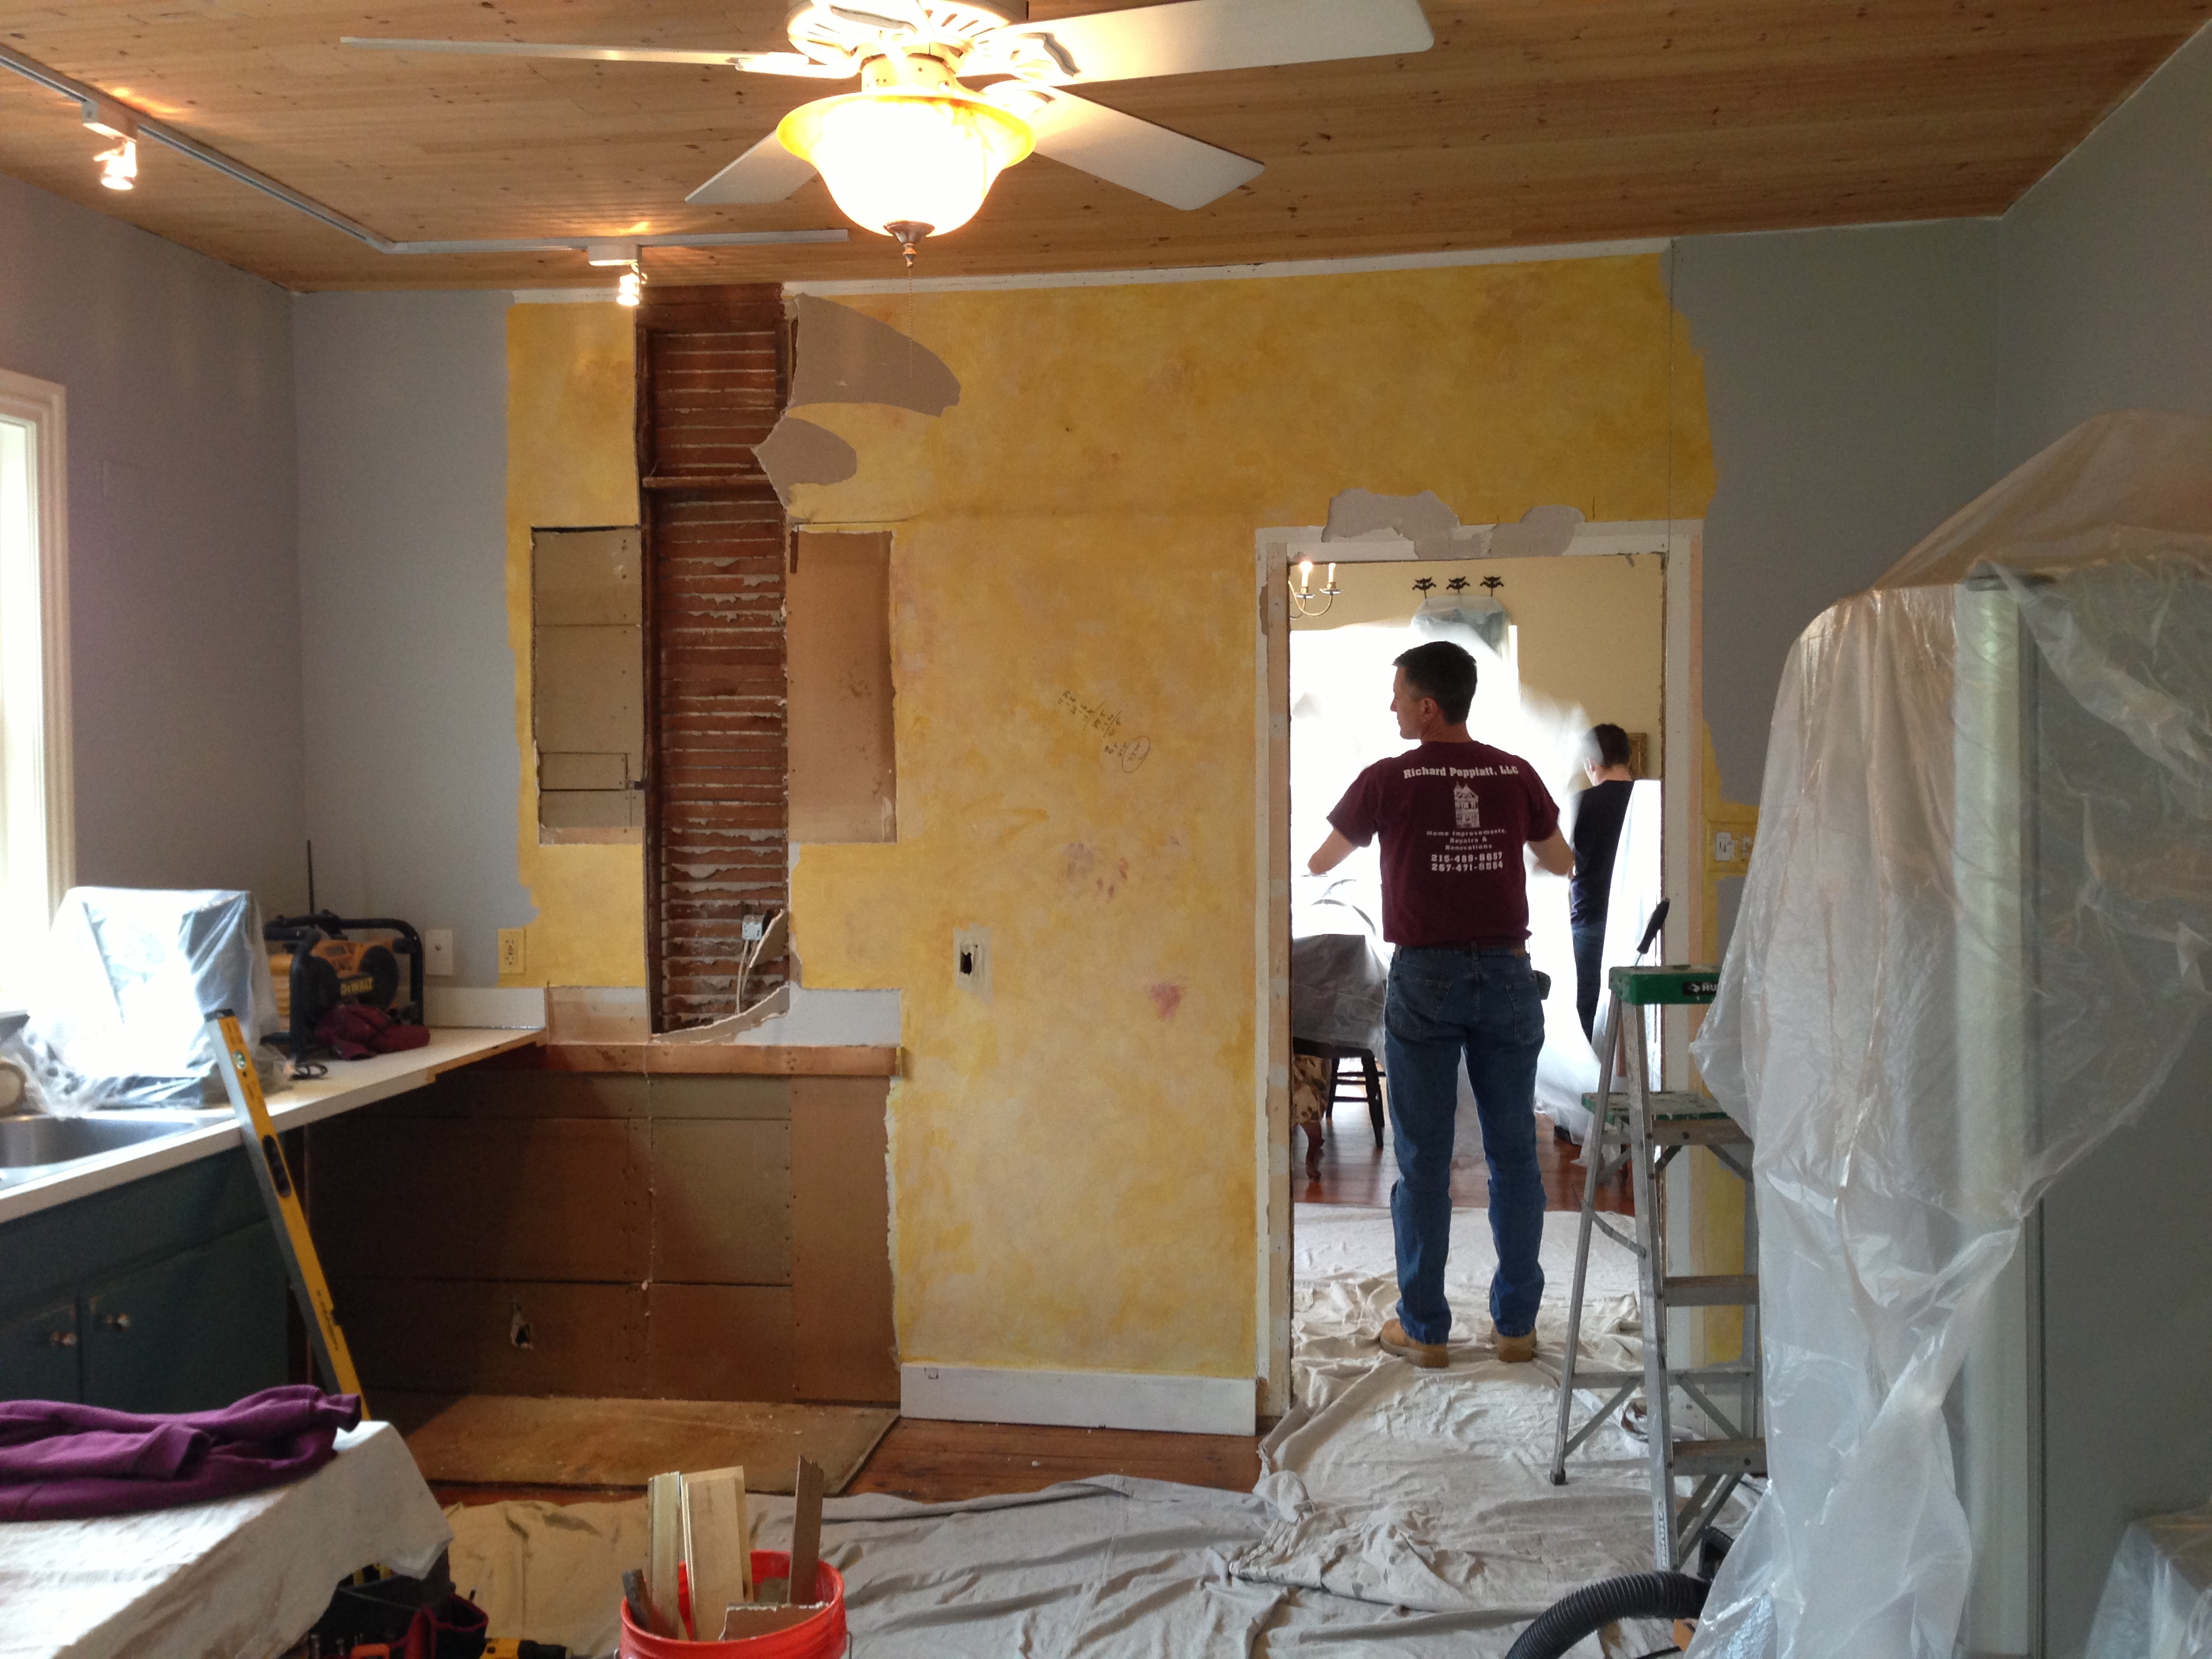
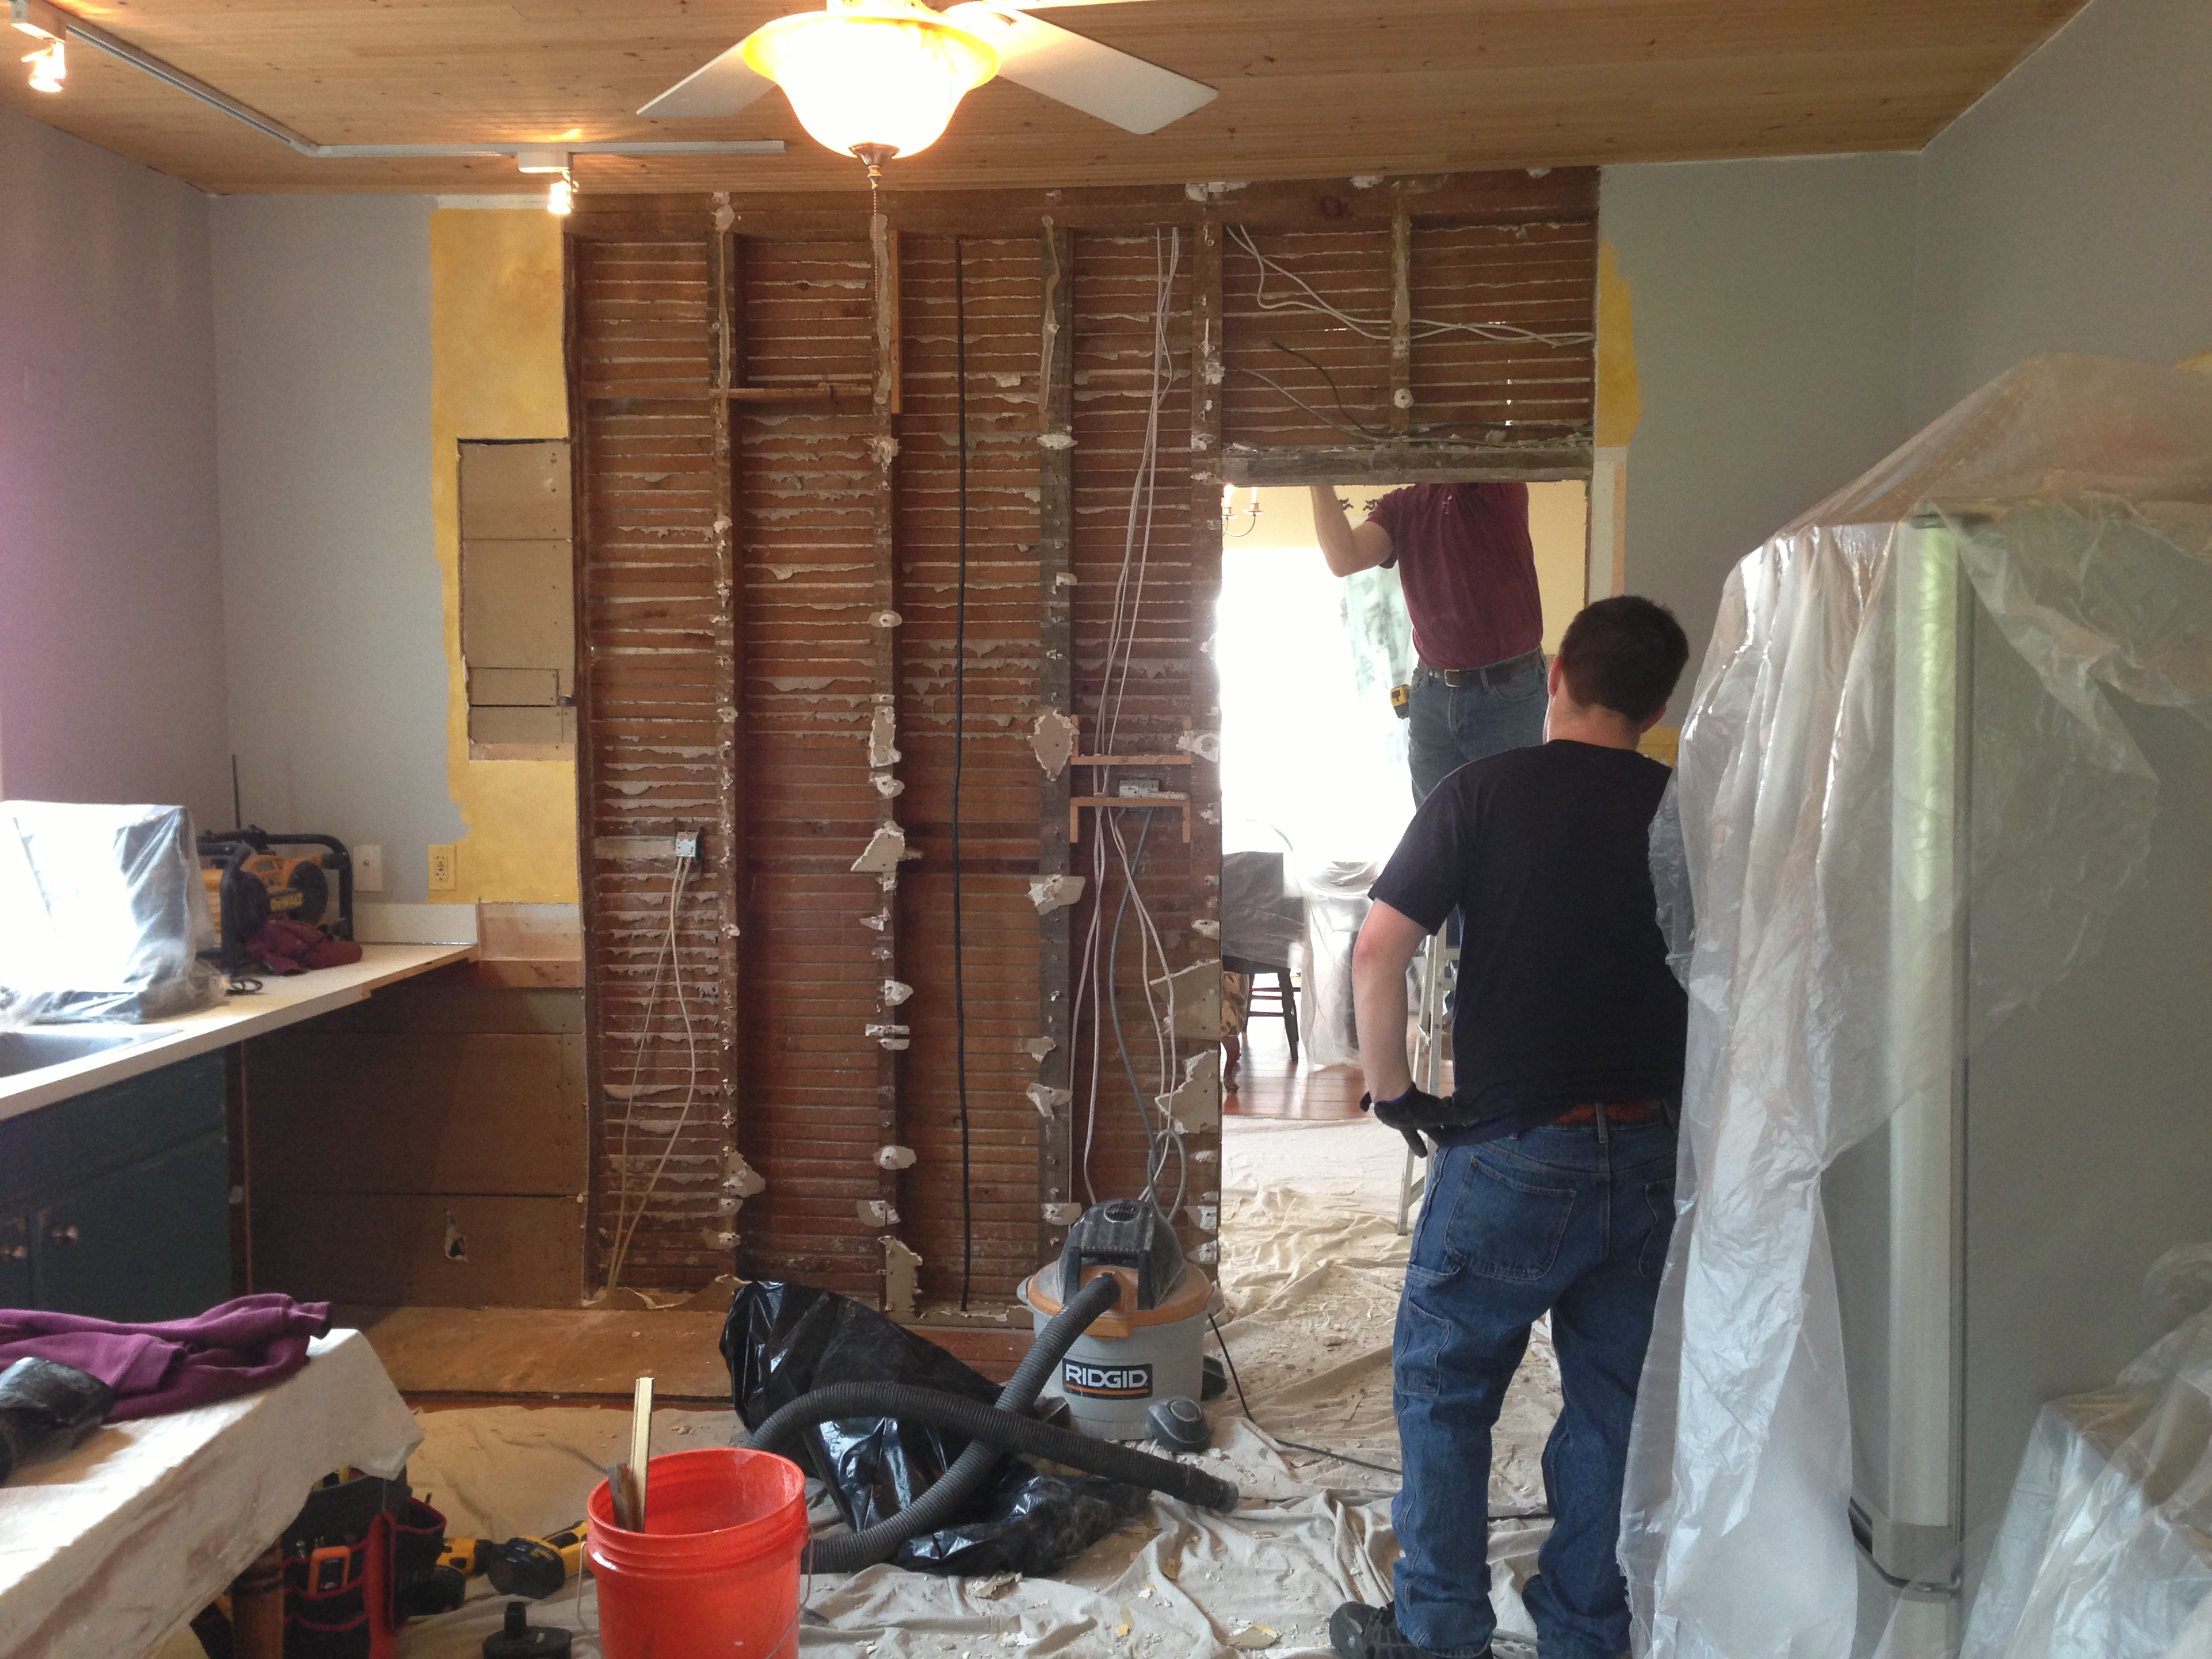
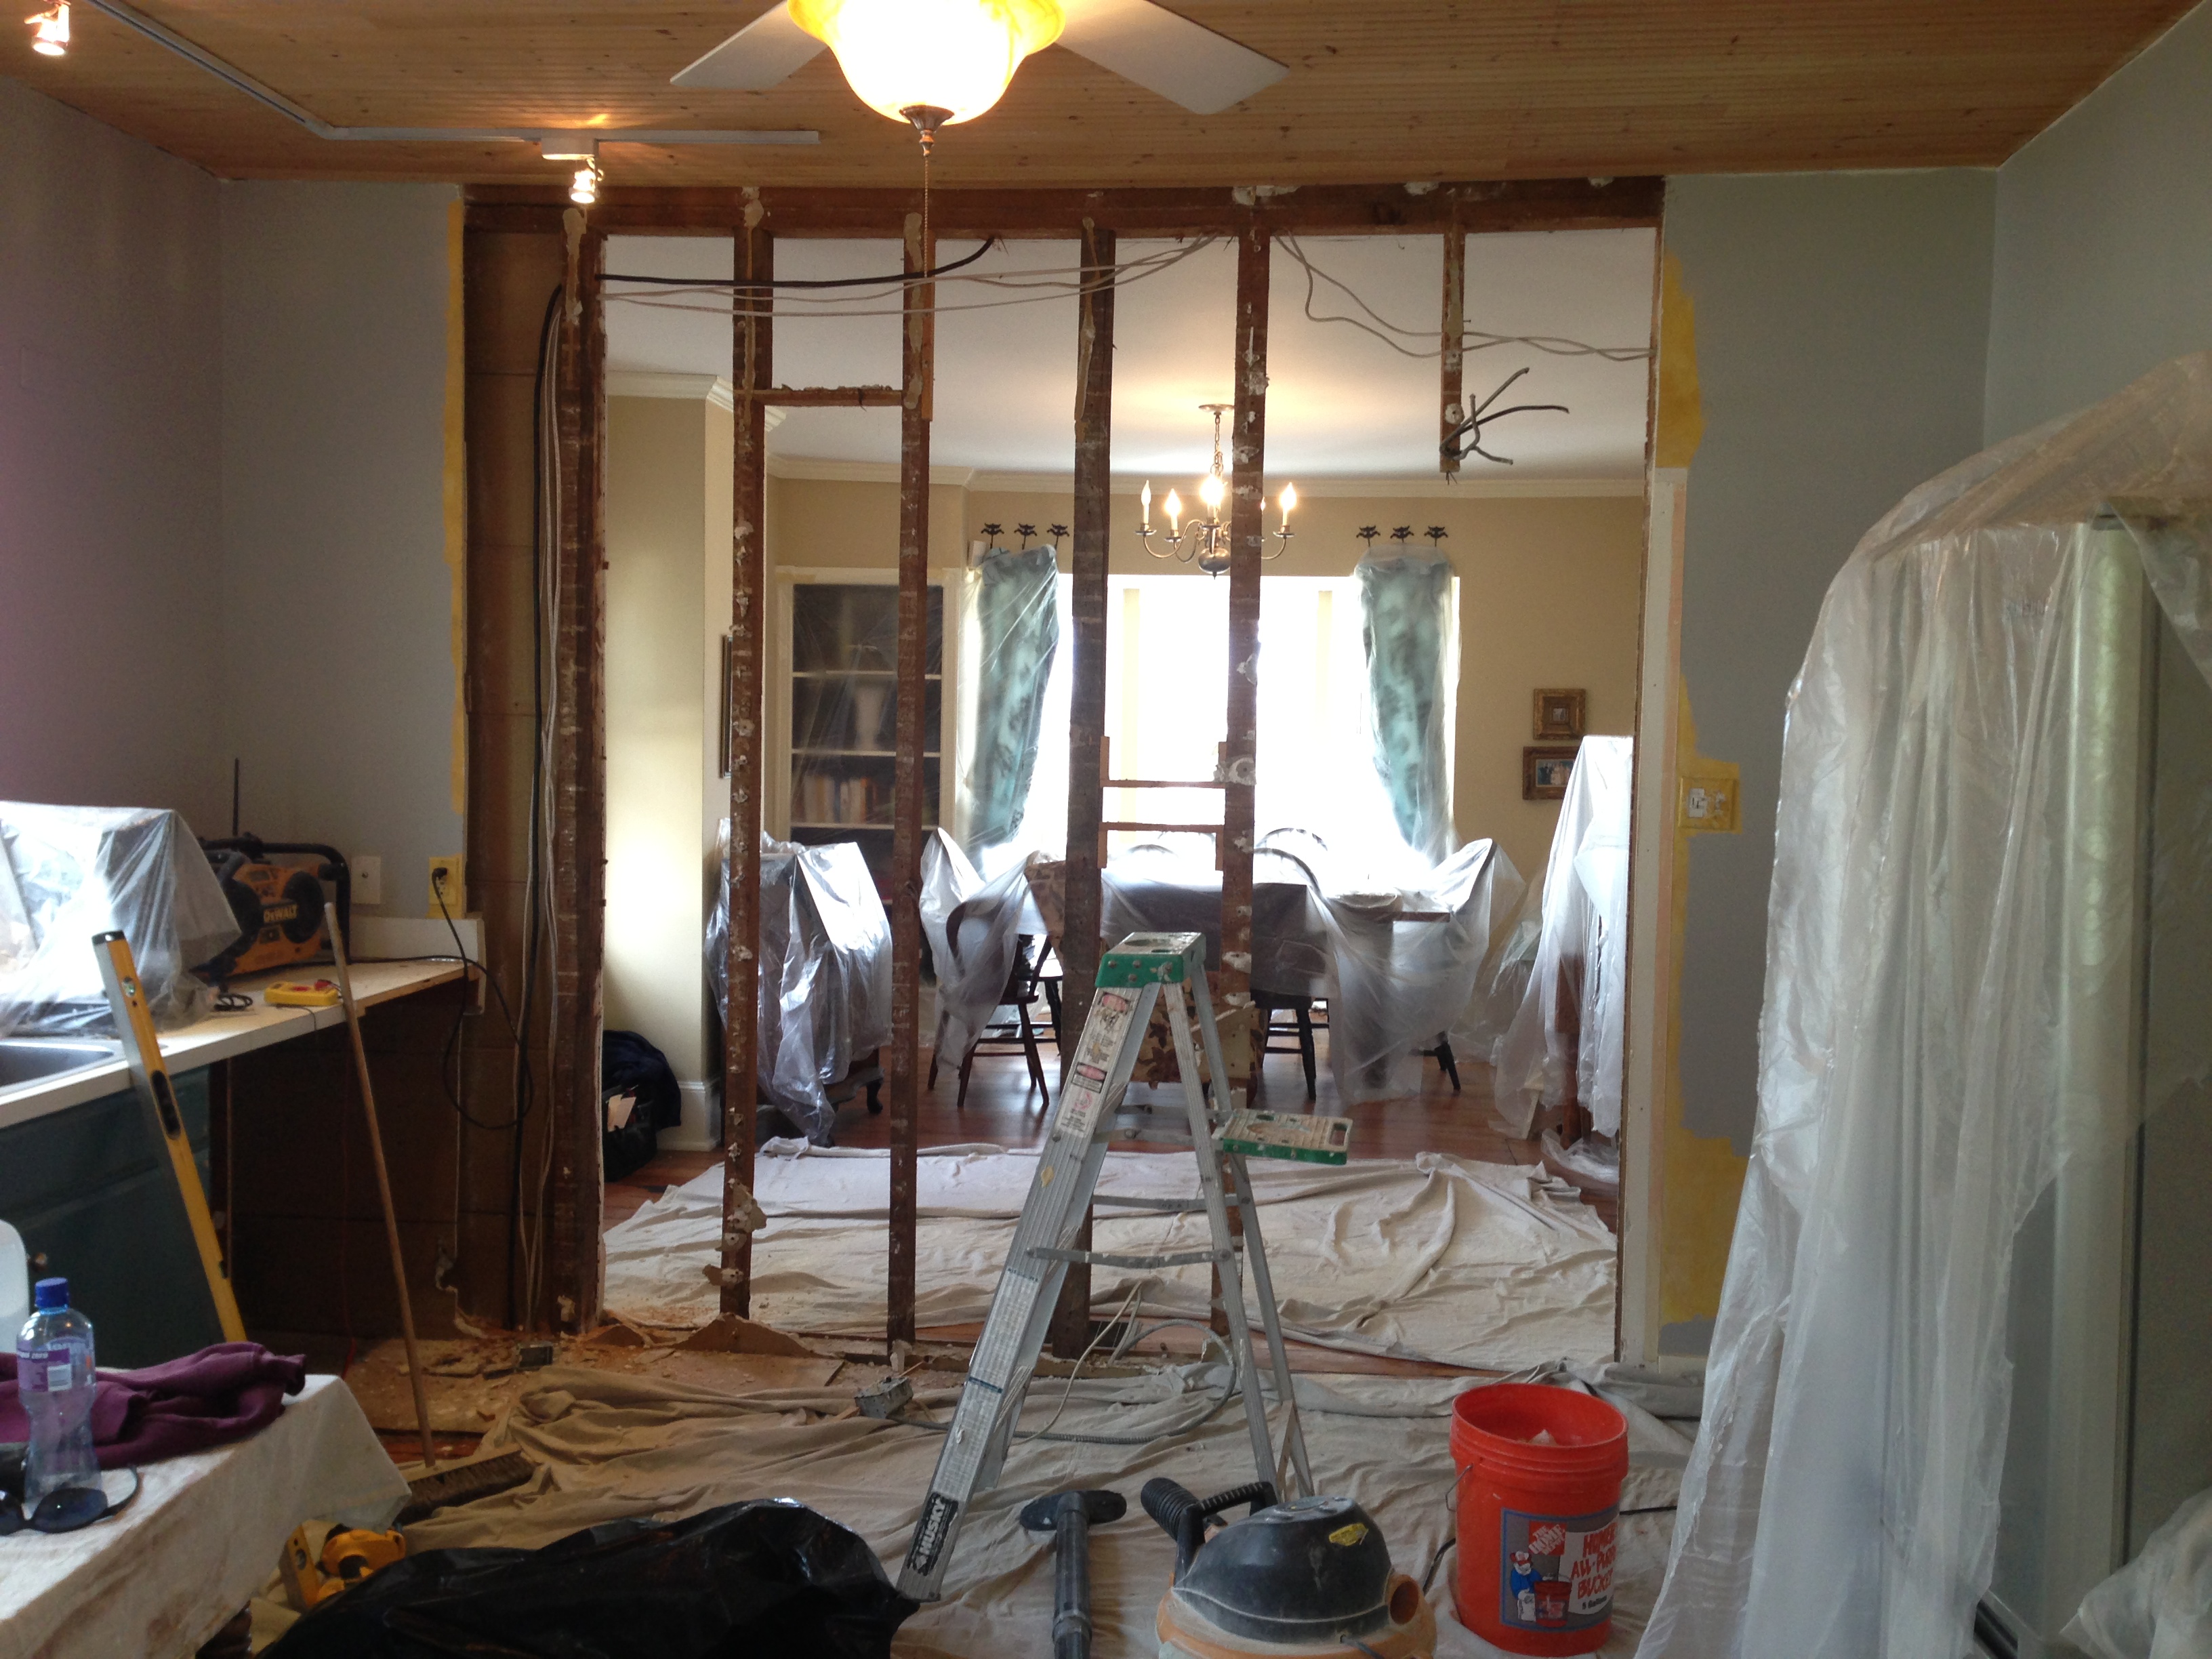
Secondly, we wanted to open up the doorway to our dining room, while being sure not to MODERNIZE this lovely historic home. For that we chose a series of transom windows, with antique latches and closures, and 2 french doors. Rich, built, installed and designed the framework – but first he had to tackle the very difficult tear down with surprises around every corner and between every lath. Rich moved all necessary electrical outlets, heating vents and plumbing fixtures without the help of other sub contractors. This was a huge time and hassle savings.
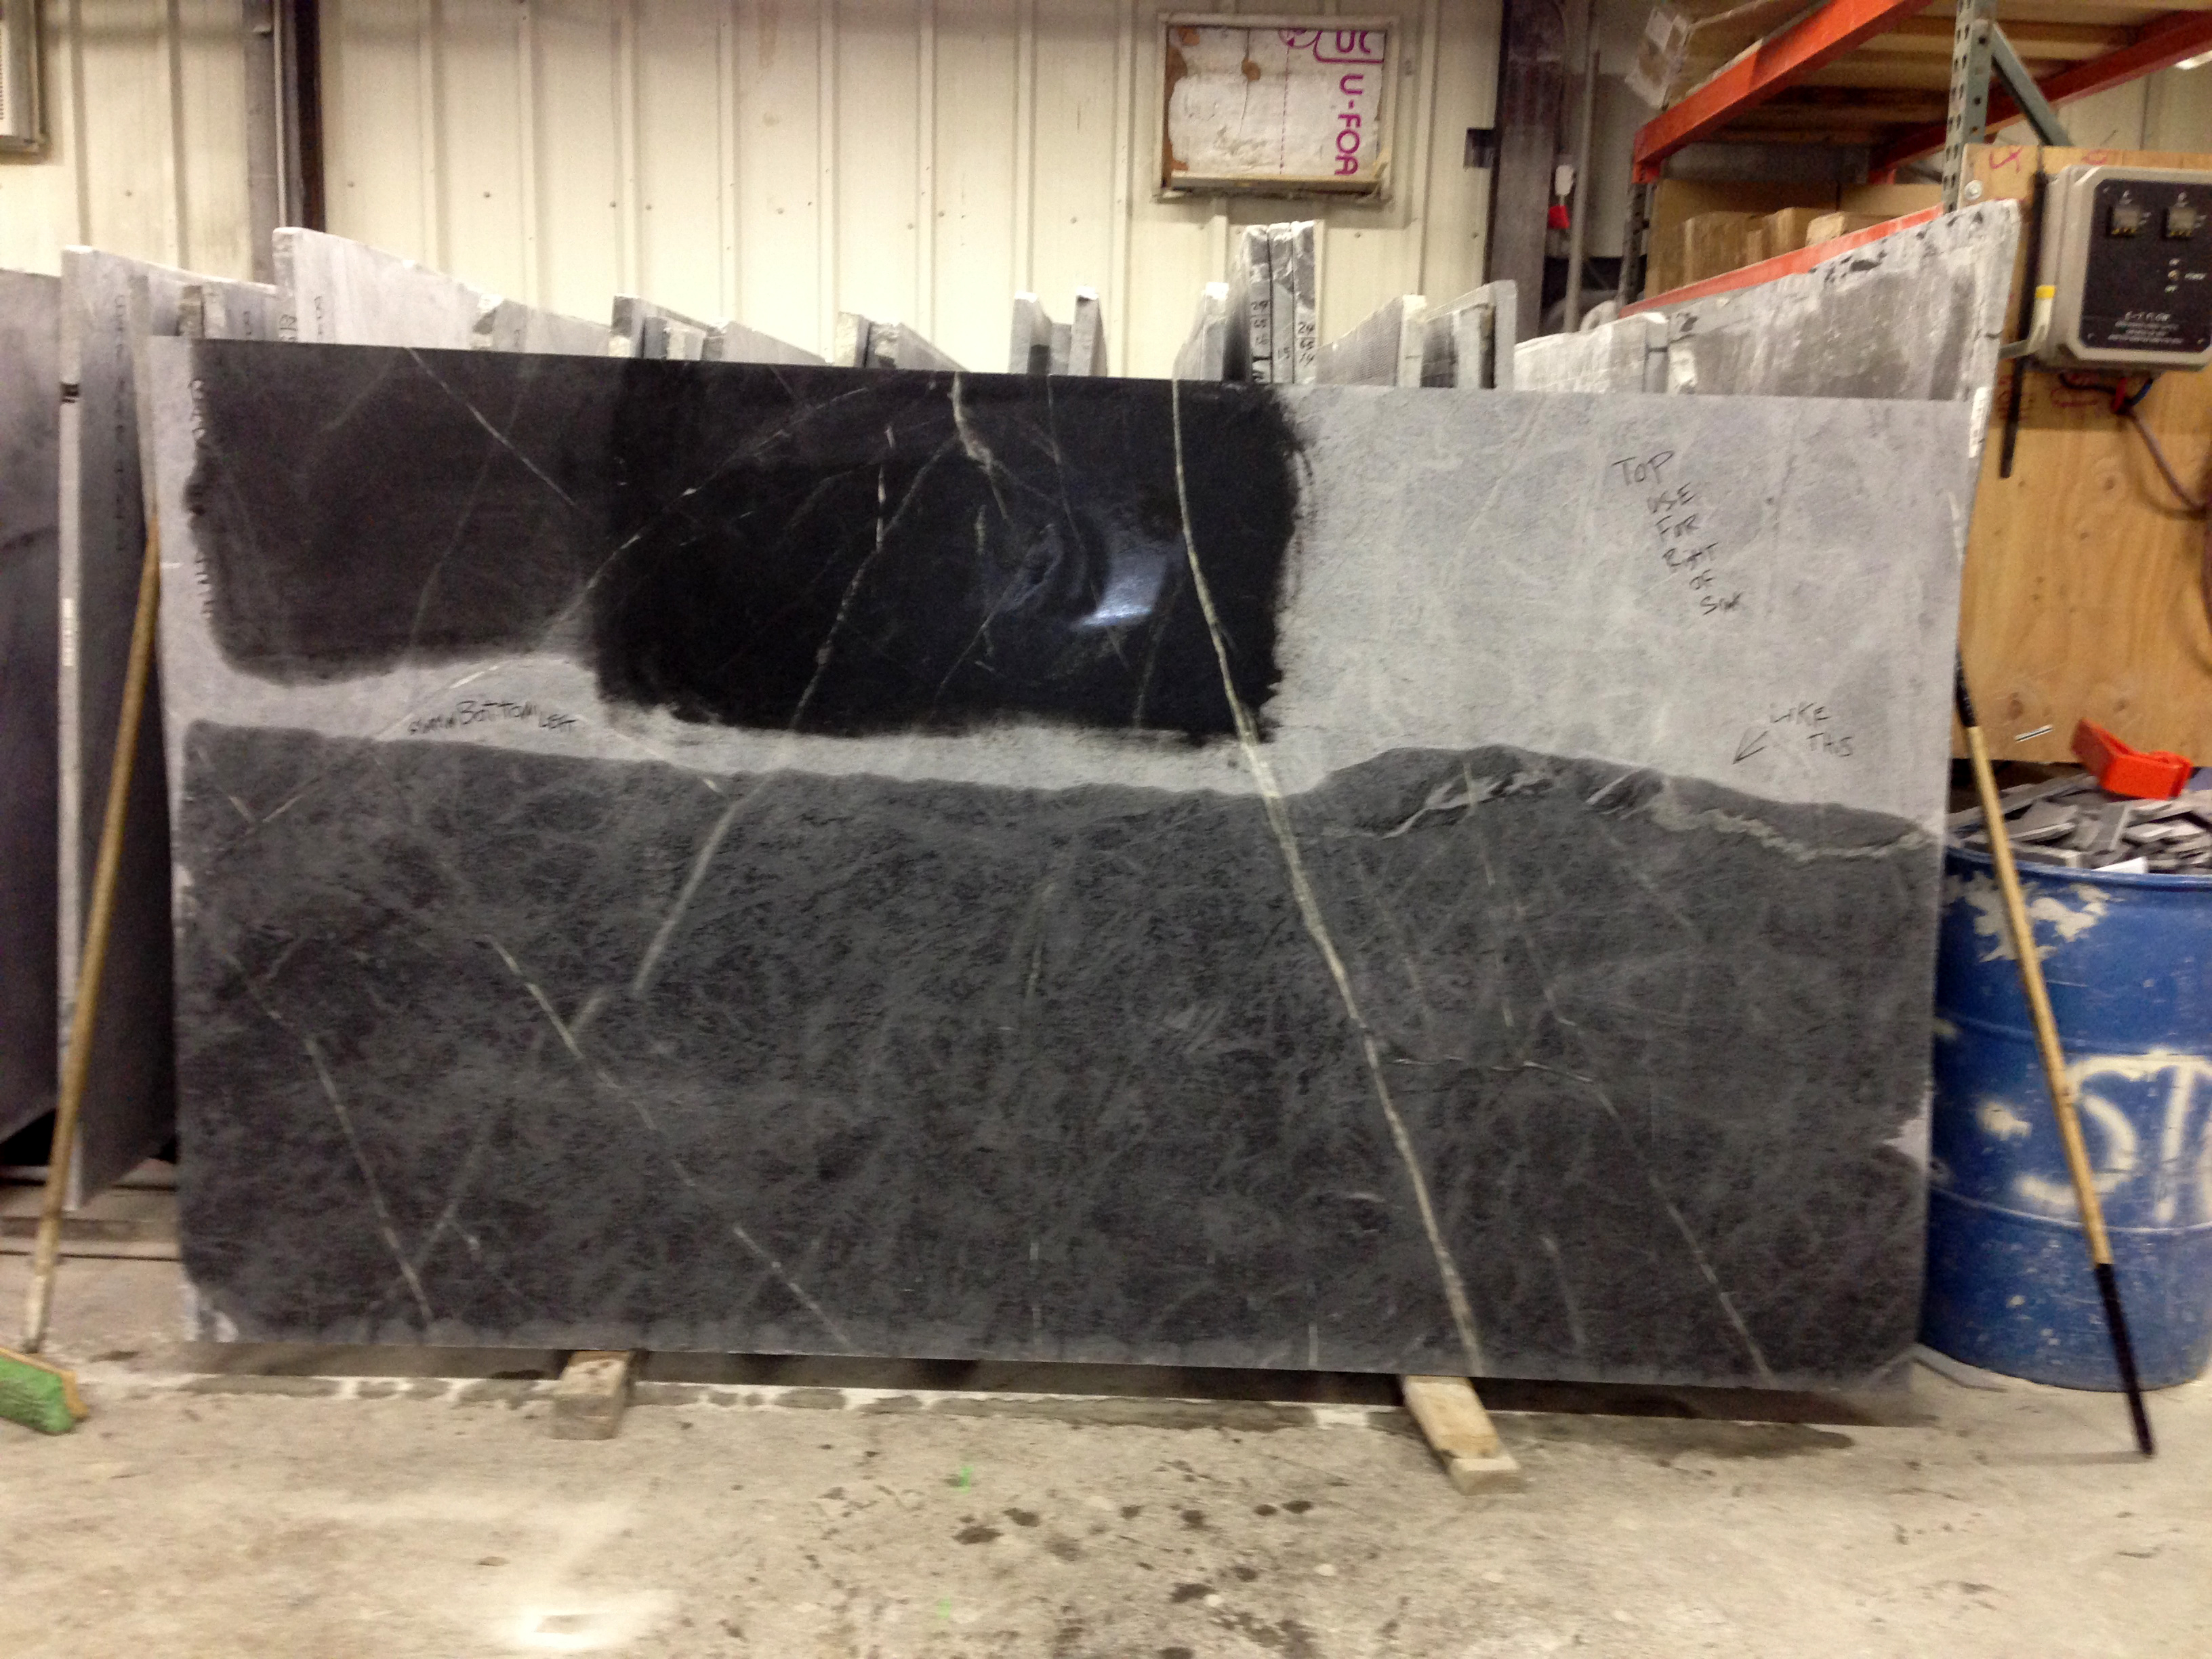
The third major part of the renovation included “salvaging or upcycling” all the undercabinets around the room, but changing their configuration to better accommodate our needs. We relocated the position of our sink to center on our bank of 3 beautiful windows overlooking the barn, and elevated to a stainless farm sink and cool faucet, with a soapstone countertop from Bucks County Soapstone.
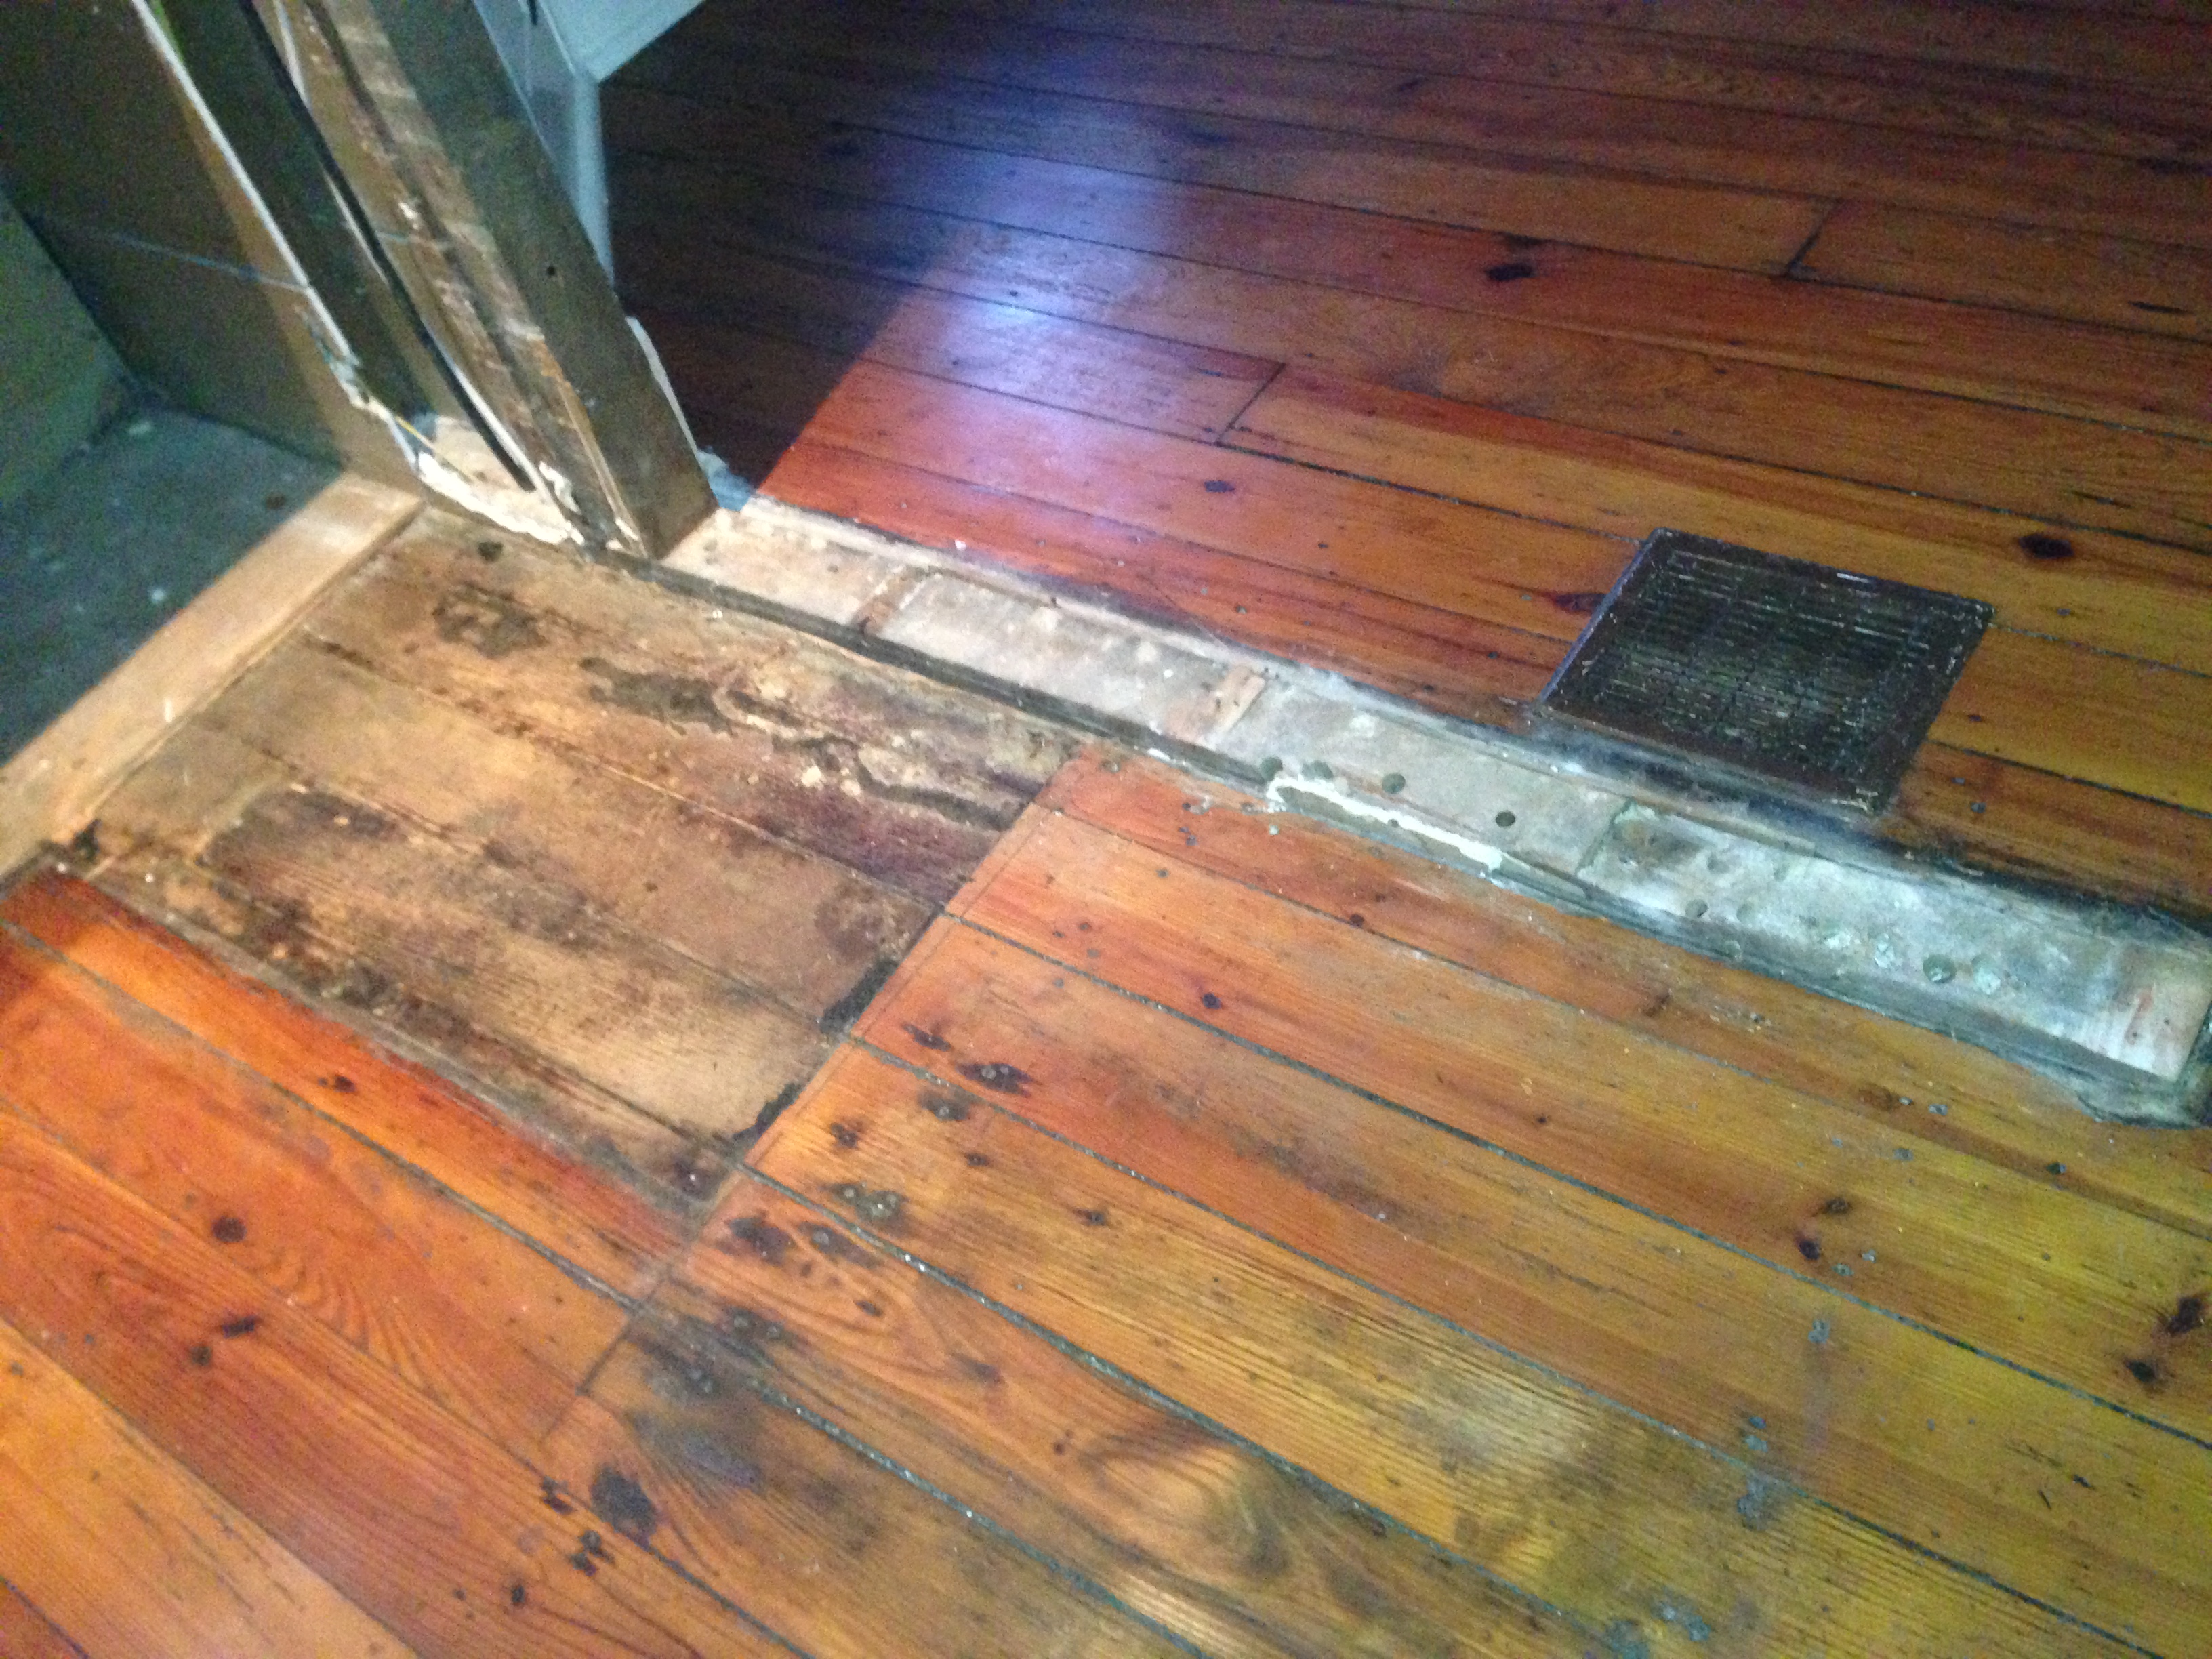
There are so many unique little details to be observed which made this renovation interesting. For instance, Rich tracked down a custom supplier of antique pumpkin pine floorboards so he could delicately replace some damaged or missing along the line of the dining room wall.
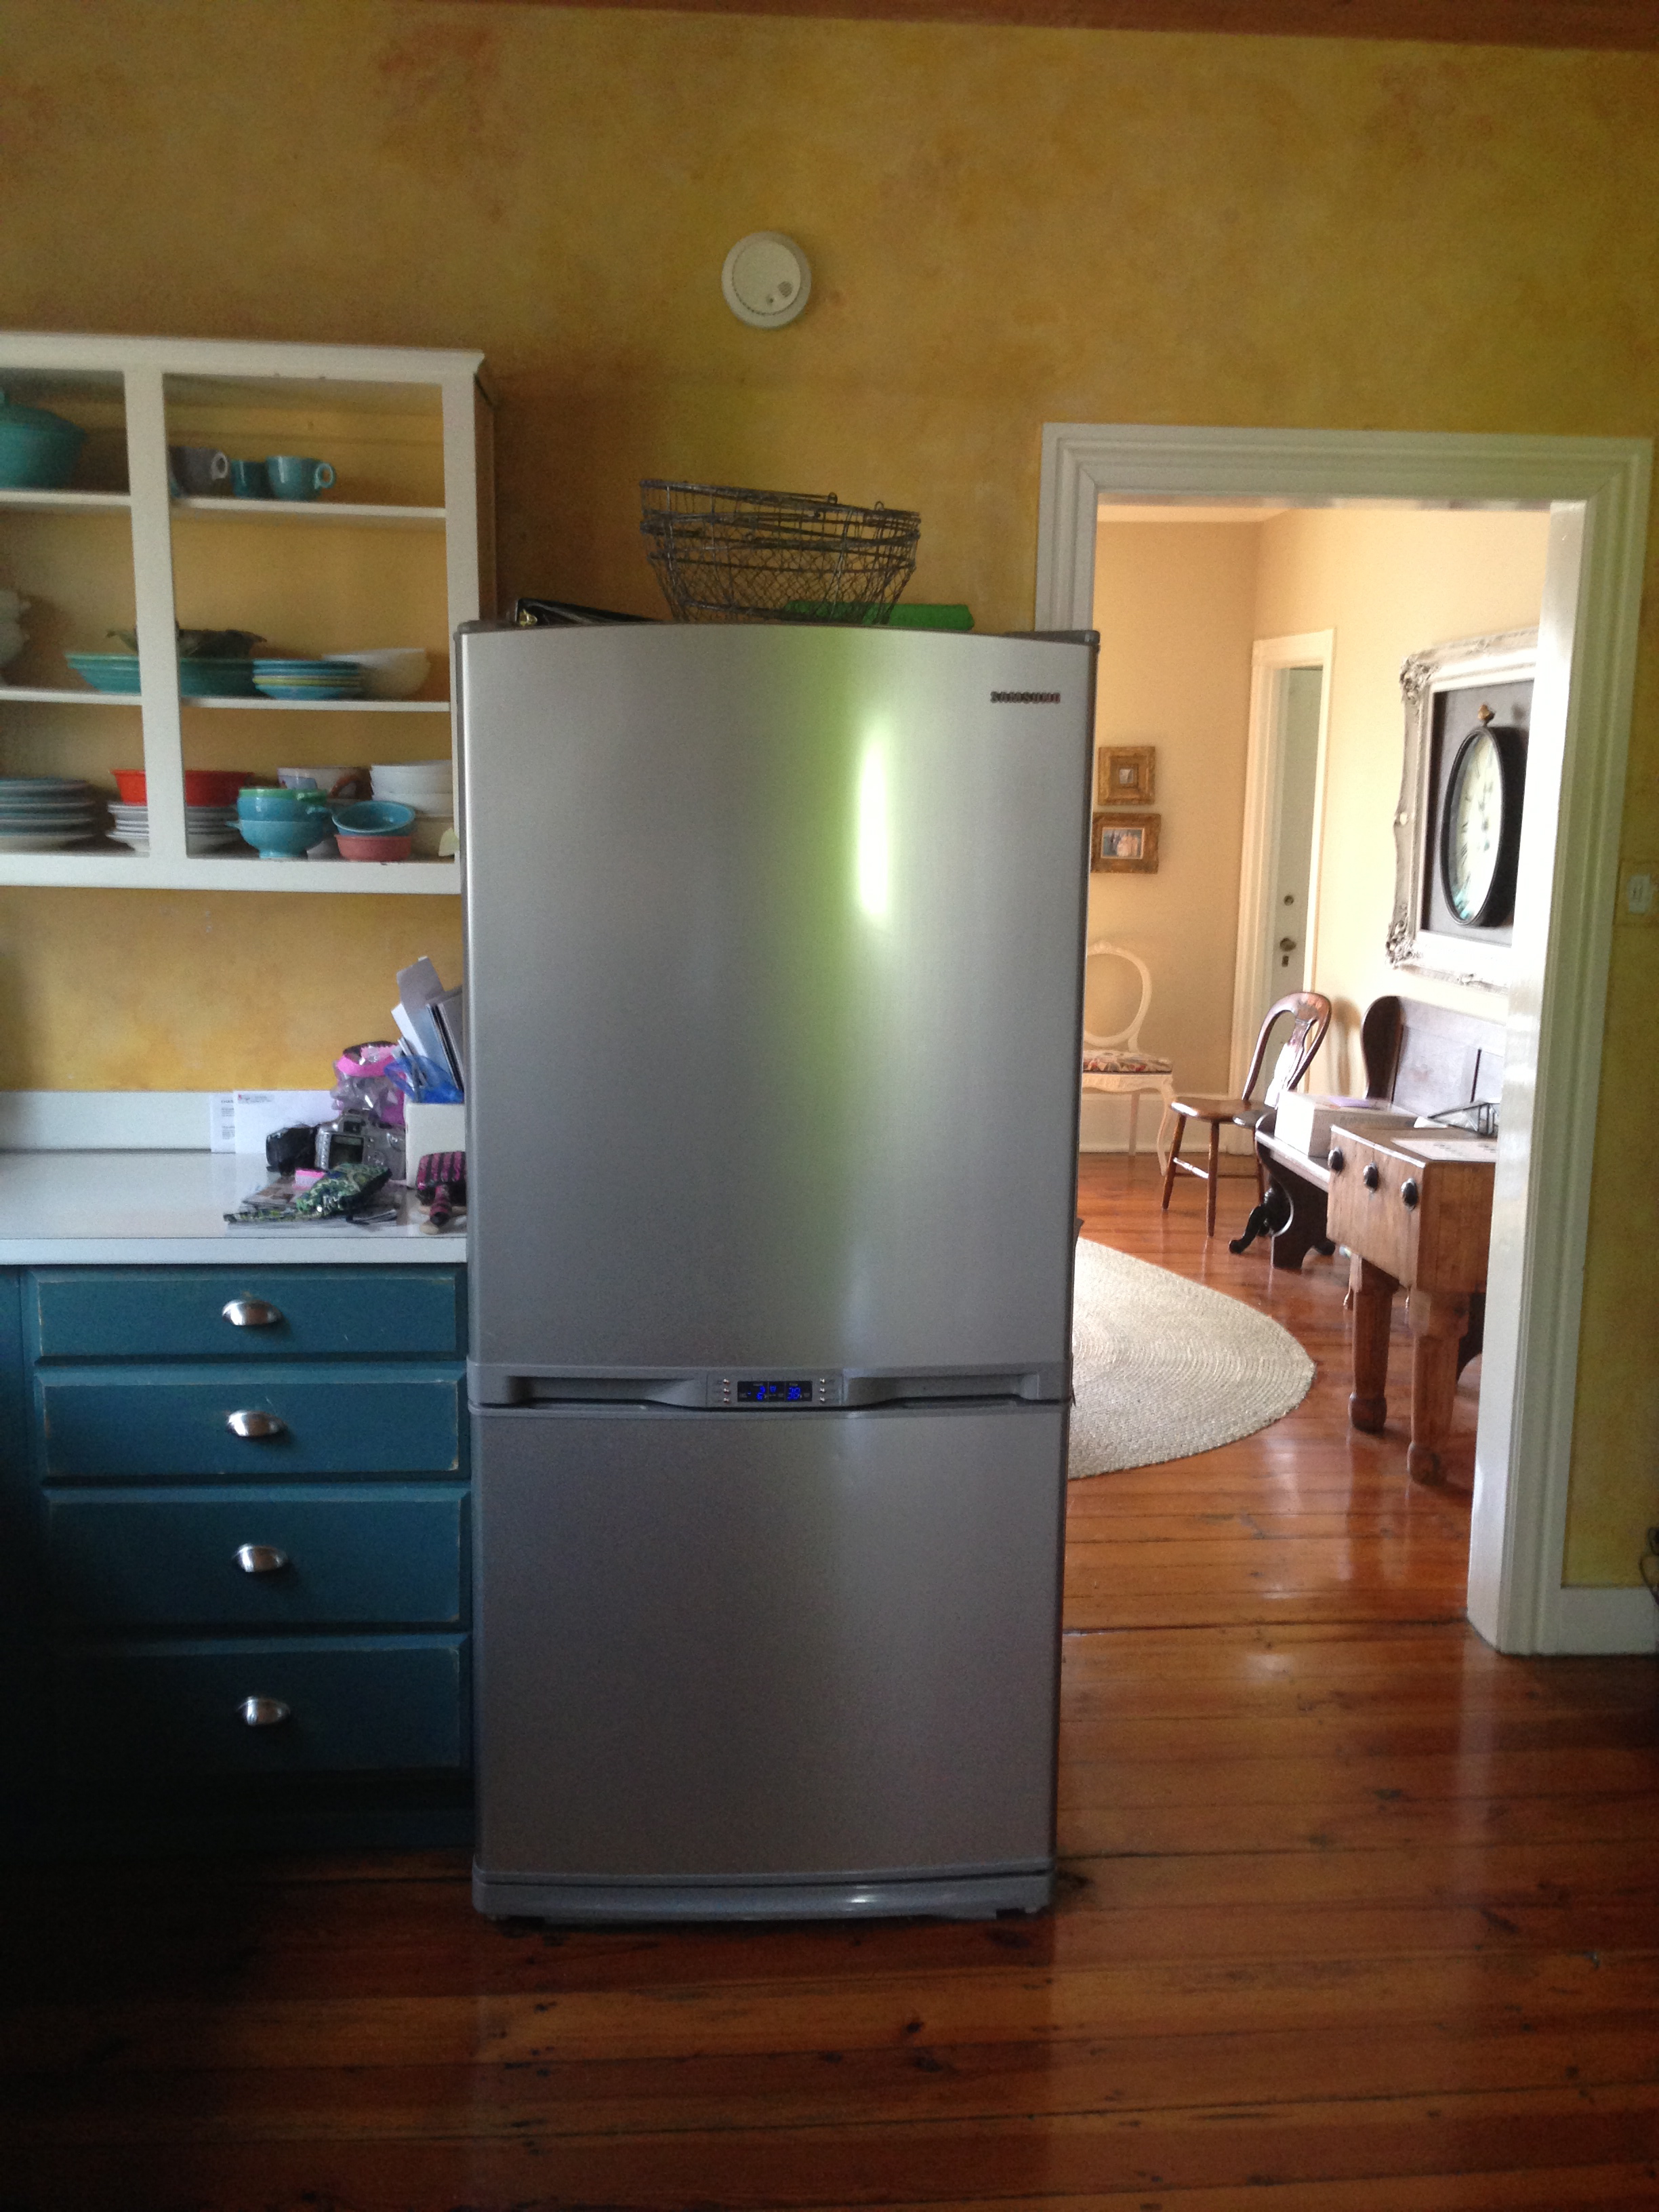
And one day we found an outer window on an inner wall. I stayed up all night trying to figure out how we could expose it because it lead into the pantry next to the kitchen. Sadly I had to abandon the thought, as there was nowhere else to position the refrigerator. It was a low moment for me, but I bounced right back.
Still keeping in mind that I wanted this kitchen to barely resemble a kitchen, I called Doylestown Glass and had them order a sizable “antiqued mirror” to fit a vintage wood frame I already had. We placed this above the butler sink as an unexpected turn. I also really wanted some sort of an island, but I really didn’t want to buy one like everyone else, so while expertly thrifting with my sister-in-law, I stumbled upon a gorgeous antique buffet. The next day when I called it was clearancing for only $200. There was my island. I brought it home, polyurethaned the top 3x, and now it’s “3-kid ready” for action!
Now please enjoy the after photos. If you would like help refurbishing furniture or are stuck and need ideas for your own home, please do not hesitate to contact Kim at Heirloom. www.heirloom-occasions.com, or 215-859-2202.
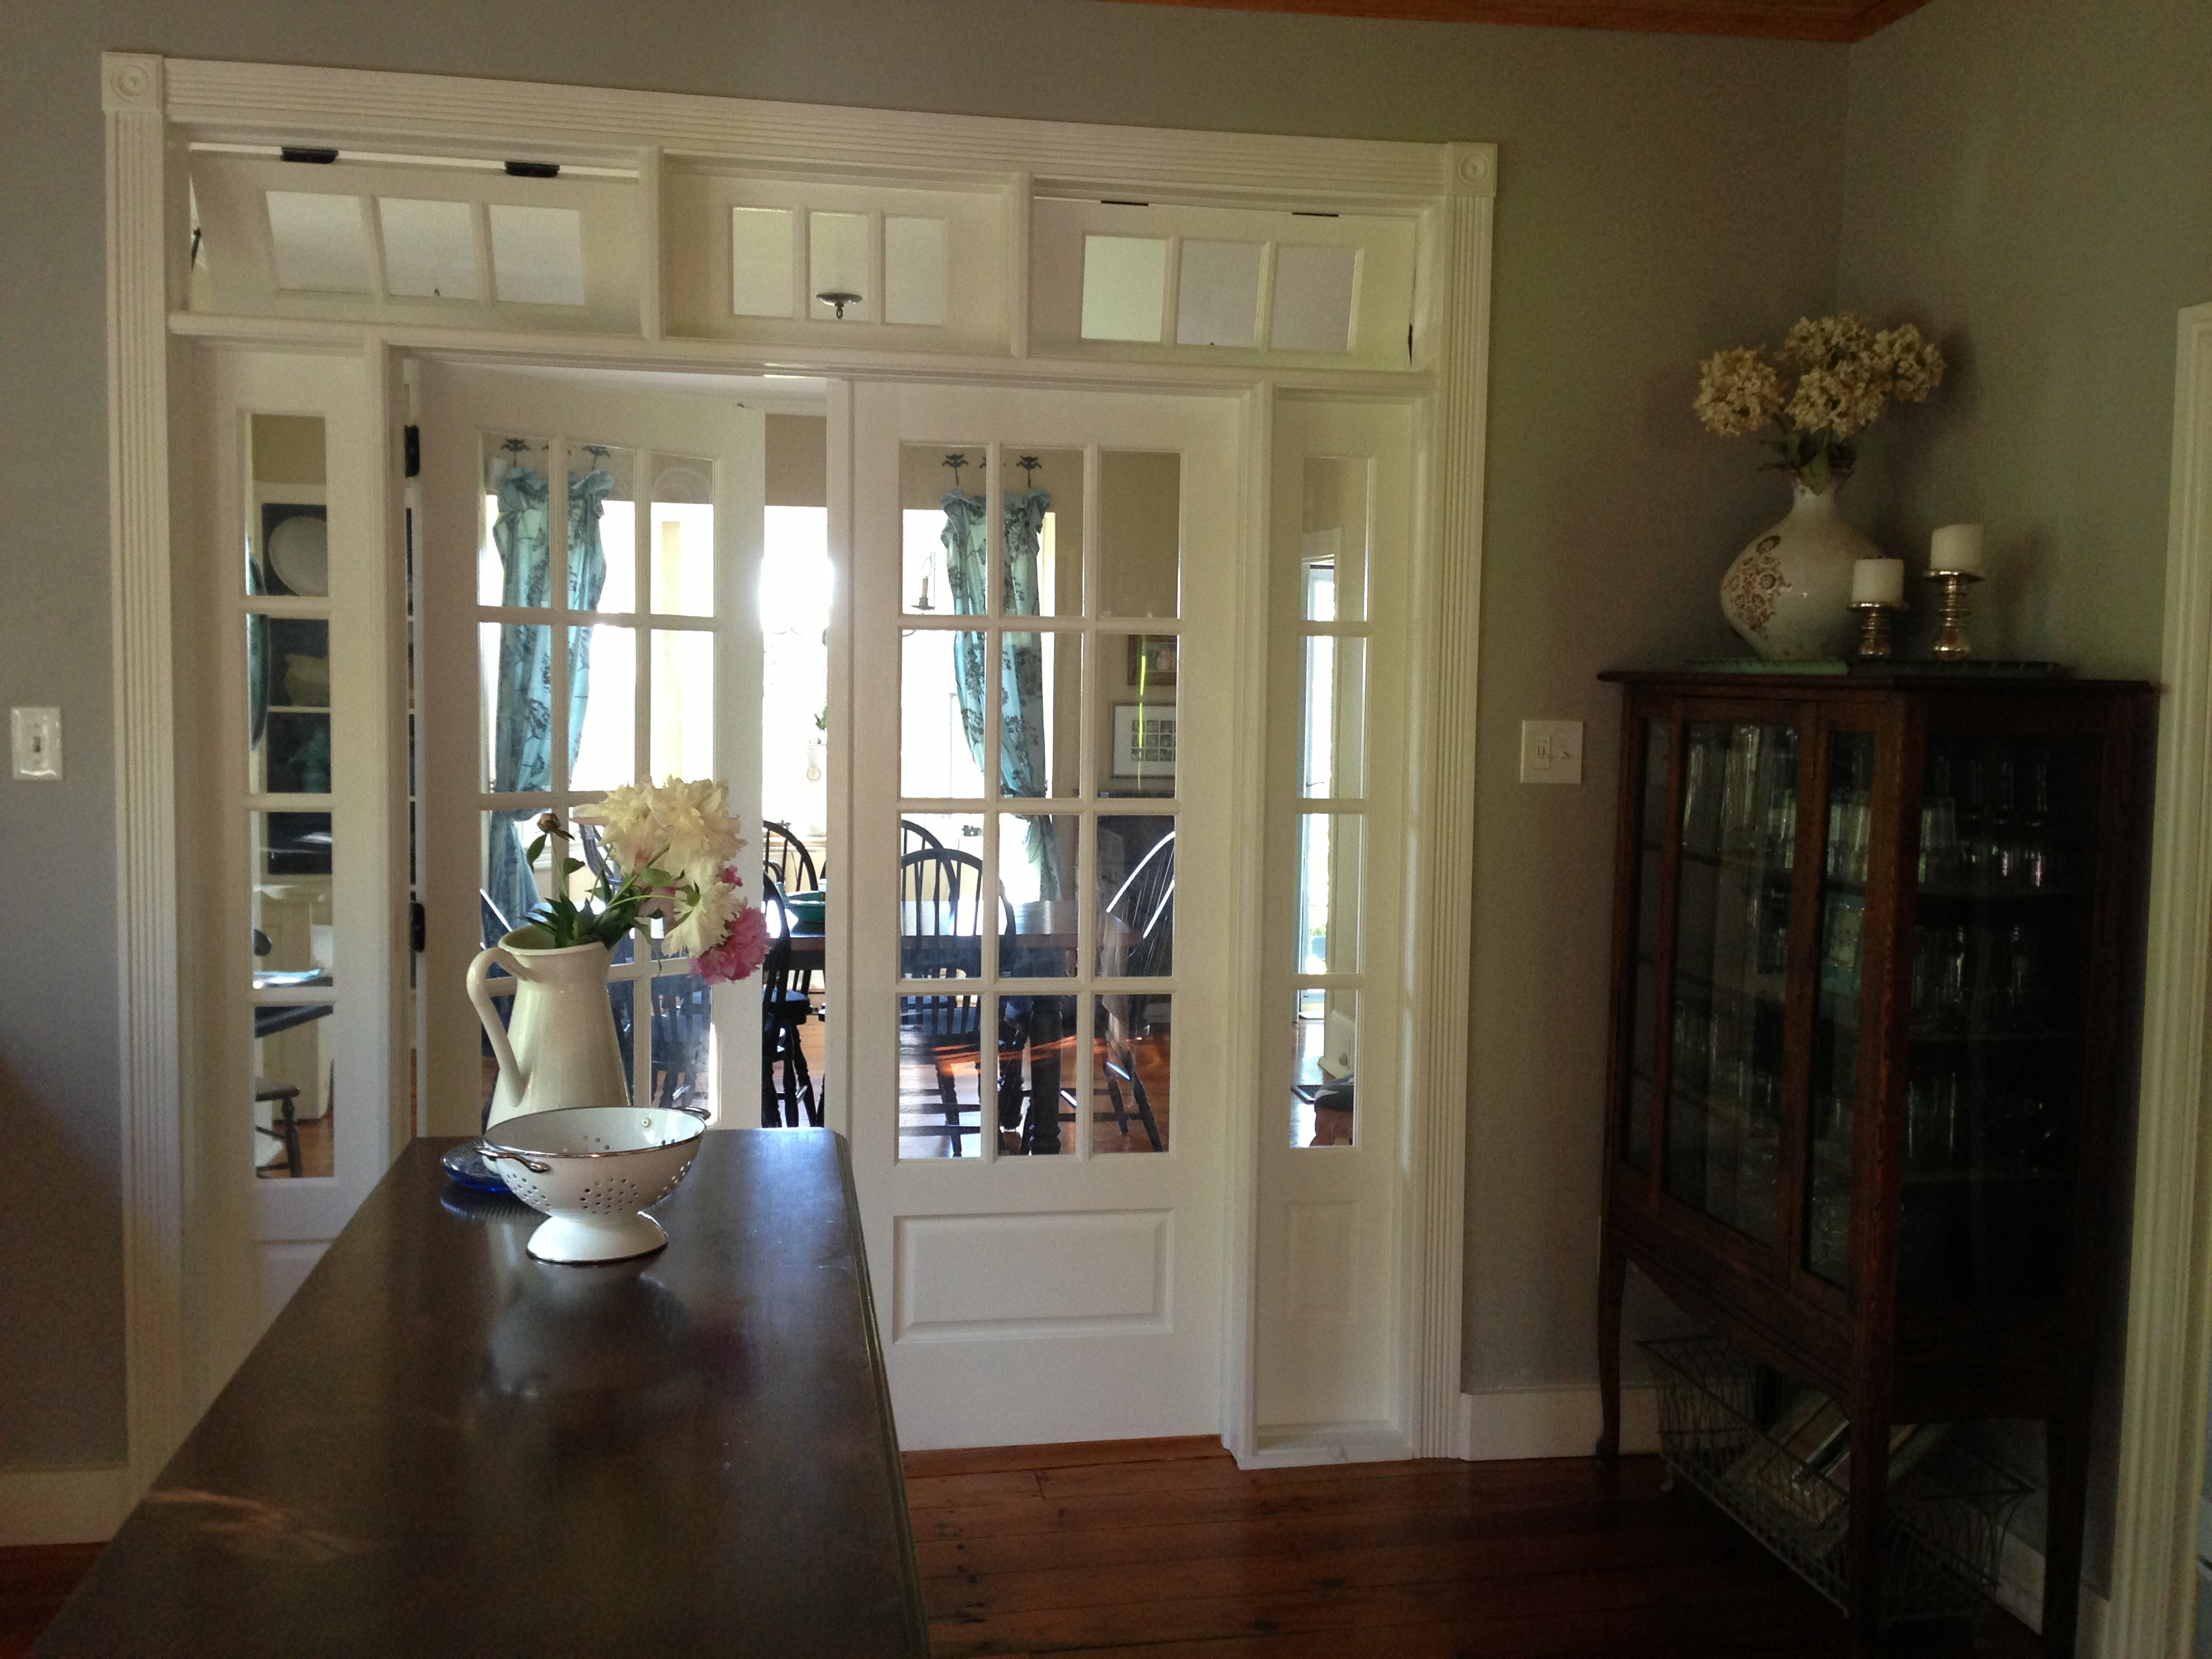 New doorway with transoms for air circulation. New wall color is Benjamin Moore’s Smoky Embers.
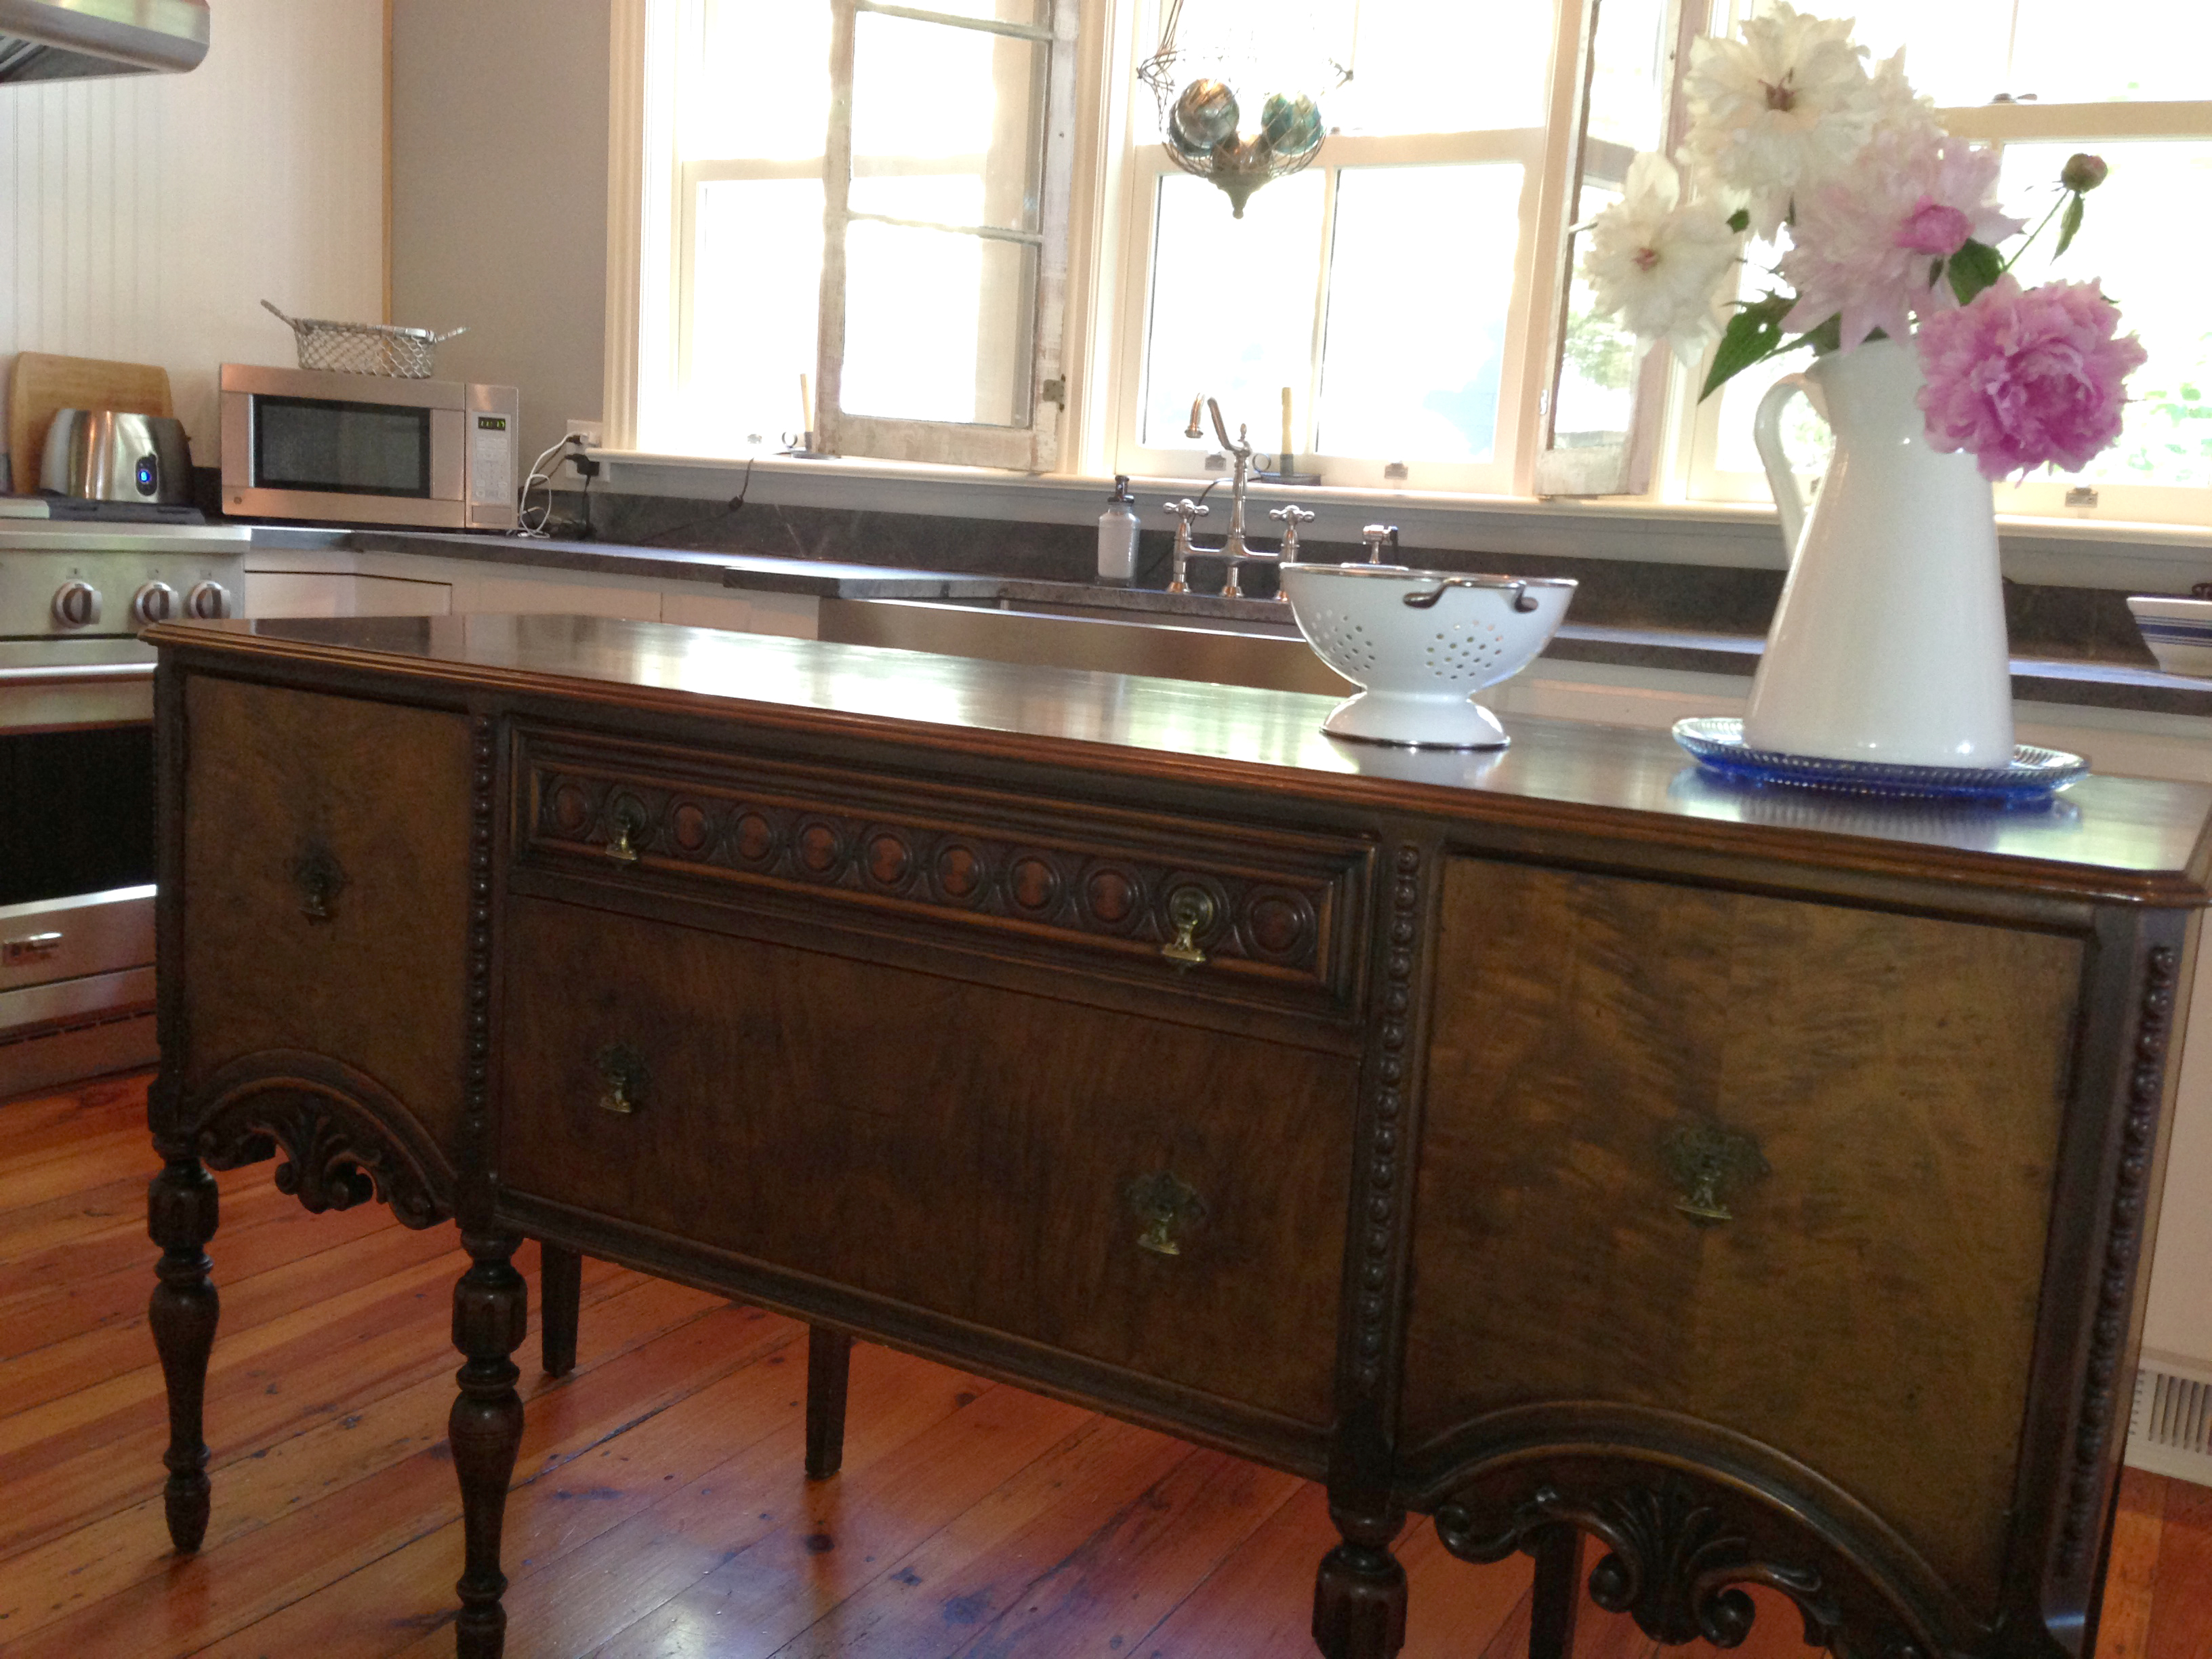 $200 island work surface purchased at Care and Share in Souderton.
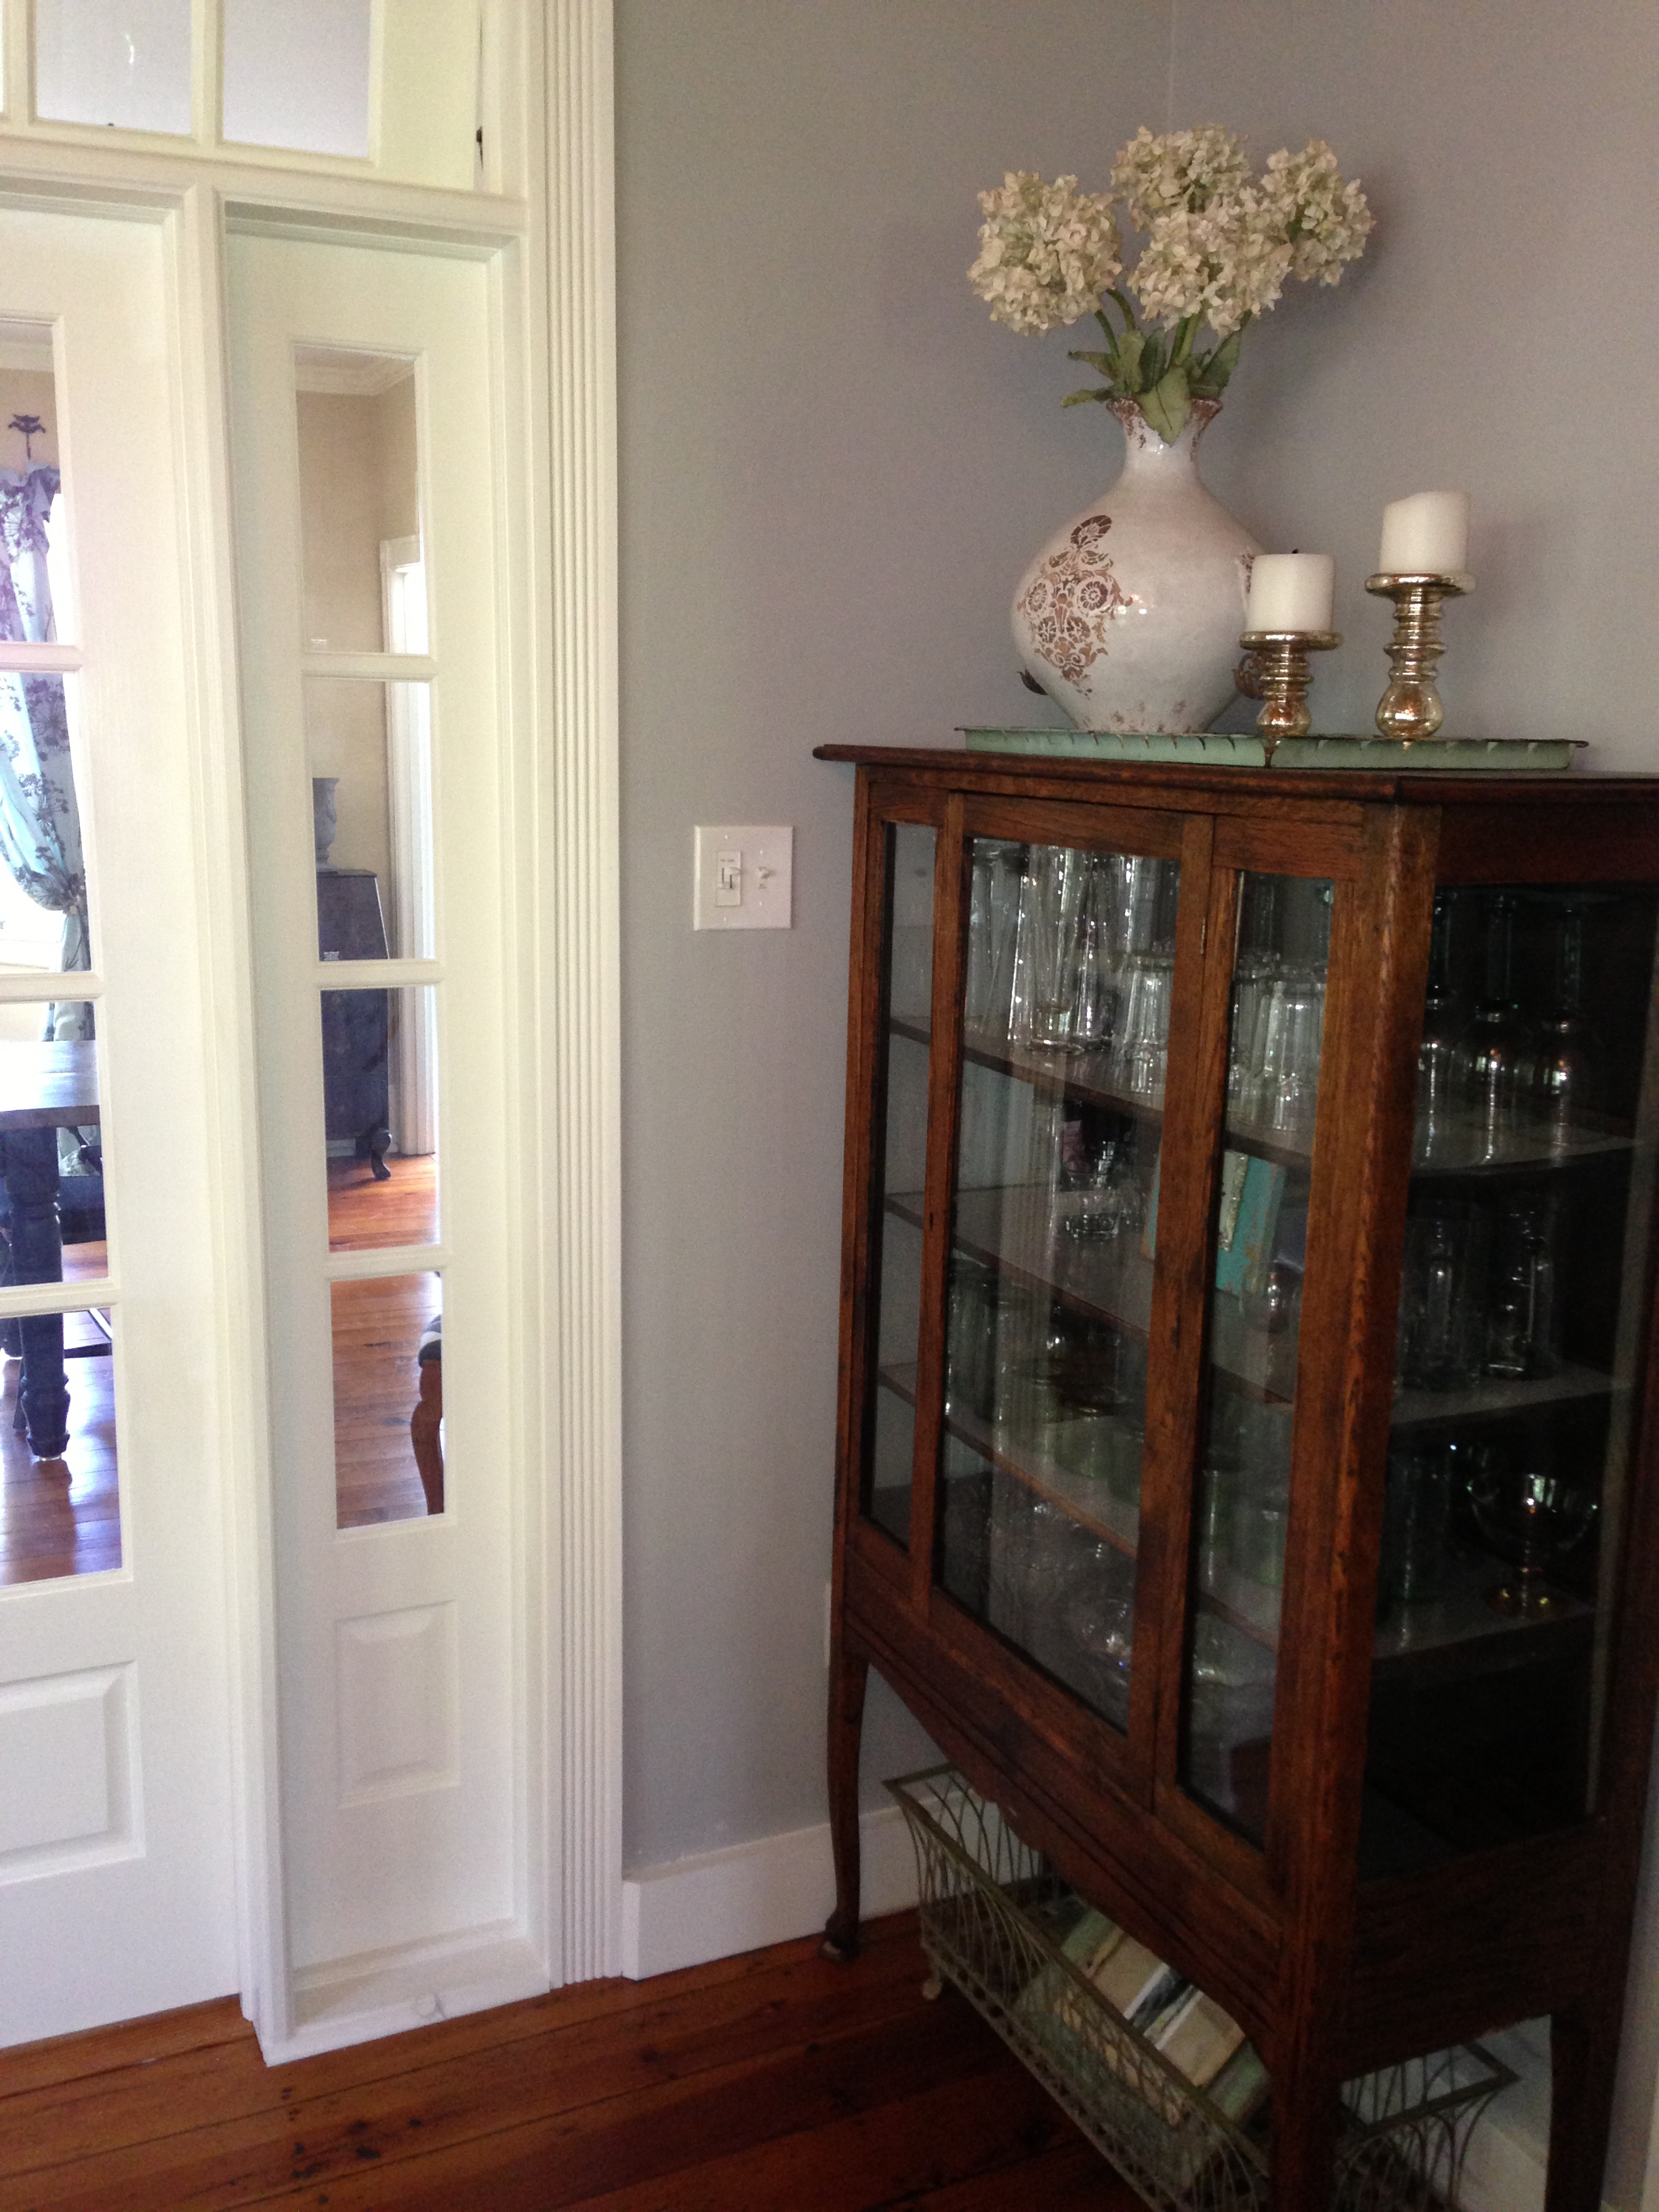 Antique cabinet salvaged from dining room, houses all of our glassware.
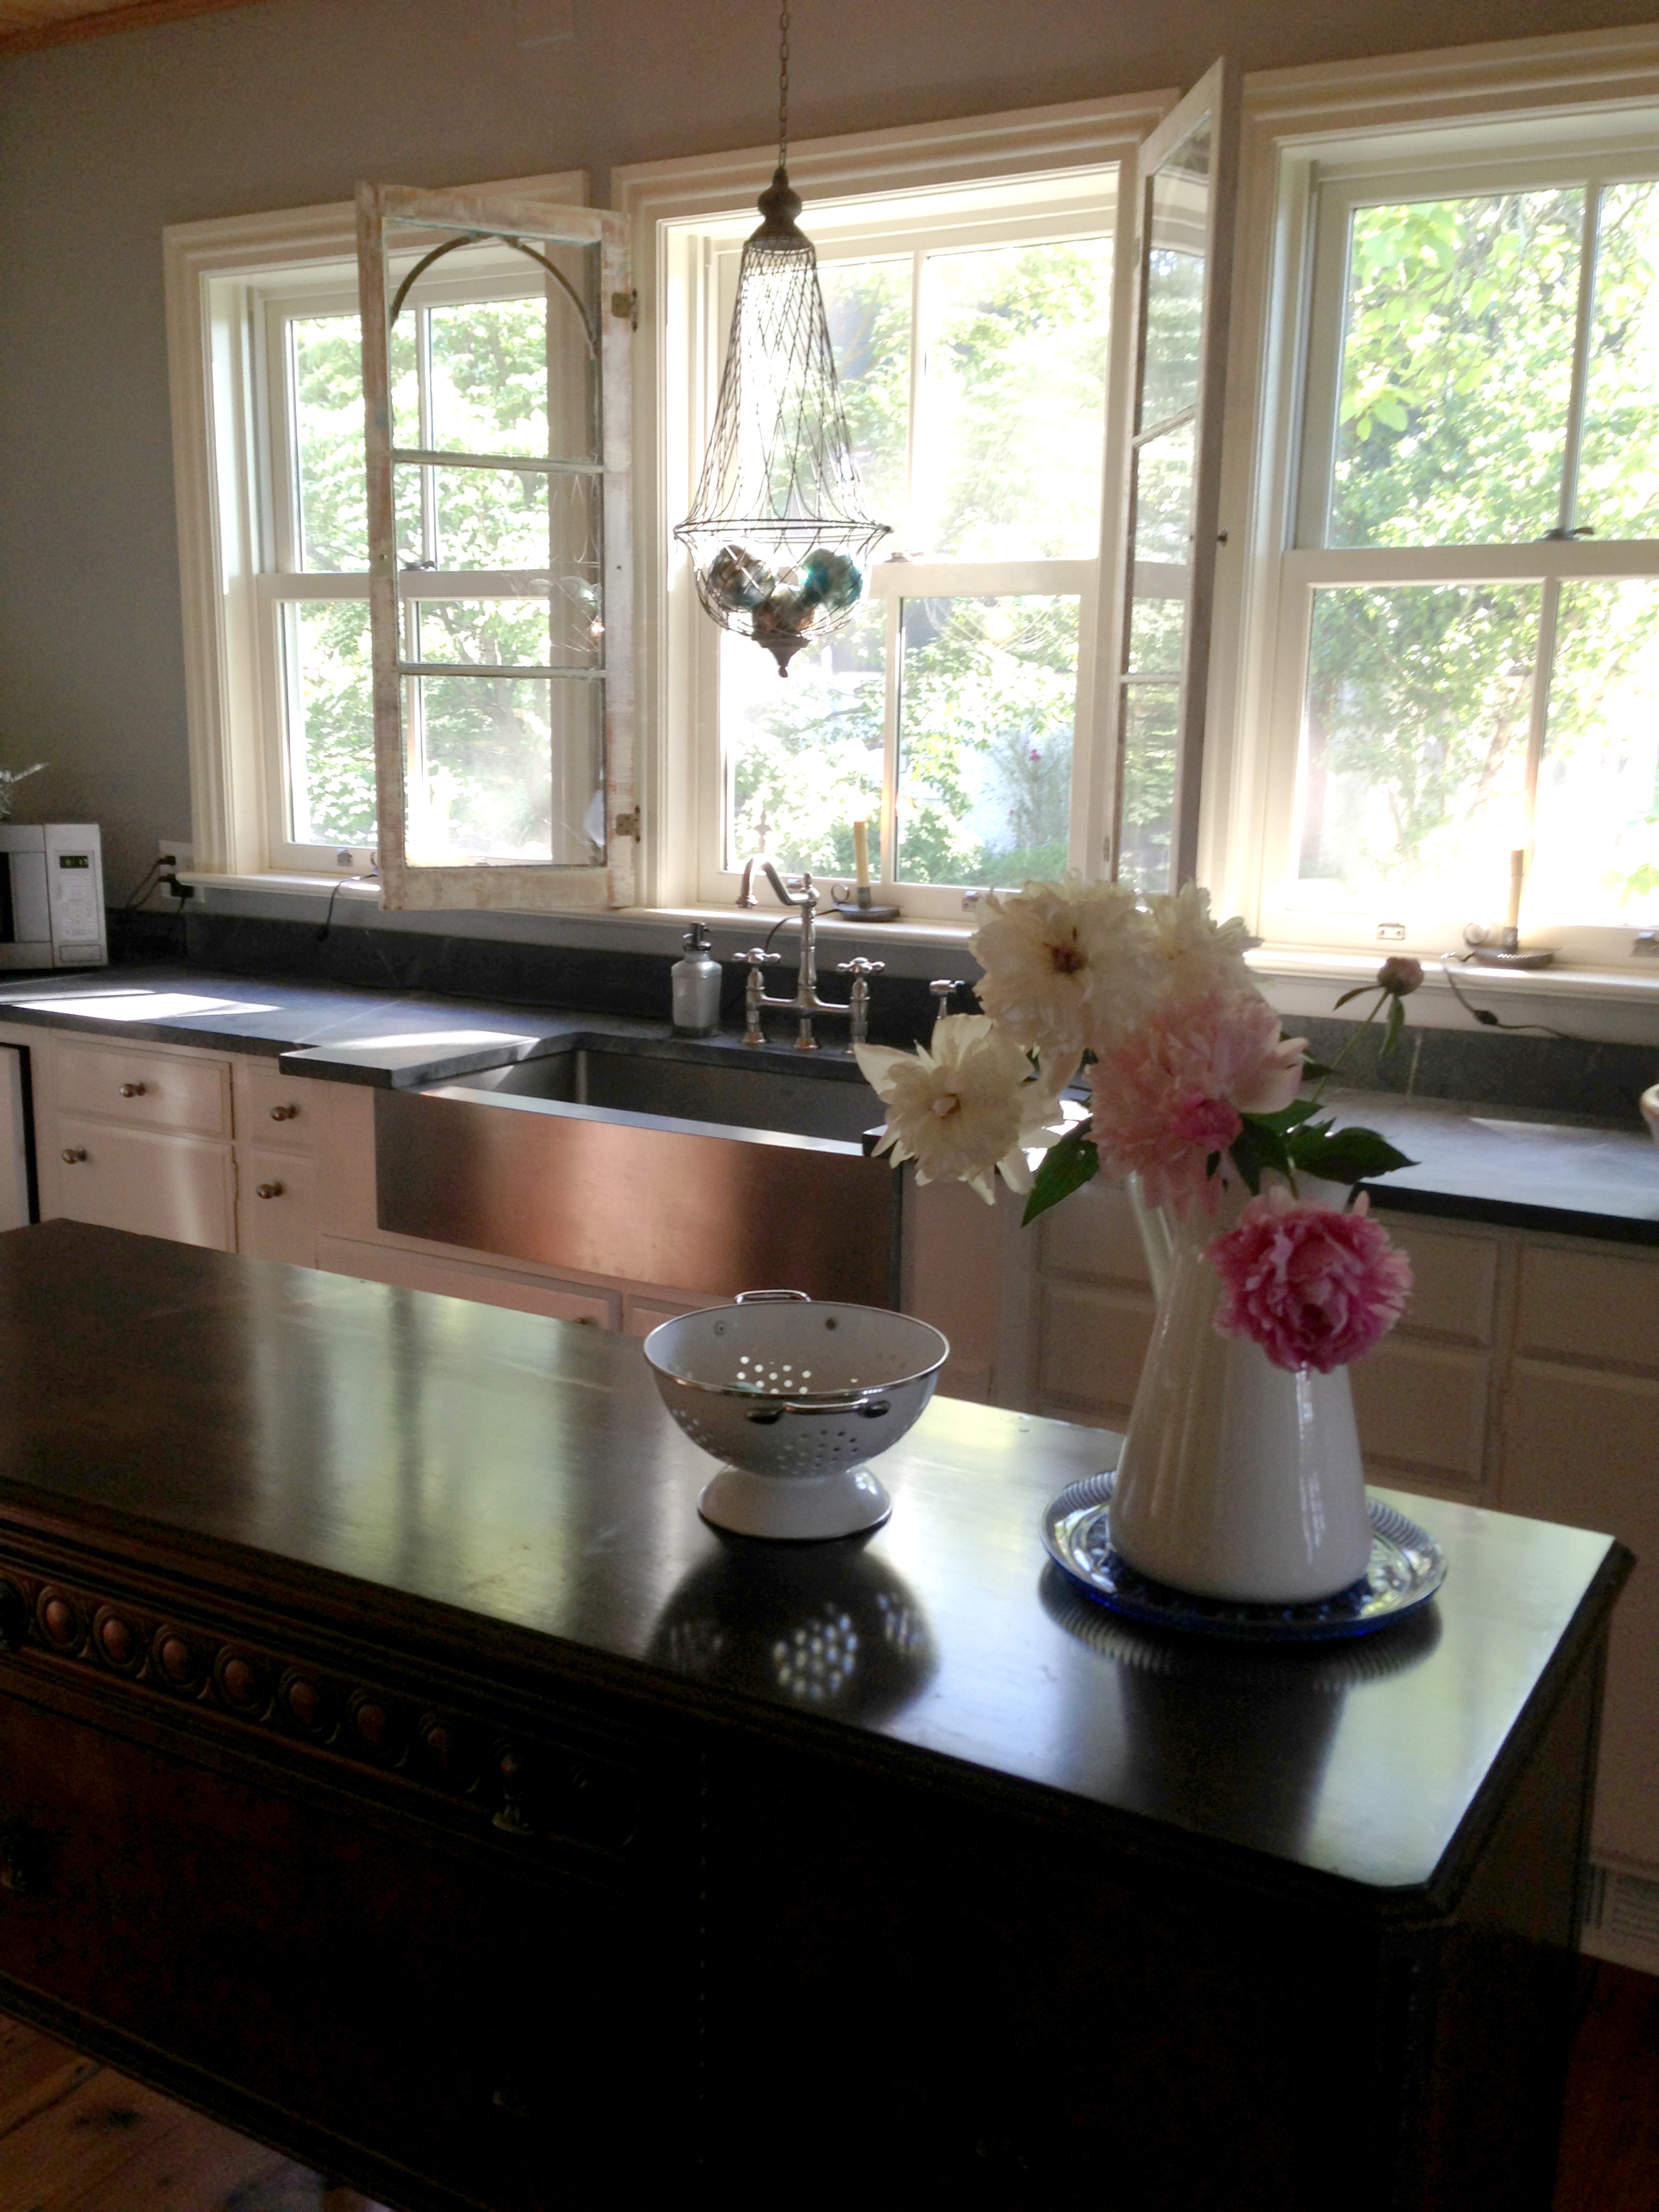 View of sink, bank of windows.
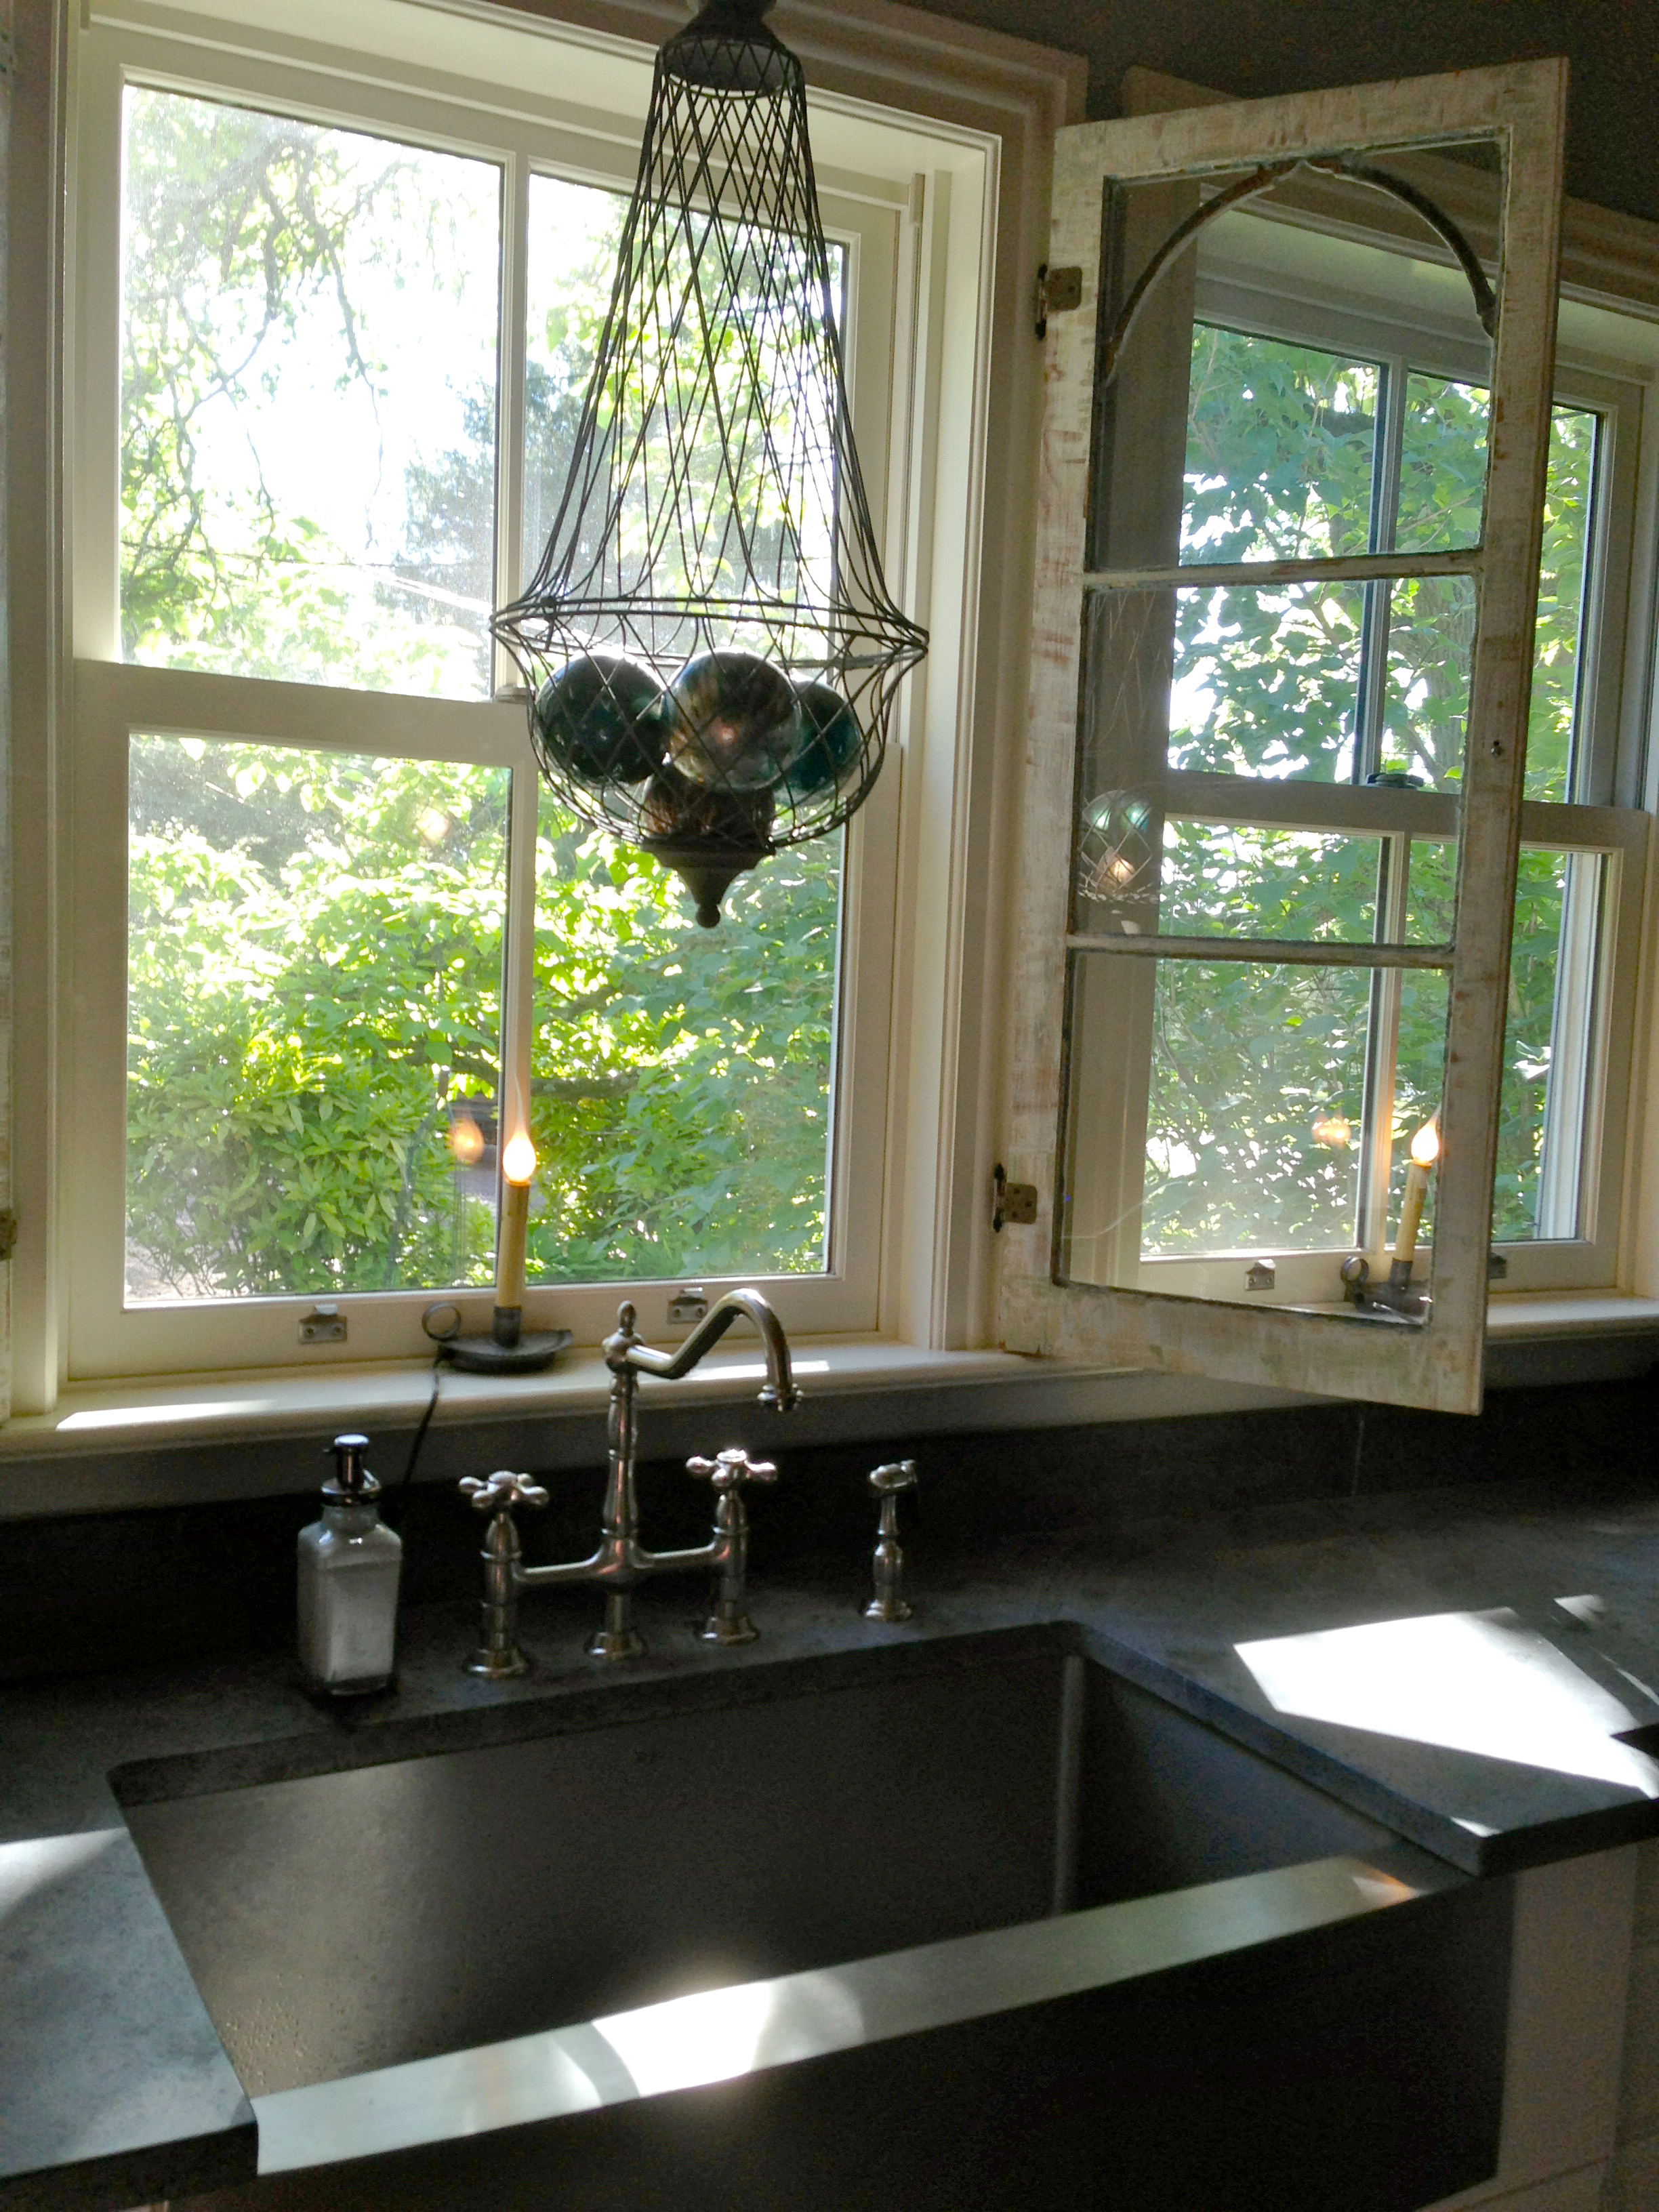 Soapstone countertop. Antique shutters I found in Rehoboth beach last summer dress up our middle window. No curtains necessary. Cone basket from Frenchtown, decorative spheres from Pier One.
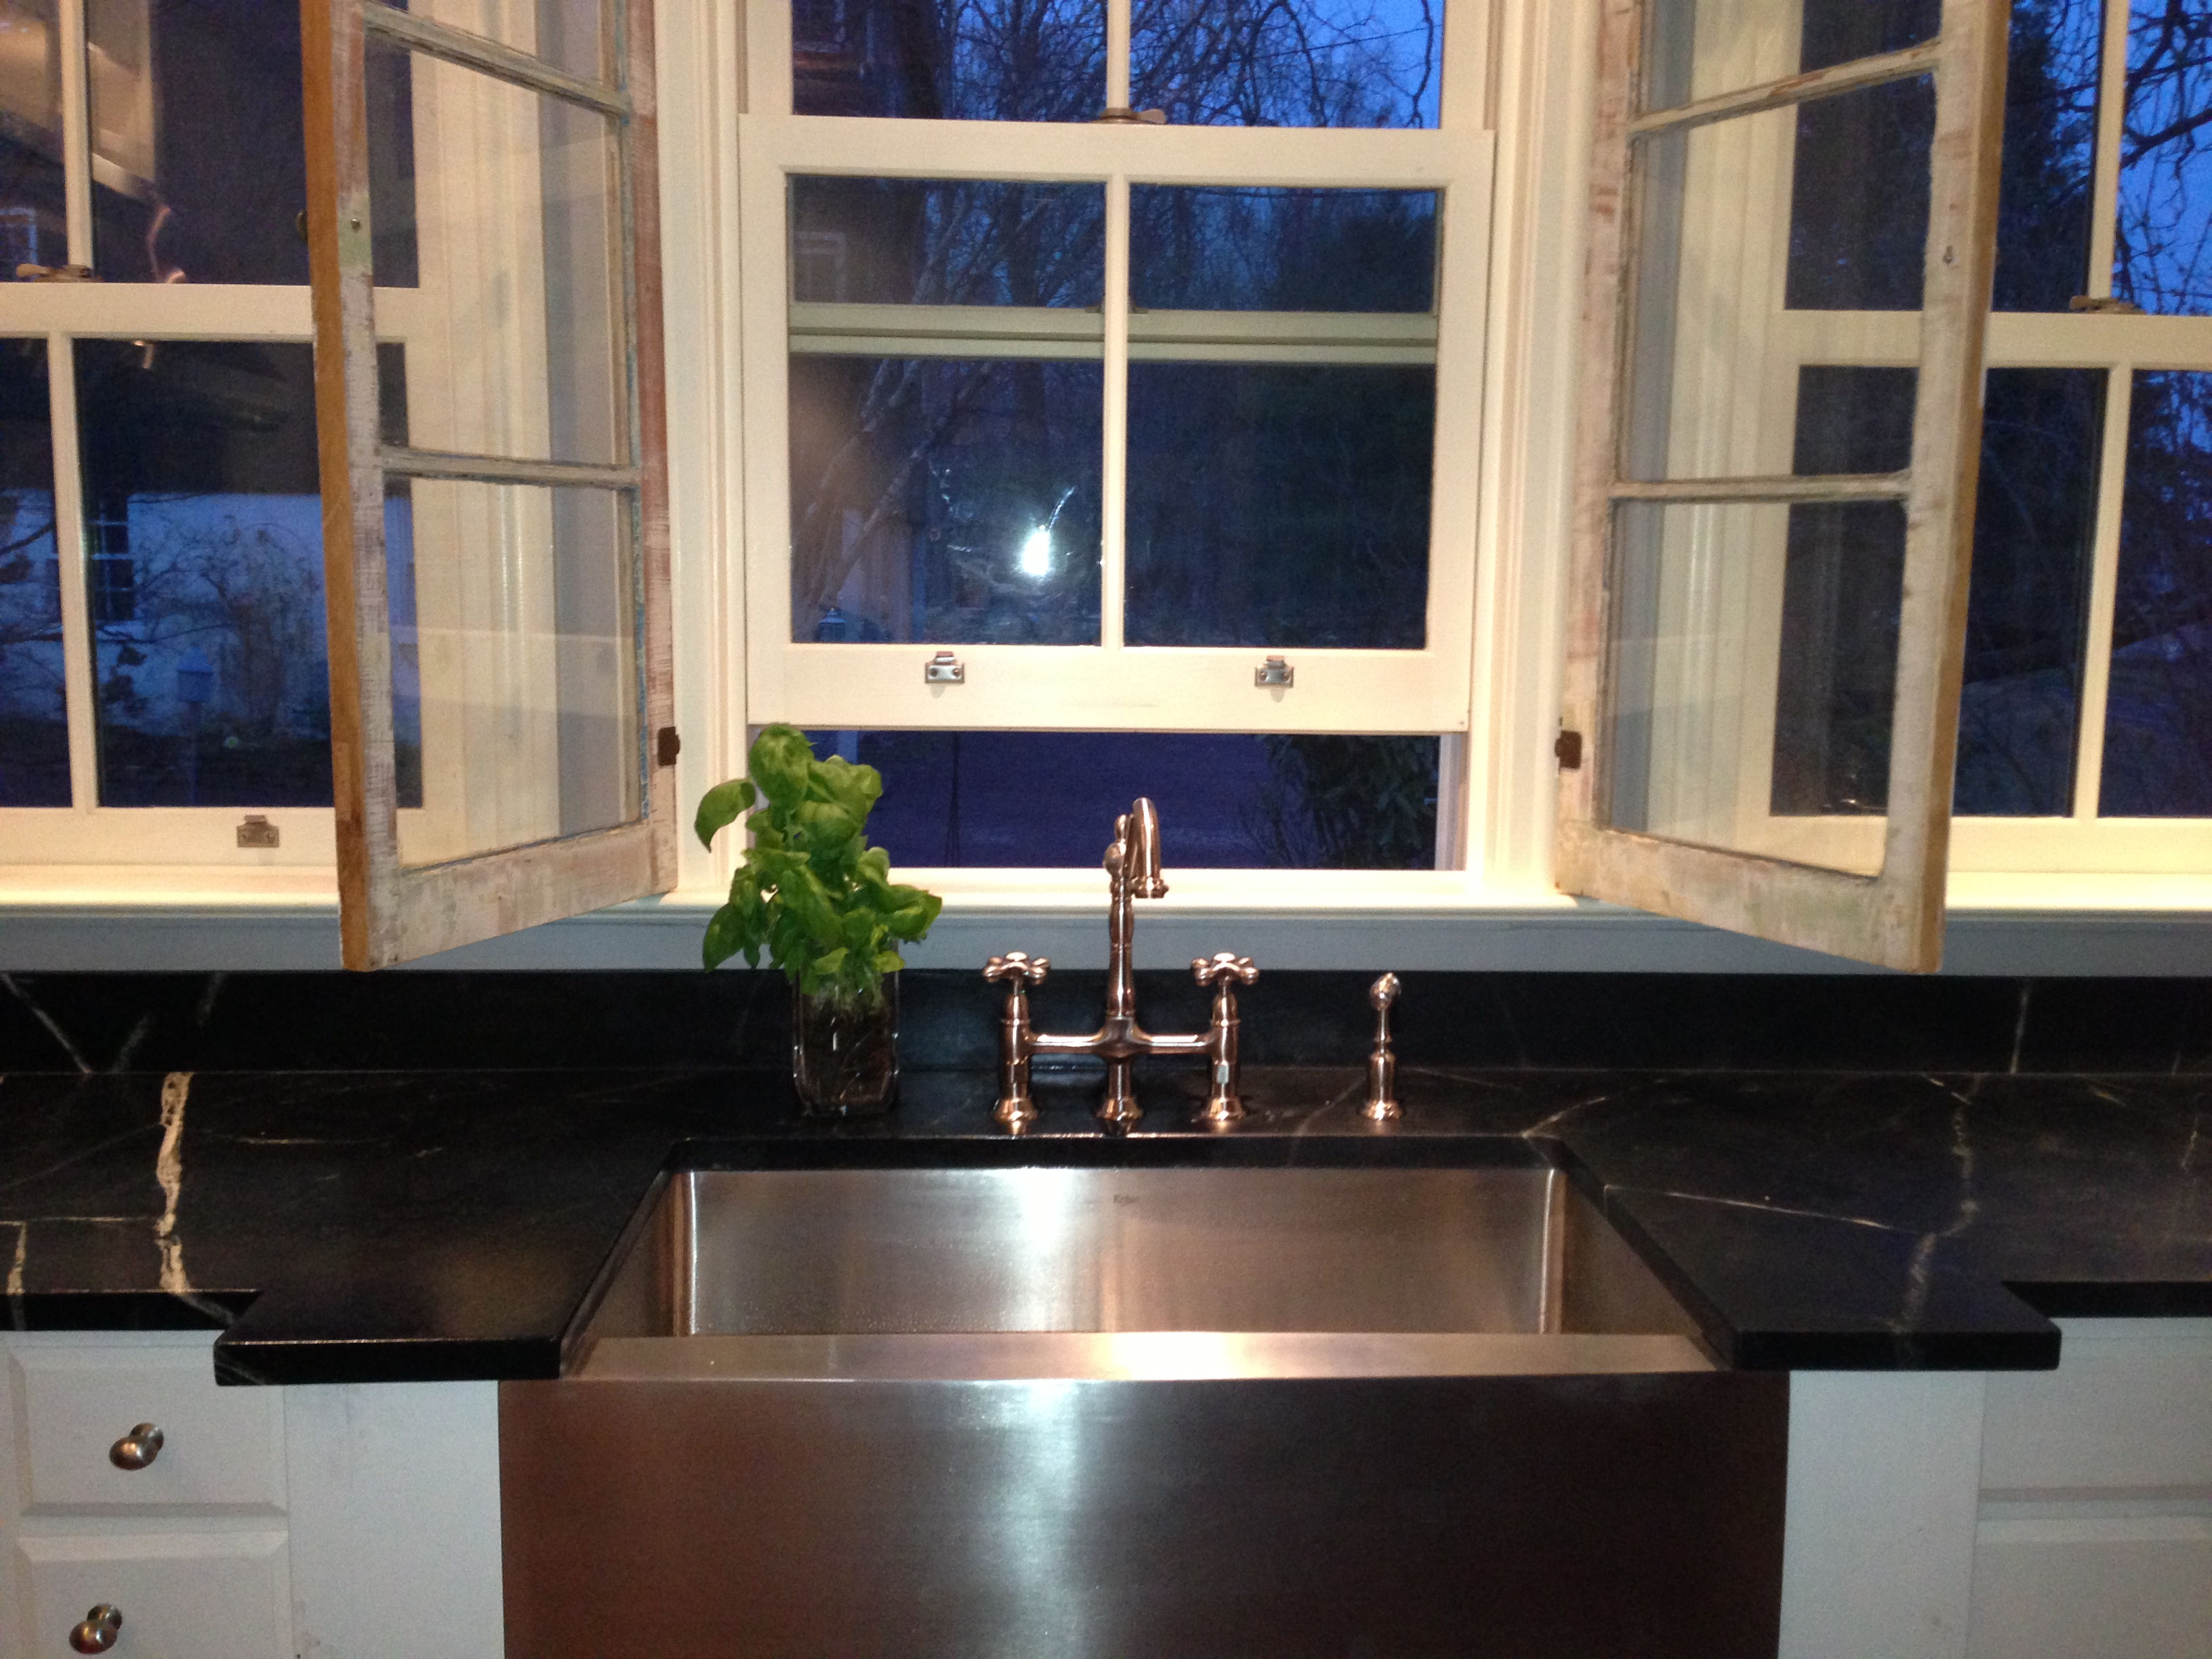 Stainless farm sink now centered on the windows. This is the soapstone after it’s been freshly oiled.
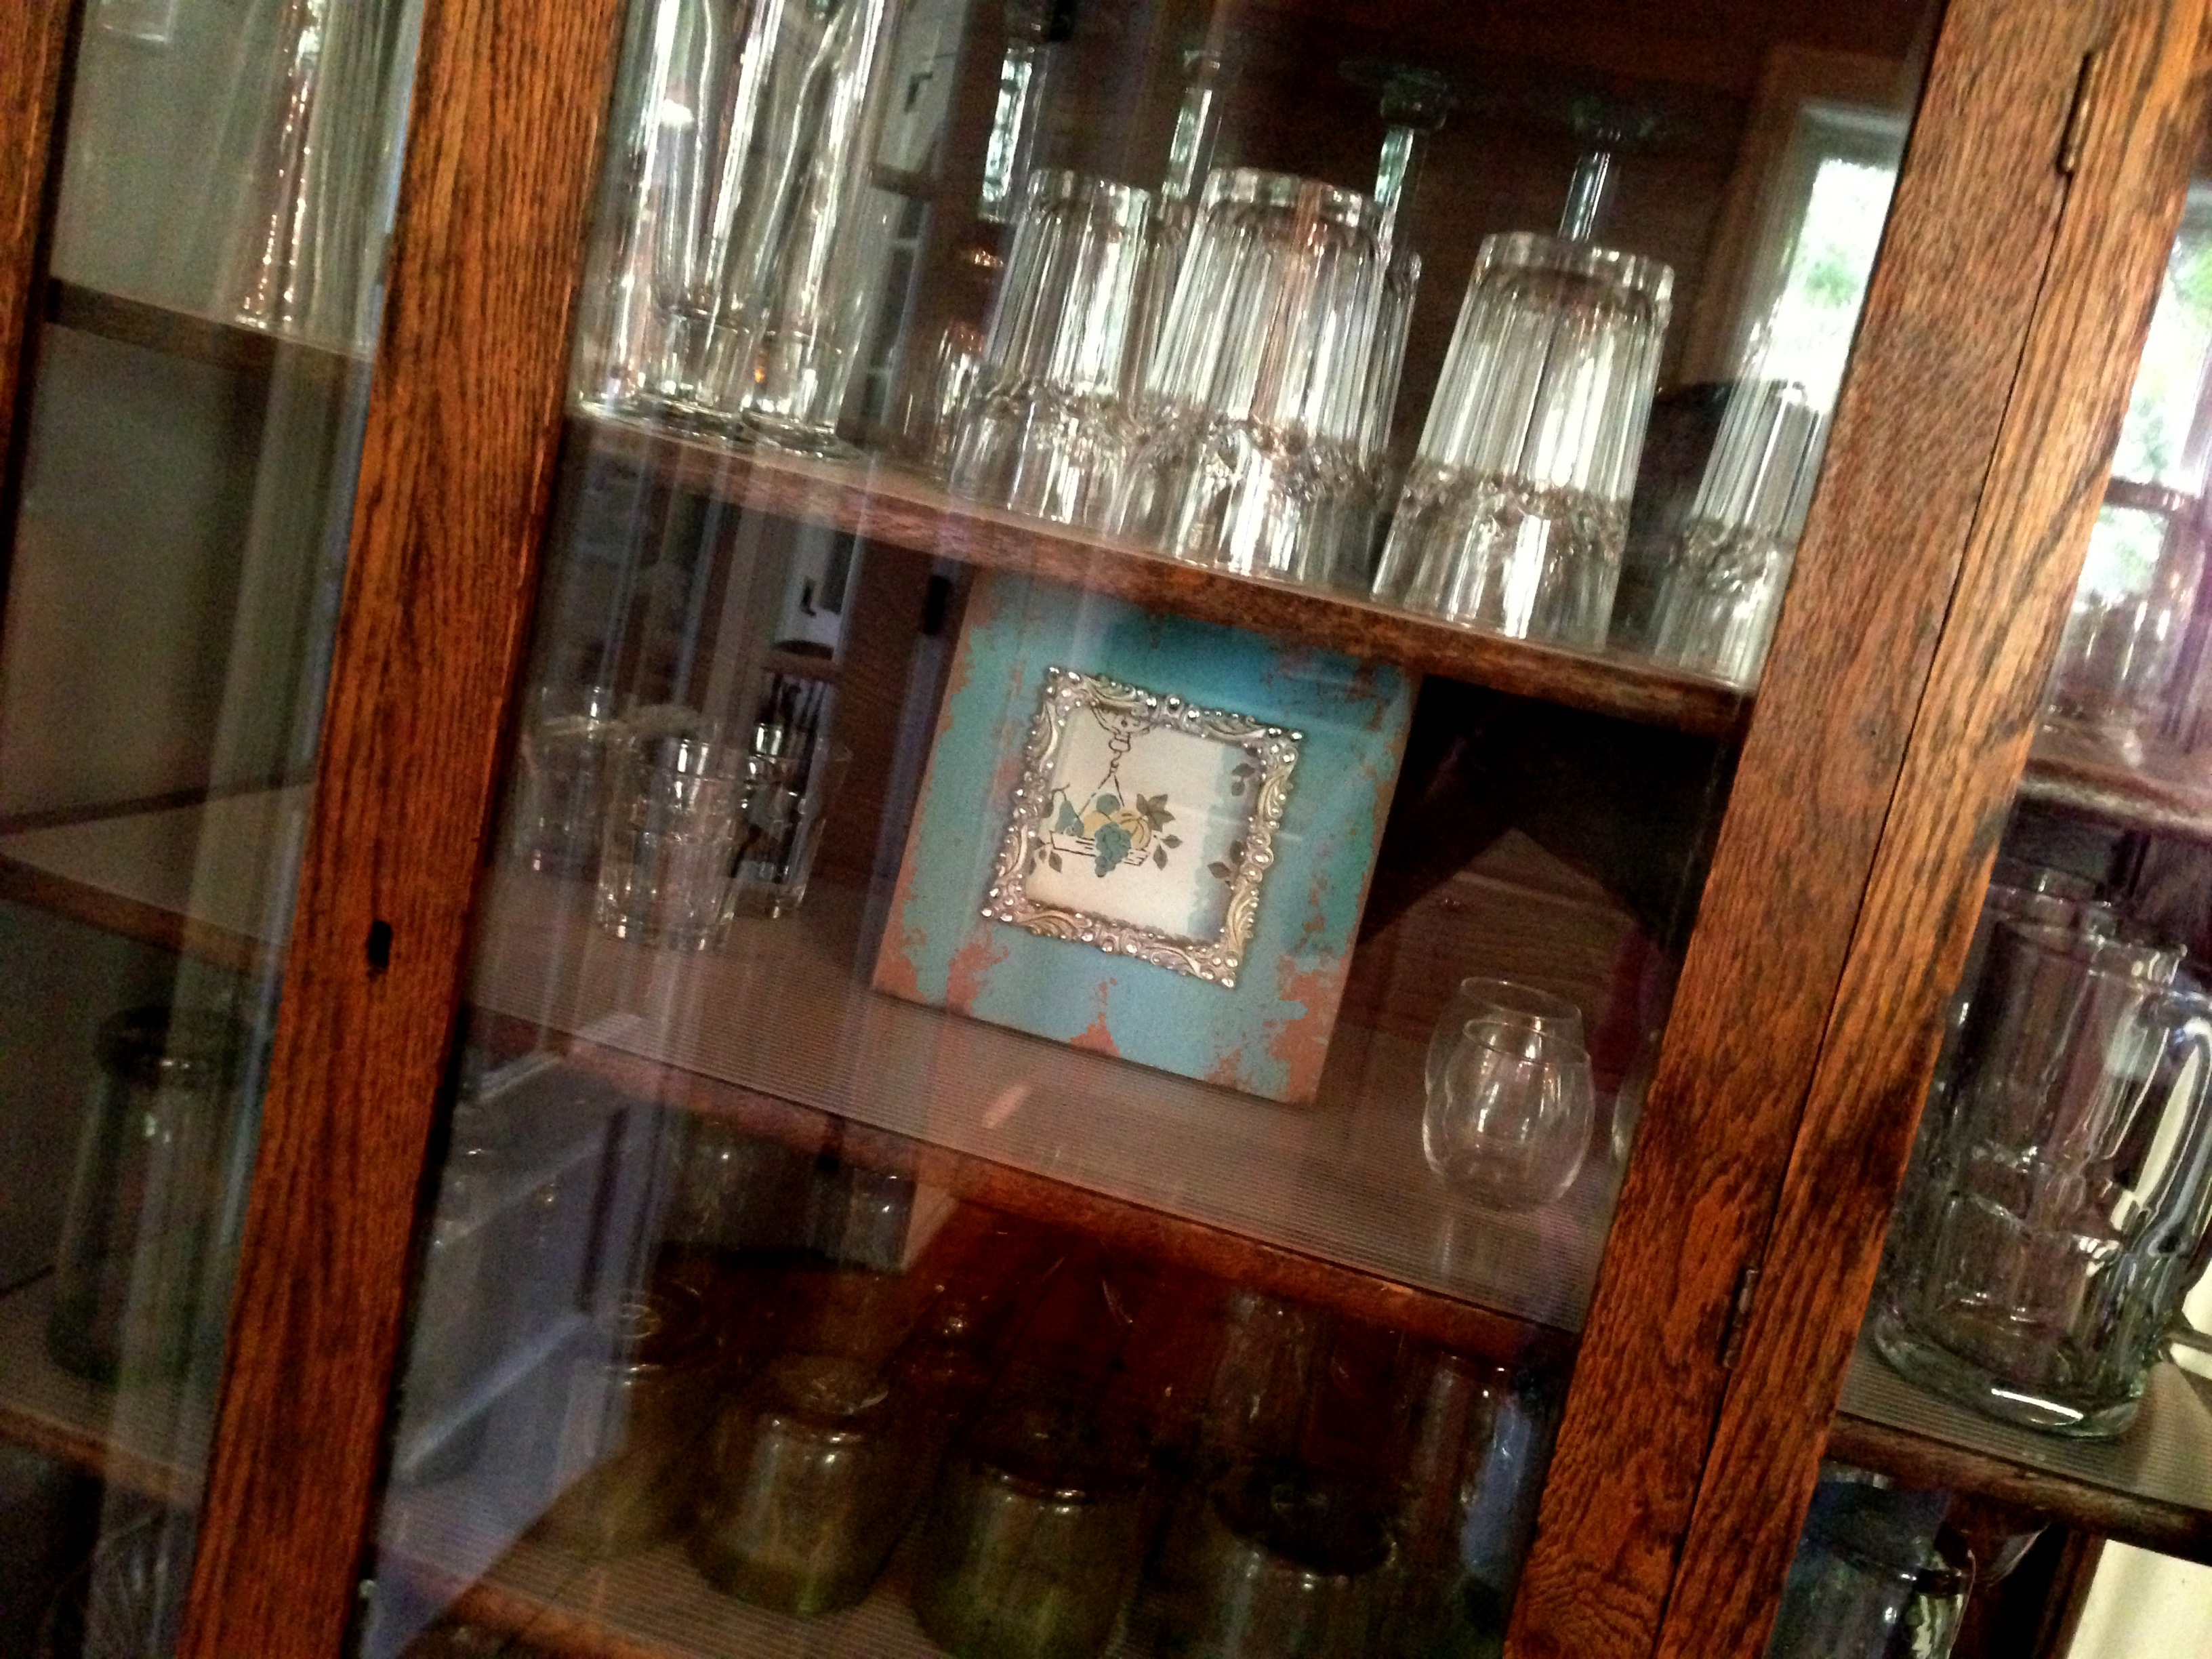 Framed piece of vintage 50’s wallpaper we found behind everything. Teal blue frame for memories!
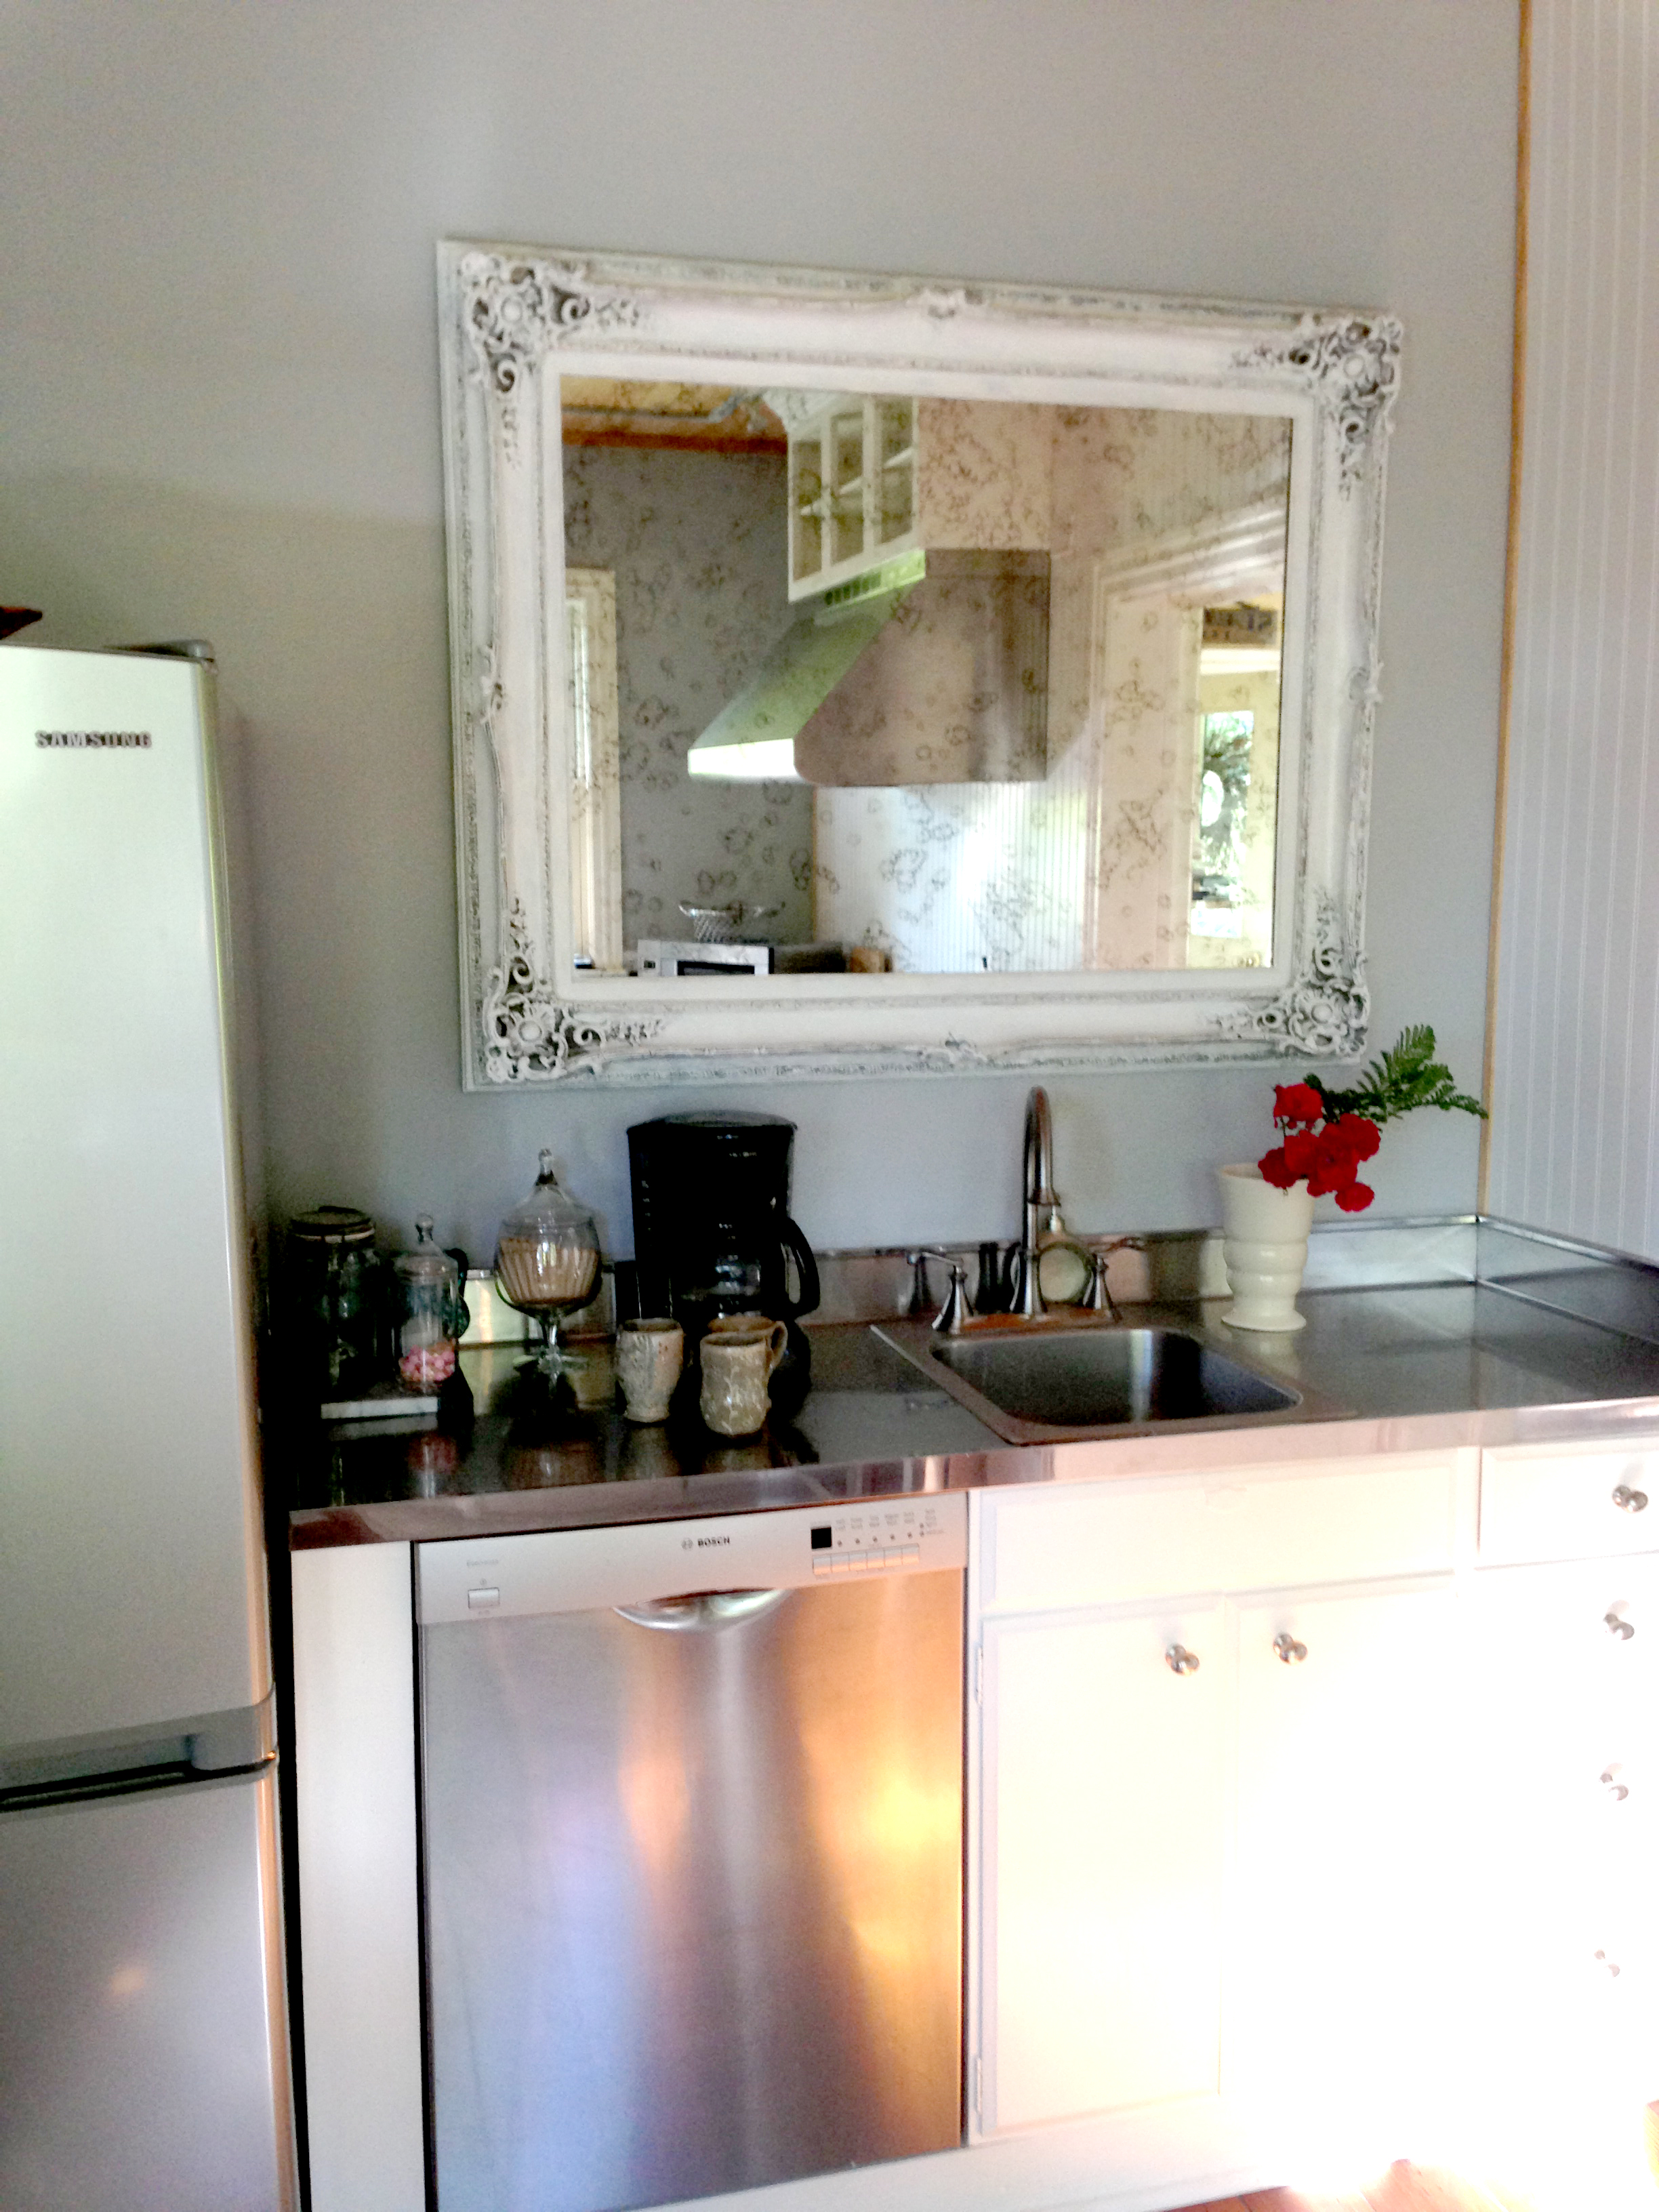 Antique mirror from Doylestown Glass and frame which was salvaged from the side of the road a few years ago. Bank of undercabinets painted with White Dove, Benjamin Moore.
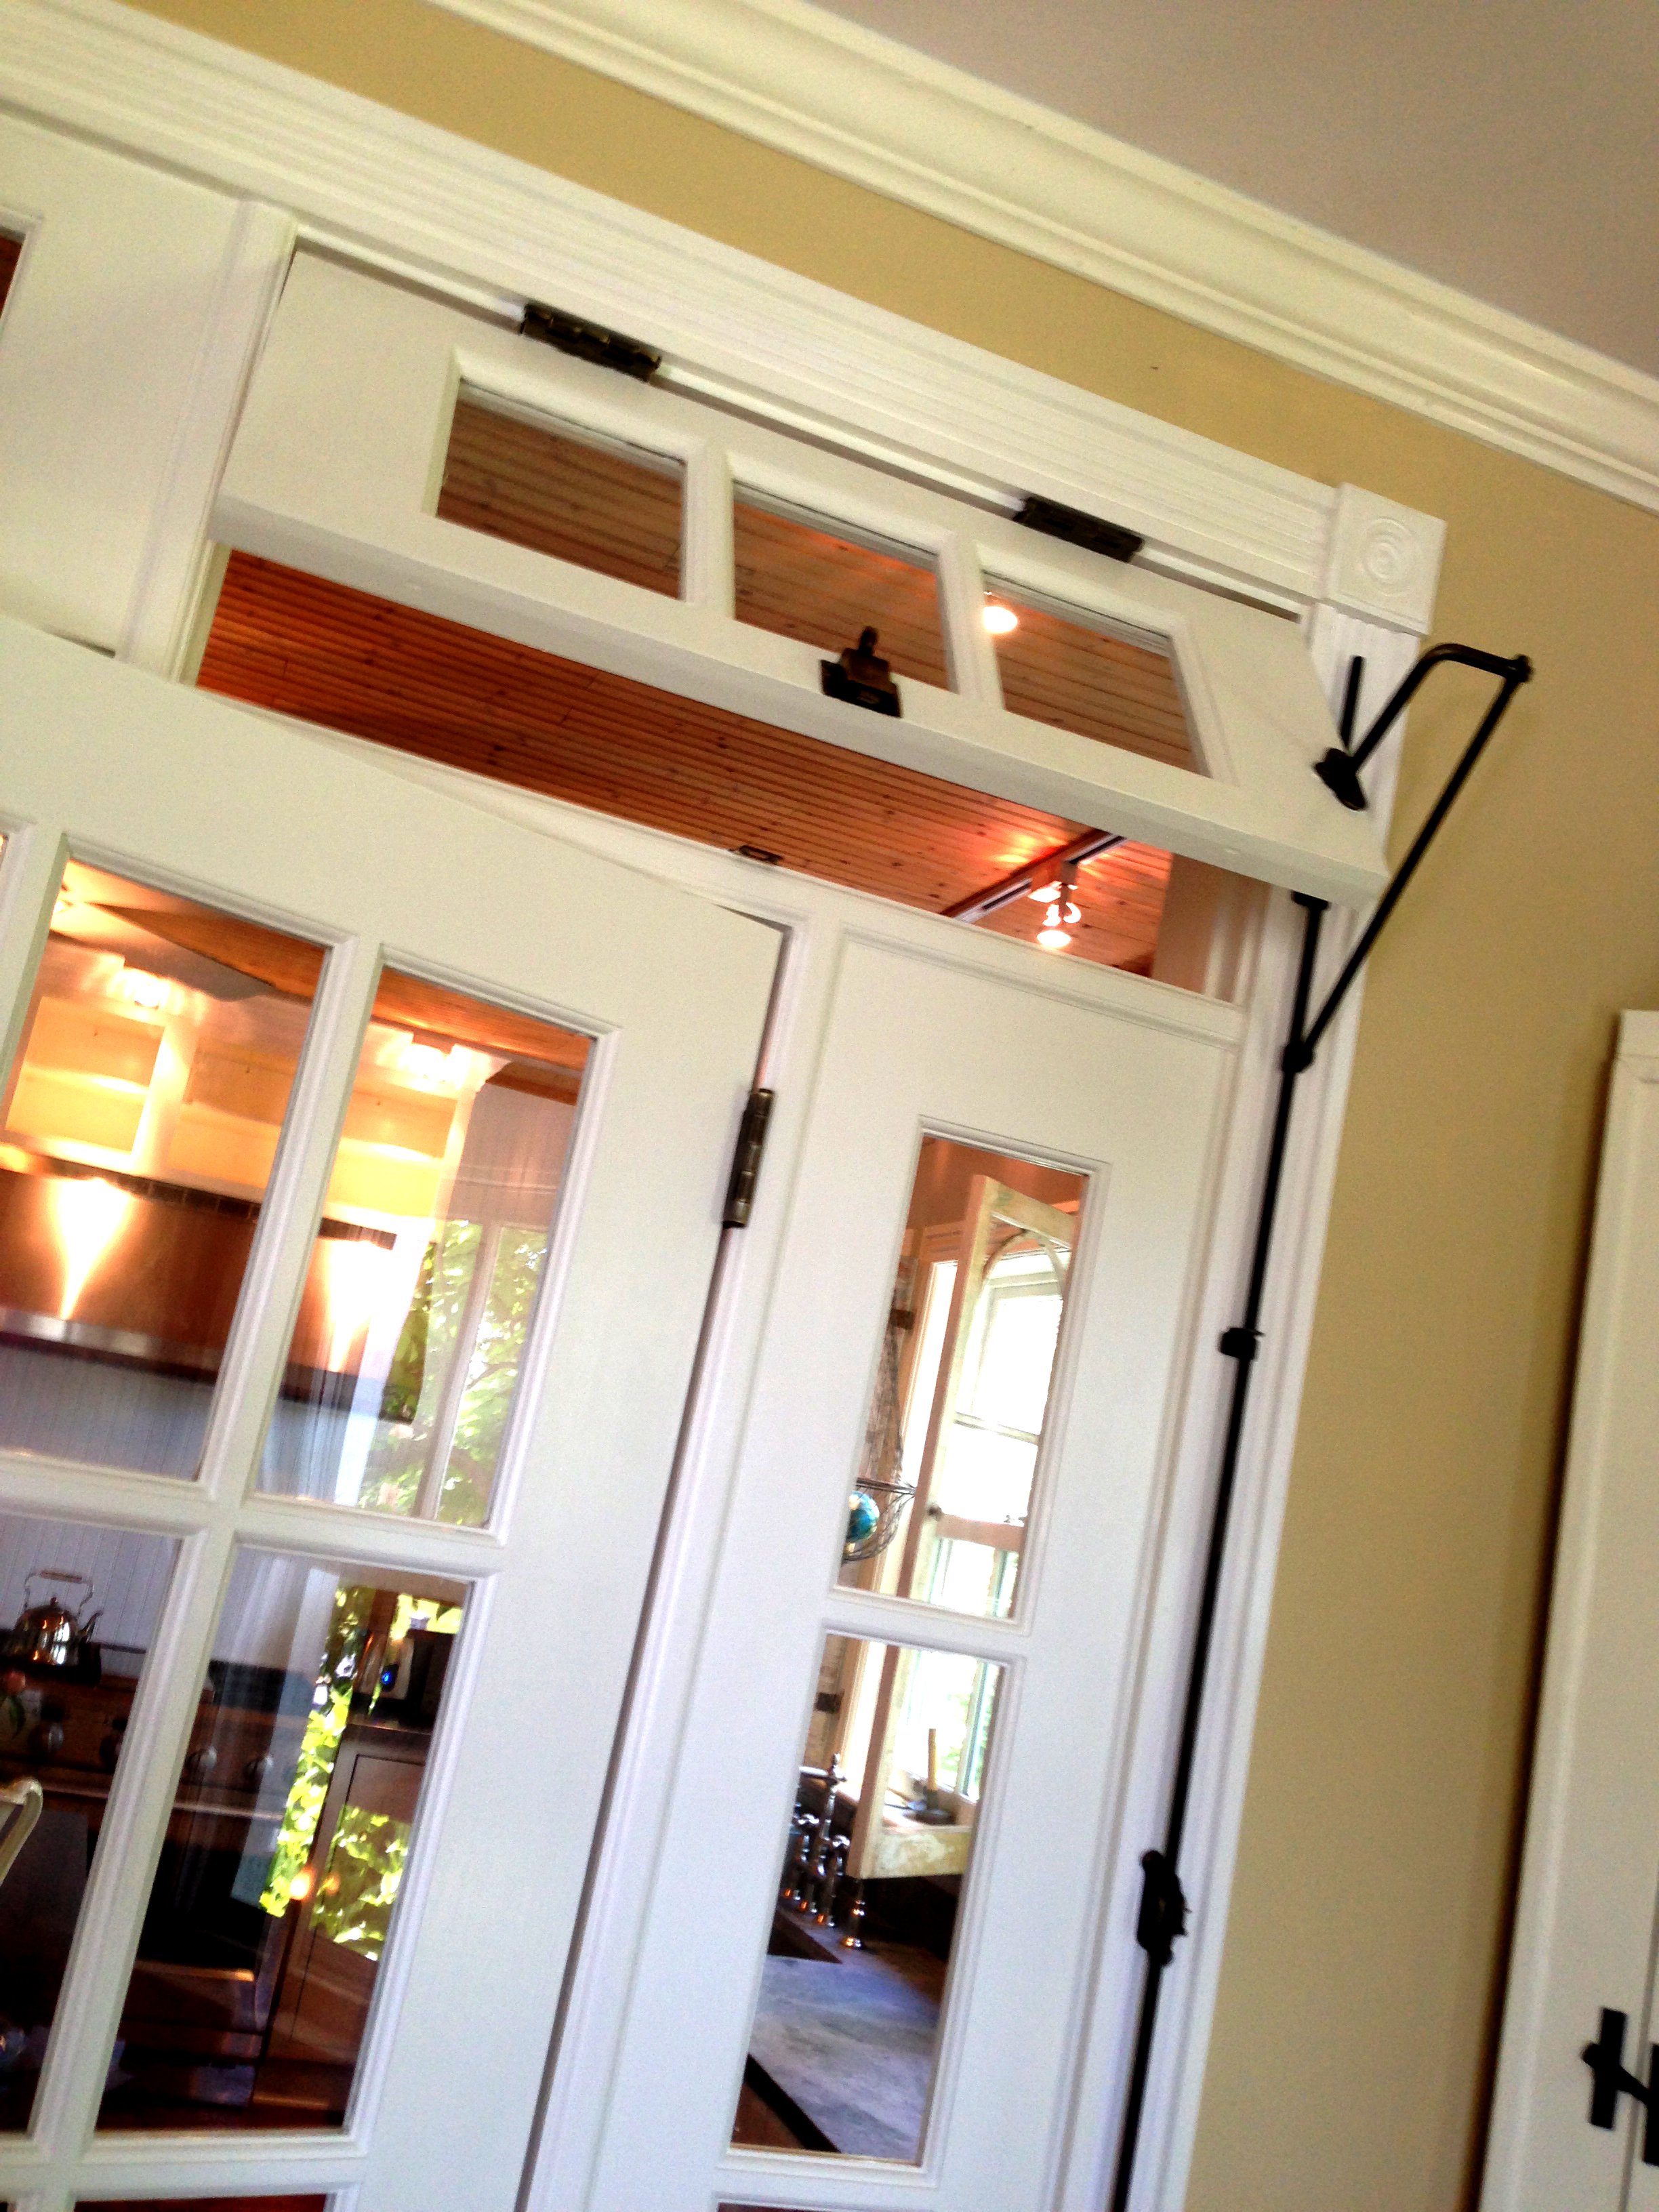 Transoms hinged with antique pulls.
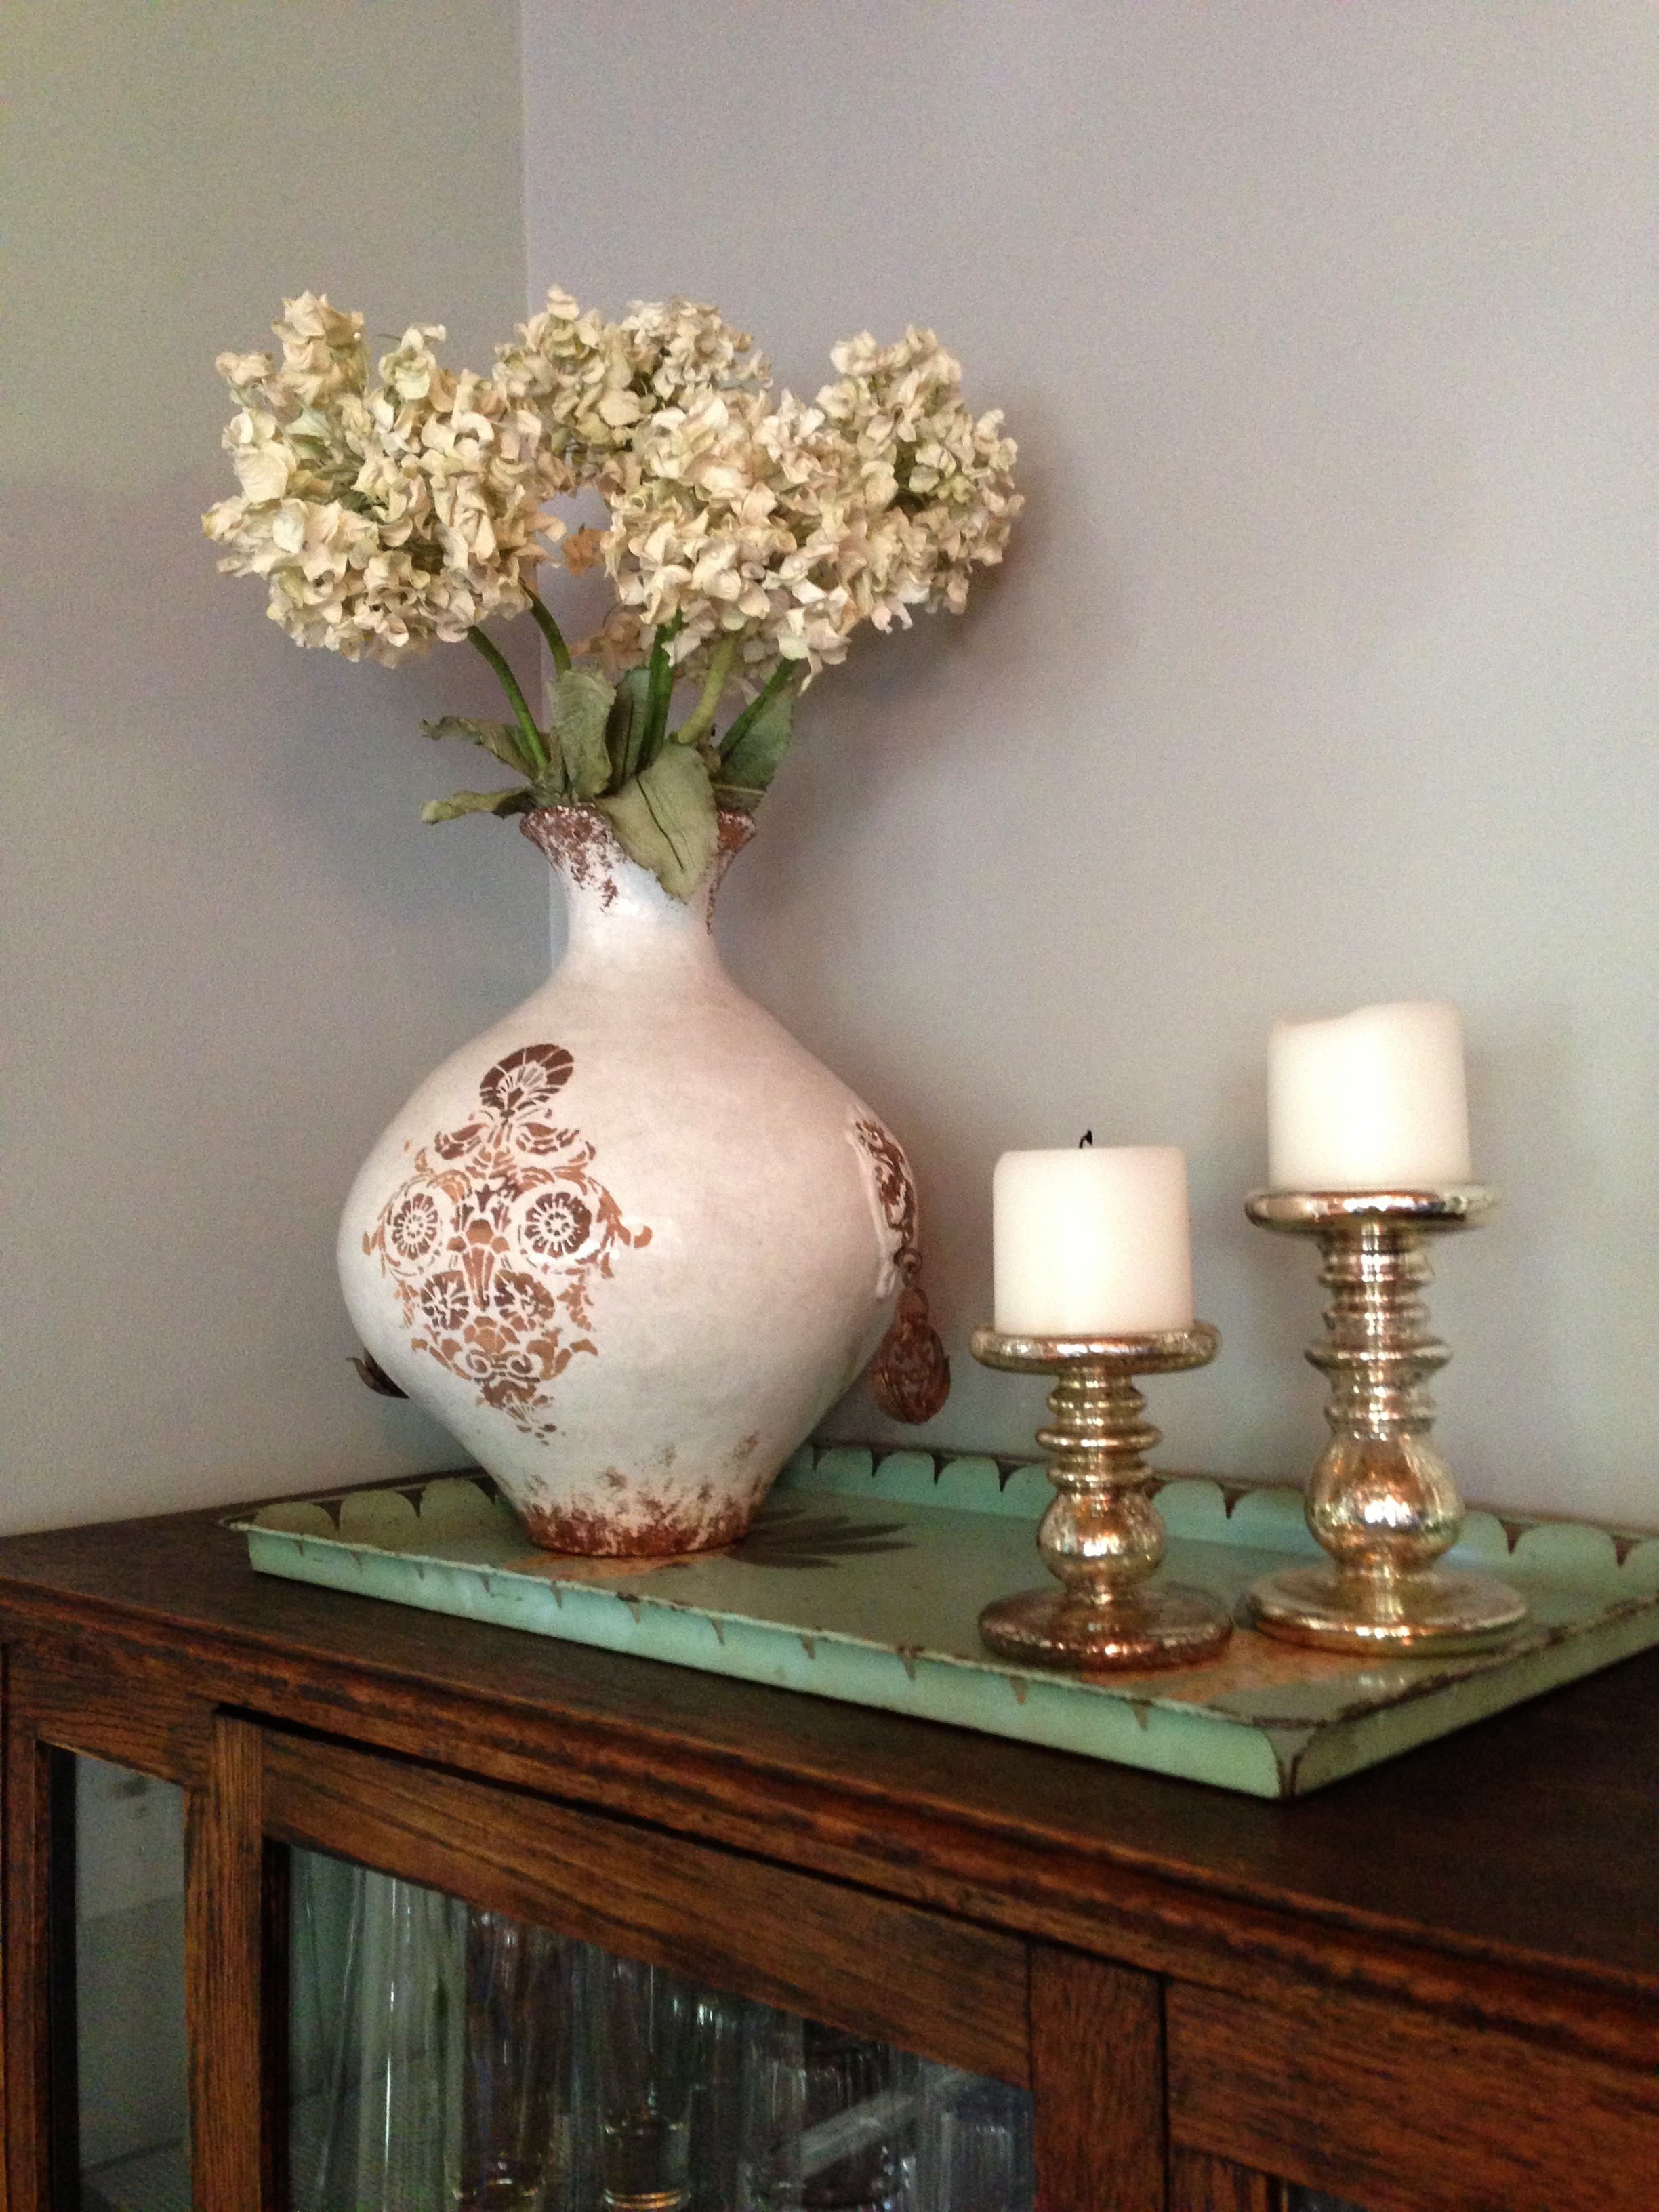 Ceramic vase from Doylestown. Paper hydrangeas from Poor Richards. Vintage tray from Mike’s grandmother.

Welcome back to Creating Heirlooms Blog. I had a wonderful summer enjoying my three children. I hope all of you made many lasting heirloom memories as well.
The creation of “Sweet Dreams” (two darling antique twin beds) was one of my artsy summertime activities. It was fun vintaging these two very precious pieces of art worth saving. For help shopping for, purchasing and incorporating personal Vintage Pieces & Heirloom Creations into your own home, talk or text Kim @ Heirloom.


I am not sure what prompted this, my desire for a pretty laundry room, or the nearing of Mother’s Day, but I recently decided to give this little room of ours a much deserved facelift. Most of you know we live in a 19th century farmhouse in PA, so prior to the redesign, laundry was not such a great experience in our home. Baskets teetered on an ENORMOUS wash sink that just didn’t fit the room, and there was absolutely nothing to look at while washing and folding clothes, day after day, hour after hour.
One day this spring I decided to change all that. After I forced my loving husband to agree with me (the toughest obstacle of all), we ripped out the gargantuan sink and faucet and patched the holes. Next we mixed up a bunch of old white paint left over from other jobs and just got to painting, praying I had just enough to cover the walls. I did. Then we bought a little bit of white base trim and covered some old glue that was all around the bottom of the wall to make it disappear.
We kept the same washer and dryer, as an upgrade was not necessary quite yet, but needed to hide the old pipes behind them, so I bought a shabby chic valance and draped it across a wrought iron curtain rod I had lying around, and attached it to a shelf. Presto…pipes gone, but still easily accessible.
We added a pegged shelf from another room, to hold memories and vintage laundry items I’ve been collecting. One of the items I’ve collected is an antique ironing board which I propped against the wall. Next to it I added an old white window that I found in my barn. I grabbed several christening dresses I have acquired from family and hung them on antique baby hangers. The linen dress on the far left adorned every child on my mom’s side of the family since 1927. All 3 of my children were baptised in this precious heirloom. But the main focus of my new room is a small sepia photograph of my mother pushing a bike at the age of 2. She sits centered above the ironing board right in the middle of “our new room”. Since I lost her 21 years ago this May, it’s nice to see her every day now. She certainly makes doing laundry much less of a chore.
This mother’s day week find your least favorite room and give it new life. Use your imagination and your Heirlooms, instead of your wallet. Total cost of renovation. $15 for wood trim, $50 for 2 white valances and $8 for a basket hook. All the rest came from upcycling and repositioning.

Antique ironing board framed by my collection of sepia children in white dresses, including mom, above ironing board.

An old window and a linen curtain hang next to my collection of sepia children in white dresses.

Find a stylish book to prop, grab a little lamp, and take a glass bowl and fill it with laundry detergent, then add a little tin scooper. This adds a fresh linen scent to the room, naturally. I just reach up and grab soap powder.

Found this great oval bucket one day and couldn’t pass it up. Paired it with an embroidered laundry bag I’ve had for decades. It was probably my mom’s.

Here is the collection of linen christening dresses. Some from my side, some from Mike’s. The one on the left has been passed down in my family since 1927, and christened my grandfather, my 3 children and almost every cousin and aunt and uncle in between. Antique laundry beater hangs alongside.

Pretty basket hook from Lowes.

Make sure it’s sturdy enough for everyday use.

Above the pegged shelf I have an assortment of things I just pulled from places around my home. Vintage sewing spools plopped in a cream crock, a little white McCoy pitcher with flowers, a vintage comb and brush holder and a book I love about New England design. Above all is a framed vintage school photo passed to me from my mother’s sister. The pretty white vase came from the salvation army shop, and I placed scrub brushes inside.

This wooden yellow table (now work surface) was just the right narrow width for the space. This, I found a long time ago at the Habitat for Humanity Re-sale store. It was a steal. I “repurposed pottery barn baskets” which were once lined in red checkered fabric and used in my children’s playroom, a gift from my mother-in-law. Now they store, plastic bags, rags and detergent under the table very neatly.

Found a wrought iron curtain rod and attached it to the shelf with a white eye-hook. Draped the valances to hide the ugly pipes and knobs. Who wants to see that!

A wrought iron candle holder from my uncle’s farmhouse. Incidentally, my mother’s brother.

I took a glass bowl from my kitchen and filled it with detergent, then found a old tin cup to scoop soap into the machine. The tin cup came from my mom.

And old lantern I had lying around, a framed piece of art from a neighbor and the framed photograph I had commissioned of the 1927 vintage christening gown sit on this shelf, along with dryer sheets tucked into a basket for easy access. I use the little lamp for all-day lighting. It provides a nice glow.
It’s Easter, my favorite week of the year. As I watch the birds outside my studio perch on limbs with brand new buds, I anxiously prepare for our Annual Vintage Easter Brunch. Each year I try some new ideas, simple cakes, lavender cookies, and a little luxurious outdoor table art. We live in the Northeast, so we can’t always rely on the weather to cooperate, but we try our best to set a few pretty tables outside, just in case we get lucky!
I am obsessed, by the way, with this artform, so I studied the internet for some great examples for you. You can also see them on my new pinterest board which will be continuously updated, Outdoor Tables.
Here are some simple ideas that do NOT need to be reserved for weddings and big events. Try some of these the next time your best friend is coming over for lemonade, or when your kids invite a few friends for backyard soccer. Lovely ideas when the neighbors stop by with a new bottle of wine. And remember, don’t buy anything, instead use vintage tablecloths from your grandmother, buckets from your shed, pretty vintage glasses from a consignment shop, and any pretty plates you pick up! Place your table in an unexpected spot and enjoy.

Take note of the bucket of flowers off to the side and the mix matched chairs –
all colorful and perfectly positioned in this lovely orange grove above.

I think this table is stunning. Fun bird houses dangling from trees.
You can use a giant curtain and just throw it over any old table.

I just love lime, so this image above spoke to me.

I could not take my eyes off this table and natural lattice. Dangle a little chandelier, and you are all set.

This is colorful and fun. Just hang some paper butterflies or birds above your table of cakes.

Every afternoon should look like this.


My favorite place.

Above I love the big benches and the huge vase of water and greens.
Simple and easy. Enjoy Easter and Passover, a little bit outside if you can!
– Award-winning, CUSTOM DESIGNED STORY INVITATIONS for EVERY EVENT –
We bought our farmhouse about 5 years ago, with the intention of creating a few unique spaces for our family. Over the years we painted rooms, renovated a cottage, created outbuilding playrooms & art studios, but it’s our most recent endeavor that really makes me happy to settle in for the winter.
What was once just a horrible little room off the kitchen, used for storage and everything pantry related, has now been lovingly transformed into what we consider an authentic farmhouse pantry. Take a look at these awful BEFORE shots and I will tell you how my husband, Michael and I did it.


The first thing we always like to do is completely strip down the room. Everything out. Shelves included. I’d like to say we had a plan, but that is about as far as our plan went. I knew I wanted crown molding, so Mike set out to build that, while I painted the walls a soft gray, just a shade lighter than the Marina Gray in the adjoining hallway. Next step, I set out on a quest for an authentic jelly cabinet!

I was so lucky to stumble into Impact (a local 2nd-hand store in our area) and find this perfect white antique jelly cabinet, that had originally come from a store. The best part is that it fit exactly into the nook carved into one of the inside walls. Wow. We were lucky there. I quickly washed and filled every ball jar I had been saving for years and started my display of beans, nuts, grains, and even M&M’s for Mike. On lower shelves I placed wire baskets I once found at a yard sale. Filled them with onions and potatoes, even boxes of pasta.

We then found a short storage cabinet in another room of our home and repurposed it as our Cereal holder. I’d like to say it holds other items, but Mike pretty much panics if we run out of cereal, so it’s stocked for eternity. I drapped a vintage feed bag, and decorated above with floral prints by and old friend, Khara Flint, framed in barnwood. I gathered a few more LARGE sealable jars for granola, rice, and even more cheerios, added an antique gumball machine, that was my mother’s, and the room was almost complete. Kids are allowed ONE gumball on fridays after school. (but I keep finding Mike reaching for stash).

This is a favorite…I stumbled upon this New York Dairy Crate at another sale, and brought it home for $5. I purchase all of our milk from Penn View Farms in glass bottles, so this is a great place to keep them safe, before my weekly return.

Next, take a look at the pegs holding pretty aprons and an egg basket. The lime green apron is a treasured gift and the expandable wire egg basket, another find, is waiting for some wooden eggs. (still hunting).

Just before you walk into the pantry we painted a rectangle with black chalkboard paint and framed it with a wooden frame, added an alphabet above and recycled pegs, we had hanging in our other house, across the bottom. The pegs neatly store the chalk, a hand-made cloth eraser, and a few kitty toys.

Two of our favorite parts of this renovation are the door and light fixture we added. These two, totaling only $200, were our biggest splurge. The room was formerly closed off with a farm door, with a great black vintage handle. So we salvaged the handle and put it onto a french door from Lowes, painted white to match the home interior woodwork. The door and track light add dimension to the room, allowing visitors a peek inside. You can also spy on the kids when they are sneaking candy.

We also carved out a cookbook shelf and an antique wooden ladder, propped against a wall, holds vintage tea towels.

This renovation project reminds me of my beloved grandmother who used to bake hundreds of pies and cinnamon buns and store them in her pantry til the family came to pick them up. I hope to do the same someday. Next Heirloom project, Creating a vintage laundry room.


